Azure Data Studio has a ton of great features. Of course some I like more than others, but Server Groups is something I really like. The team I am currently part of manages almost 200 production SQL Servers. However we do find ourselves working on Dev and QA servers as well, greatly increasing the numbers of servers where could potentially work with. This greatly increases the likelihood of making a mistake and running the code on the wrong server. However, even with just a few servers, it would be nice to be able to group the connections to make it a bit easier. Server Groups are not new, it has been in SQL Server Management Studio for quite some time.
Create a New Server Group
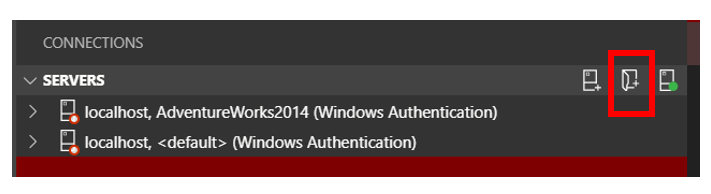
Creating a new server group is pretty easy. When in the servers window, float your cursor in the upper right corner and three buttons will appear. These buttons are, from left to right, New Connection, New Server Group and Show Active Connections. The middle one is the one we want.
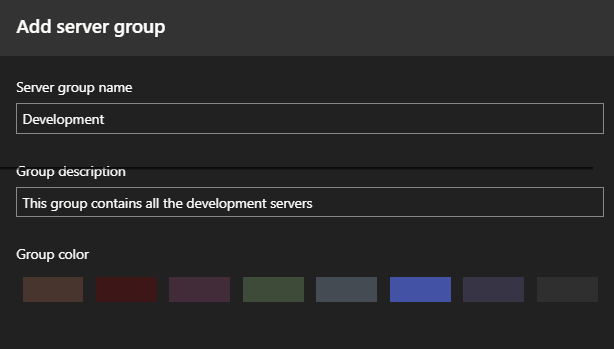
Once you do, a very simple window will open up. This window may appear on the right side of your screen, which is by default where it will appear. To create a group you only need three bits of information, the group name, group description and color.
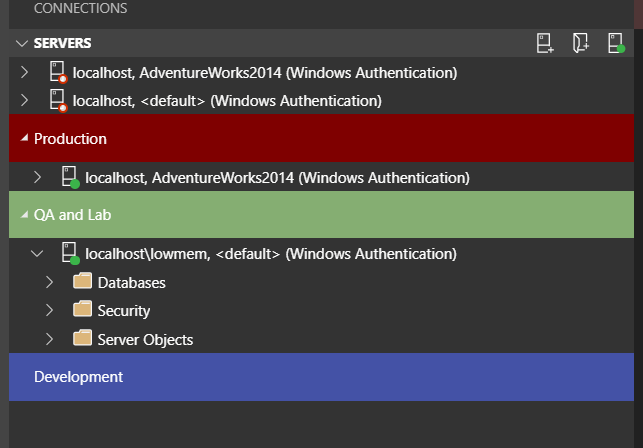
Once you click “OK”, you will now see your server group. You will see the description when you float your cursor over the group.
Now that we have our server group, it is time to add a connection to that group. This is pretty easy as well. When creating a new connection, one of the properties you will be asked to fill out, although not required, is the Server Group.

What if it is an existing connection I want to move to the new group? This is even easier. When in the connections window, simply drag the connection to the group header that you want to move it to.
Add a Server Connection to a Group
Now that we have the group, we can begin to add server connections to the group. This can be done simply by right clicking on the group and then clicking, New Connection. This will open the New Connection window with the server group already filled in.
If the connection already exists and would like to add it to the new group. All you need to do is click and drag the connection to the header of the group.
Changing settings of an Existing Group
If you attempt to right click on a group, you will get three options.
-
-
- New Connection
- Edit Server group
- Delete group
-
As mentioned earlier, the New connection will take you to the new connection window with the server group already filled in, although you can still change it if you like.
Edit Server group will take you to the same window that you used to create the group. This allows you to change the Name, Description and color.
However, what if the setting I want to change isn’t in the list. For this you will need to go to Settings. This can be found under the File menu.
File —> Preferences —> Settings
When you are there, type group into the search box and a number of settings will appear. The ones we are looking for are under Data. As highlighted below.
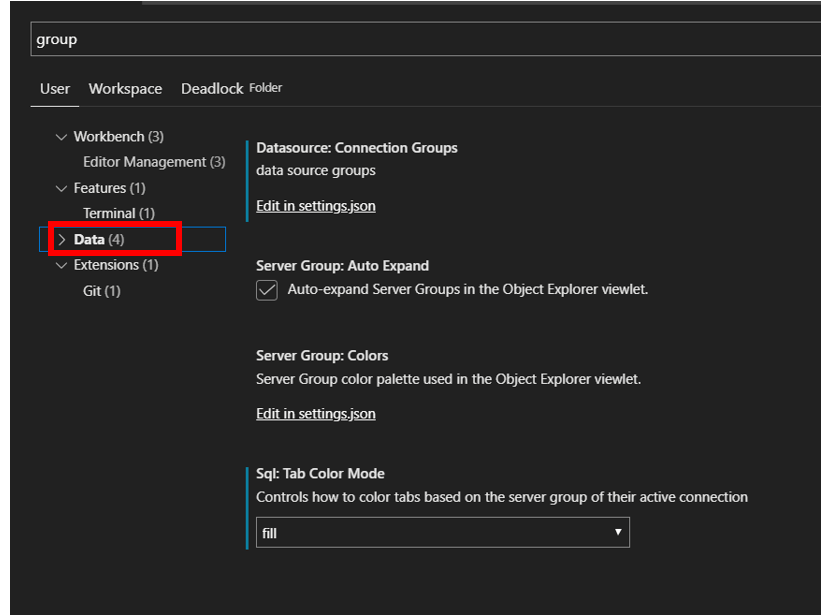
Notice there are four settings. Of which, only two can be modified here.
Server Group: Auto Expand – will expand the server groups automatically
SQL: Tab Color Mode – This will change the color of the tab to the color of the server group it is in. I complete another blog post on the details of how this works and how to change it. The post can be found here.
That leaves Server Group: Colors and Data Source: Connection Groups. These will need to be modified in a much different way. These will involve editing the settings.json file.
The settings.json file can be found here:
C:\Users\daveb\AppData\Roaming\azuredatastudio\User
According to Microsoft’s web site the file can be found in this location:
%APPDATA%\azuredatastudio\User\settings.json
Although knowing the location is good, we really don’t need it. Azure Data Studio provides a link that will open the file in ADS so we can modify it.
Reading the Json File
Let’s take a few minutes to go over how to read the json file. While this is not a json post, knowing how to read what you see is important. We will discuss only the two settings that are relevant to this post. While reading this, please keep in mind I am not a json expert. Jim Dorame has a really nice SQL Saturday presentation titled “Json for the Data Mortals” that is very good. He presented it at the SQL Saturday in Madison, WI this past year. The presentation can be found here. The image below is a screenshot of what you might see if you clicked either one of the links in the settings window.
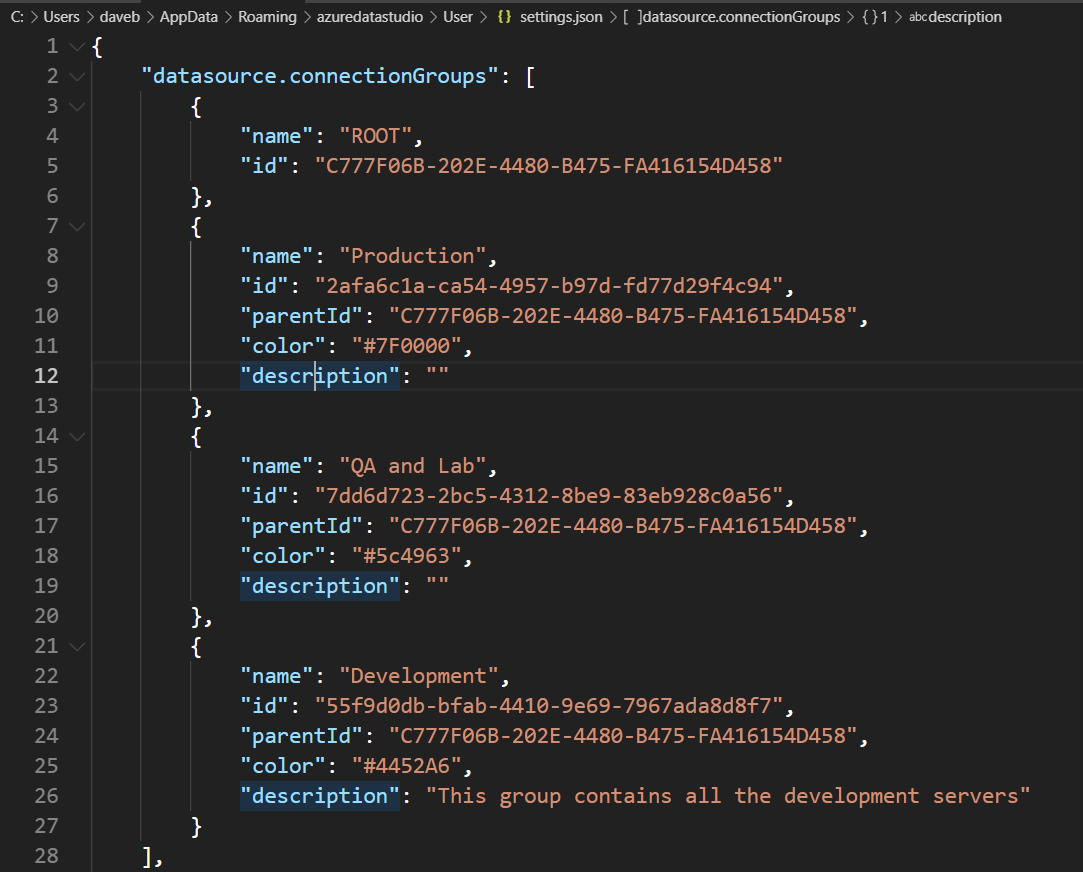
If you look above, you will see these []. These define an array. In this case the array is named: dataource.connectiongroups. Under that you will begin to see these:{}. These will define each object within the array. In this case there are four items. Finally within each object you can find the properties.
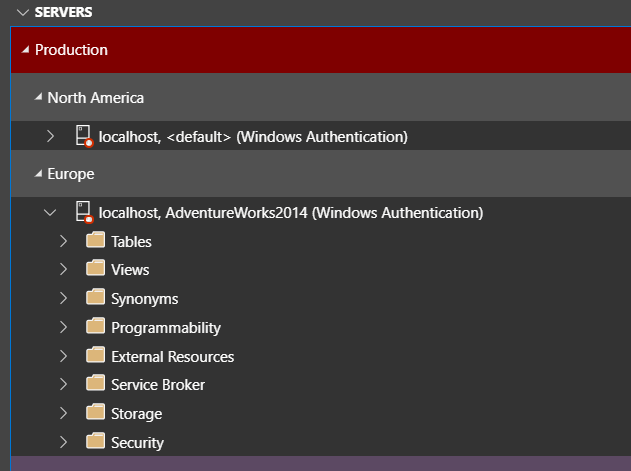
Notice that each object has an ID as well as the ParentID. The ParentID can be used to create a hierarchy of the server group. This could be useful in many ways. For example, you have a ton of SQL Servers, some in North America and some in Europe. You could create a top level group named Produciton and then under that of two subgroups, North America and Europe. Similar to what you see below.
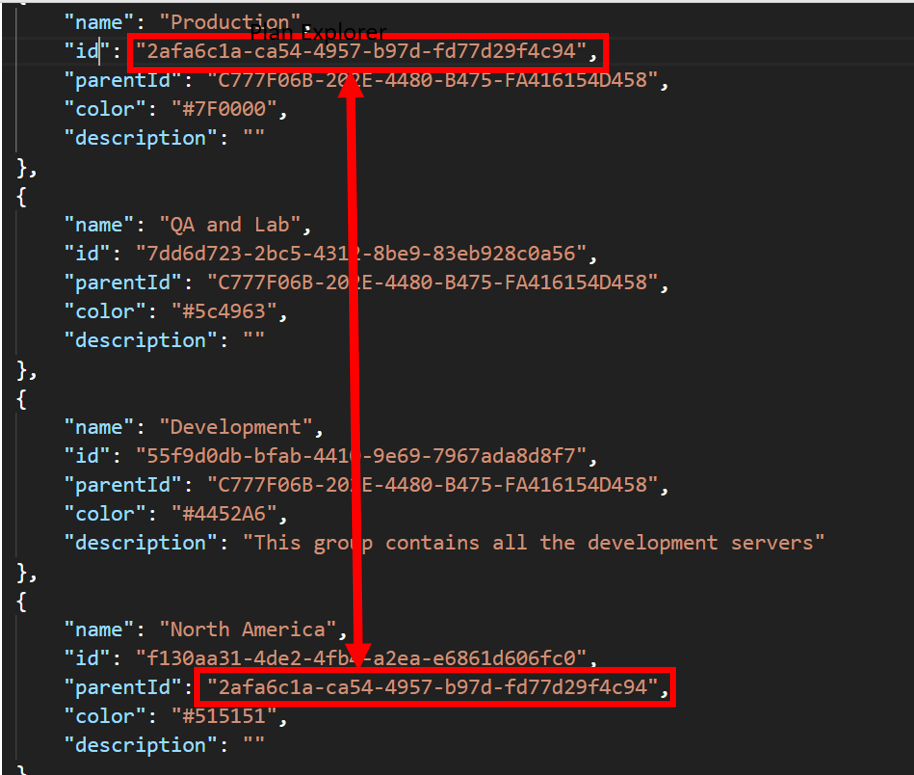
Now let’s take a quick look at the Json. In the image below, you will notice that the parentID for the North America object is the same as the ID for the Production object. If you wanted to move the North America group to another top level group, you will need to find the ID of that new group and paste it into the ParentID setting of the North America group. When you exit out of the settings.json file, you will be asked to save the file. Of course you will want to save it. If you do change it, keep in mind that the setting won’t take effect until Azure Data Studio is restarted.
Another property you may want to change is the group color. When creating the server group, you only have a few options.

Well, what do I do if either I don’t like the colors or I have more groups that colors. Again, this is where the settings.json file will come into play.
For each group you will see a color setting. All you will need to do is find the hexadecimal number for the color you are wanting to use and place it into this property. Here is a few good links, HTMLColors and Color-Hex.
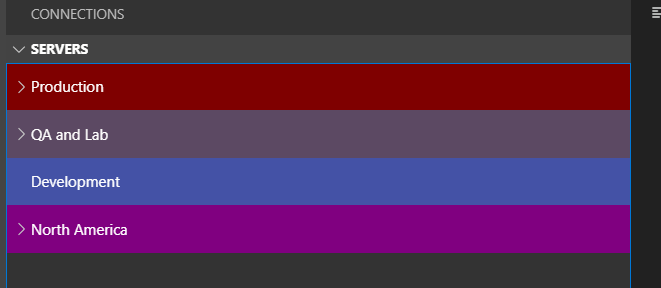
Let’s say I wanted a group to be purple. I could find the hex number, which is #800080 and paste it in the settings.json file as you can see below.
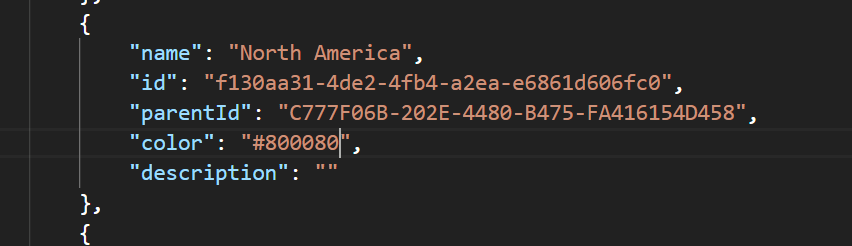
After restarting Azure Data Studio, this is what you will see, North America is now purple.
Now you have all the information to create groups to help you manage you servers.
Thanks for visiting my blog!!!