Finances are always a source of contention when they are not going well. In many homes, finances can be a stress point for the family. However, if you had a budget and were notified when we got closer to the limit, I think life might be a lot easier. Fortunately Microsoft has added the ability to create and use budgets in your Azure environment. Although almost everything I blog about is related to SQL Server, budgets are not just for SQL Server Azure services, it is for your entire Azure subscription.
This blog isn’t going to be about how Microsoft bills Azure customers or what type of activity can increase your bill. Nothing in life is free, if you follow the simple rule that everything we do in Azure has a cost, although sometimes a very small cost, it might be a bit easier to manage the costs. One thing to remember is that a budget is subscription based and it’s related resources.
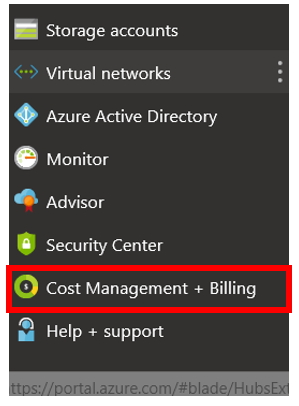
It just takes a few clicks to get to the budget part of the portal. The first click on “Cost Management + Billing” in the menu on the left side of the portal.
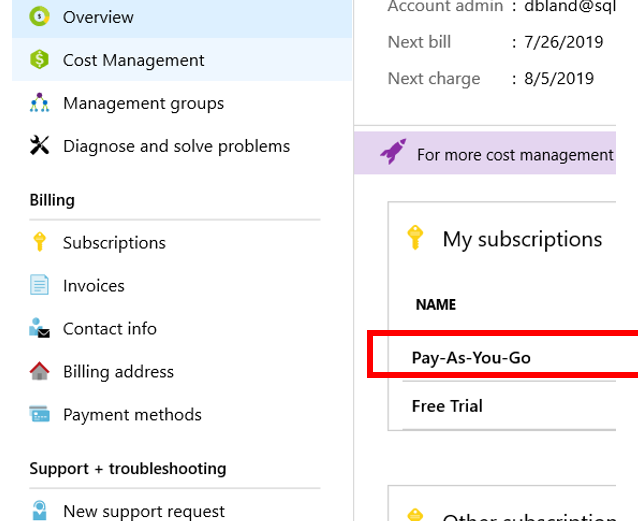
At this point, there are several different paths you can take to get to the next step. For the purposes for this post, we will just go one path. Select Overview and the click the Subscription you wish to set the budget on.
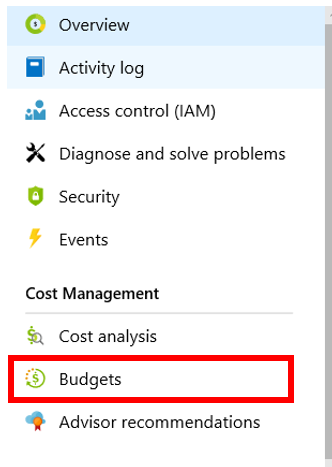
The last step to get to the Budget area is to click the “Budgets” item. Now you are ready to start the process of setting up the budgets.
When you are looking to set up a budget, there are few questions you should have an answer to, prior to creating it.
-
-
-
- What will be the maximum for the budget?
- What will happen when I reach the limit?
- Do I want incremental warnings? If so, who should be the alerts?
- Maybe an email at 80% of budget
- Text message at 100% of budget
- When will the budget start and when will it end?
- How often will the budget be reset?
- Monthly
- Quarterly
- Yearly
-
-
Once you have an idea of what the answers to the above questions might be, you are ready to proceed with creating the budget.
To demo the creation of a budget, I will use these answers to the above questions.
-
-
-
- What will be the maximum for the budget? – $5,000
- What will happen when I reach the limit? – Text message and email
- Do I want incremental warnings? If so, who should be the alerts?
- Maybe an email at 80% of budget – yes, email at 80%
- Text message at 100% of budget – yes
- When will the budget start and when will it end? – When the budget is configured and will expire on June 6, 2021.
- How often will the budget be reset? – Quarterly
-
-
Now to implement the budget in Azure.
What will be the maximum for the budget? – 5,000
This first thing that needs to be created is the budget itself. Once you clicked the budget menu item as mentioned earlier, you then will need to click the “Add” link. By clicking this, you will then be taken to the form that will allow you to enter all the necessary information for the budget.
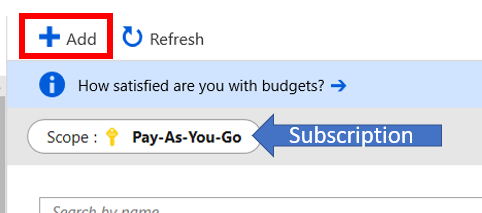
The blue arrow above points to the subscription that will define the scope of the budget. Remember, the budget is set for the subscription and covers all the costs associated with that subscription.
Once you click the “Add” link you will then see something similar to the image below.
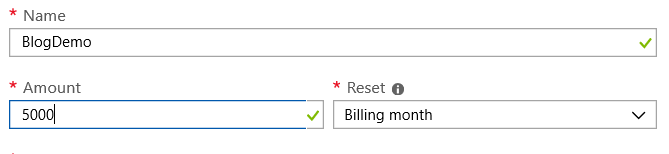
Of course the name is important, I prefer to give the budget a name that it be somewhat descriptive.
Then you must enter an amount. In order to do this properly, you will also need to identify when the amount will be reset to zero.
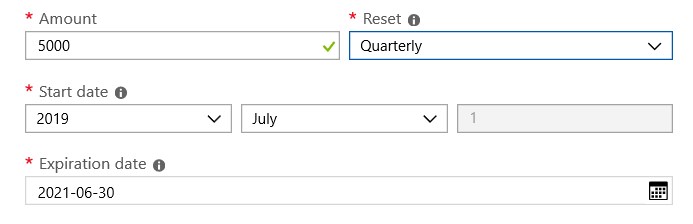
Based on the earlier answers, the amount will be $5,000. Once you have the amount entered as you see below, now you need to determine how often you would like it to reset.
As you can see in the image above, there is a “Reset” option. This is where you will determine the reset interval. You have multiple options for this settings.
-
-
-
-
- Billing Month
- Billing Quarter
- Billing year
- Monthly
- Quarterly
- Annually
-
-
-
When you pick on option, the next set of options will change, based on the option you pick. The order of the options is pretty straight forward, starting from the left, Year, Month and day. Notice below all three of which are not active, that is due to the option for renew you picked, I this case “Billing Monthly”.
Below are the Reset options and the impact of the Year\Month\Day options. These images were created on the 8th of the month. The day changed based on that.
-
-
-
-
- Billing Month
- Billing Quarter – notice the year and month are available to change
- Billing year
- Monthly – the day changed to the first, unlike the above images that set the day to the day before.
- Quarterly
- Annually
- Billing Month
-
-
-


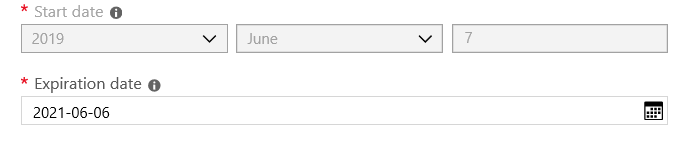
Now that we have set a starting date, we also need to set the Expiration Date. This is the date you no longer what the budget to be in effect.

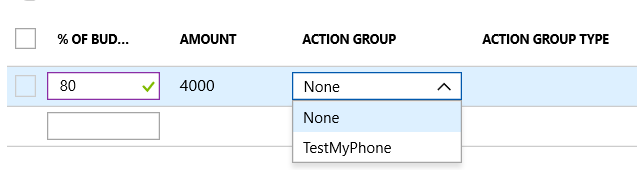
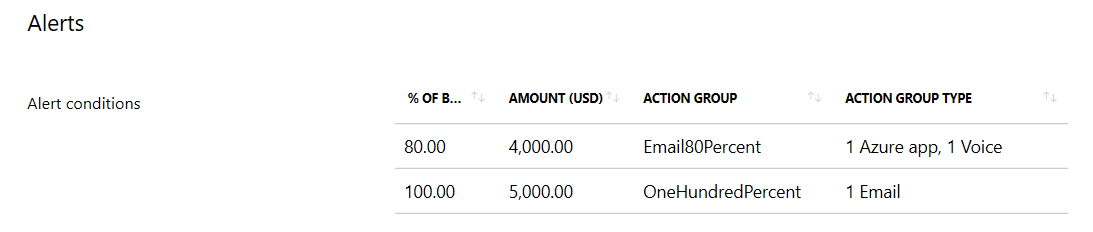
The next configuration setting we must address is what level of the budget will trigger an alert. For example, if our budget for the subscription is $5,000 and we want to get an email at 80% utilization, or $400. The budget amount, black box below, is a calculation of the amount, red box and the percent of budget, yellow box. In this case, 80% of 5,000 is $4000.

Action Group
Now that we have set up the basics, we now need to determine what will happen when the Alert Condition is met. Action Groups will help us out here.
When you are setting up the alert, you will have to click the drop down box under that Action Group header. If no Action Groups exist you will only see None. However, in this case, there is an action group, so we see that as well.
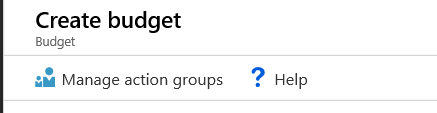
Creating an Action Group
An essential component for setting up a response to a threshold being met. If you need to create an Action Group, you will need to click the “Manage Action Groups” in the upper left, just under the “Create Budget” header.
If you are trying to add an Action Group to an existing budget you can do so by clicking “Monitor” on the menu list on the left side of the Azure portal.

Regardless of how you get to the form to add a new Action Group, You will then be asked to complete a few basic settings. These include, group name, a short name, Subscription and what resource group you would like to add it to.
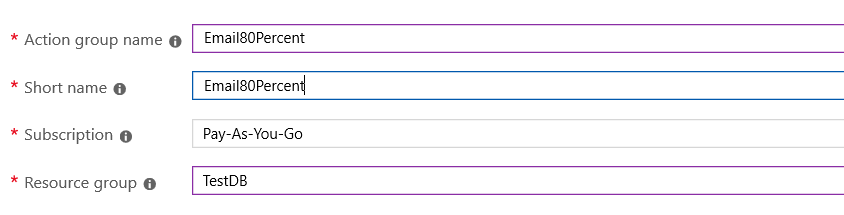
You will need to give the Action a name. Hopefully something descriptive.

Once you do, now it is time to pick the Action type. You can see what types are available, click the drop down under the Action Type header.
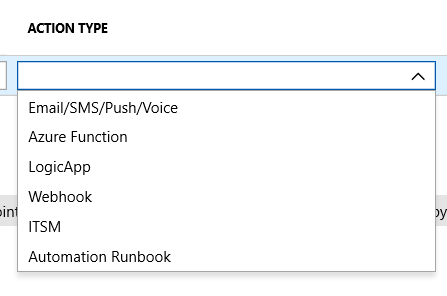
While there are a number of options we will focus on the email\sms option. If you look back at the requirements outlined earlier, you might remember that we wanted an email at 80% and a text message at 100%.
Types
Email – This obviously an email address you would like the alert to be sent to. Per Microsoft there is a limit of No more than 100 emails in an hour
SMS – This is a text message and you will need to provide a valid number to be sent to. While the limit of emails was 100 per hour, the limit for SMS is no more than 1 SMS every 5 minutes or 12 an hour
Push – This will send a notification to the Azure app. For more information about the app, please go here
Voice – This will send a voice call to the number you have indicated. There is also a limit with this type as well, no more than 1 Voice call every 5 minutes
Here is the link to the limit page in the Microsoft documentation.
Filling in the information that is needed for the alert is pretty simple. All you need to do if fill out the type you would like to utilize. For example, if you would like the action to only send an email, then you would enter an email address just under the work “Email”.
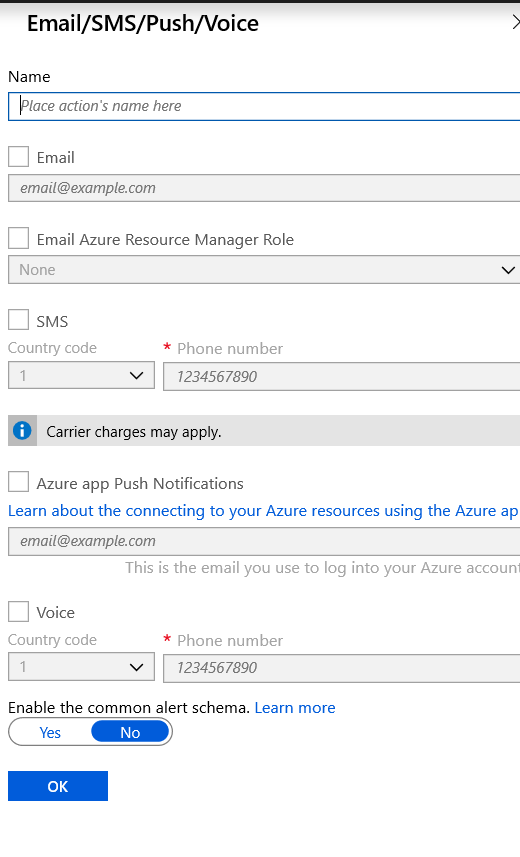
You can easily see the location for the options that we are considering. These options include, Email, Voice, SMS and Azure App push notification.
In order to meet the requirement for notification, we will need two Actions. One to send the email at 80% and one to send an SMS alert at 100%. They will look something like the image below.
Summary form and Adding to a Dashboard
Once you have everything set, you can review the budget configuration. if you look at the bread crumbs across the top, the path to this summary is easily identified.
Home –Cost Mangement + Billing -Overview –Subscription name — click on budget
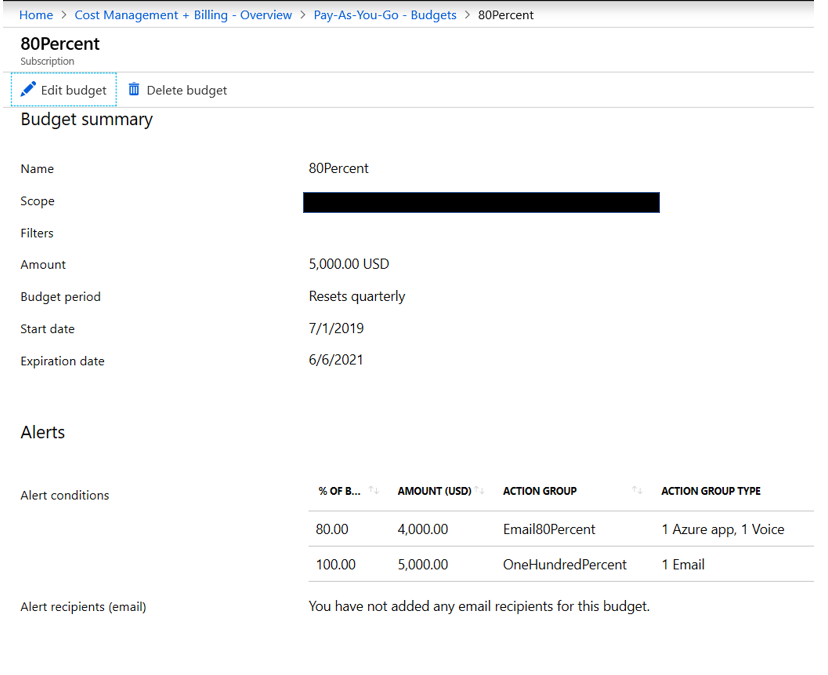
When looking at the summary form, you will also see the progress chart similar to the one below.
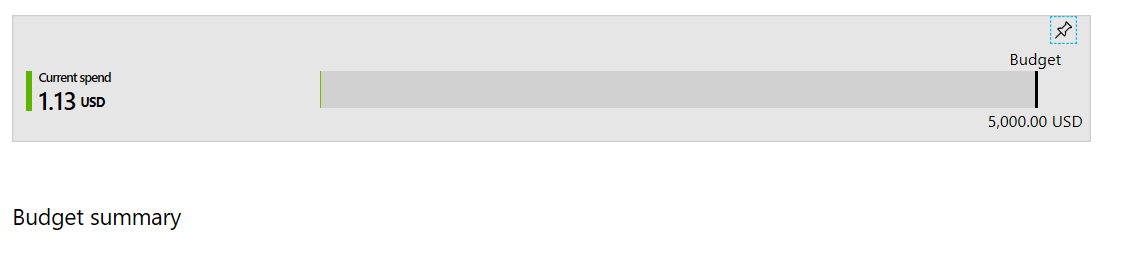
If you like the Pin in the upper right corner of the graph, you will be able to pin the graph to a dashboard.

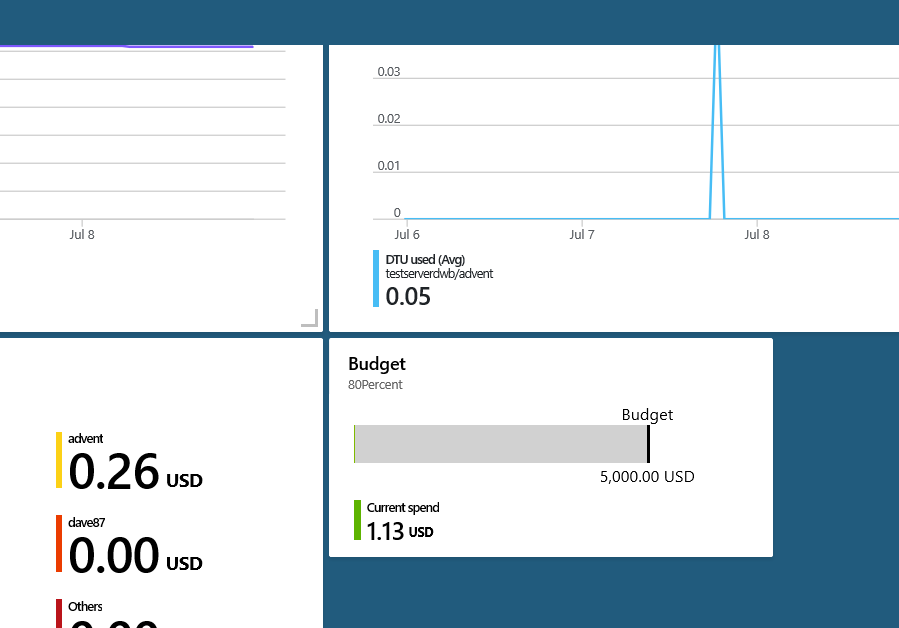
Below is similar to what you might see once the budget is added to the dashboard. I find it very useful to have the budget easily seen. By placing it on a Dashboard, this makes what could be a difficult task, managing the budget. And gives us a nice tool to easily review current status.
Creating and utilizing a budget is essential to managing the over cost of your Azure environment. Hopefully, this will help you take a small step in the right direction.
Thanks for visiting my blog!!