A few days ago I completed a post that hopefully provided information of what the Explain button is and why you might want to use it. This post is a continuation of the same general topic, execution plans. As I prepare to present my new session on Azure Data Studio I will be completing several blog posts on some of the great extensions that are available. Many of us have used the SentryOne Plan Explorer application and have enjoyed the ease at which it integrated with SQL Server Management Studio. The extension for Azure Data Studio has similar ease of integration with the added benefit of addressing a few of the challenges that currently exist in ADS. While this extension is still in preview, it can be very useful.
In case you are not familiar with an extension in Azure Data Studio, think of it as simply something that extends the functionality of Azure Data Studio. There are a number of extensions that cover a wide range of topics. These topics include Agent Jobs, performance reports, PowerShell and the topic of this post, SentryOne Plan Explorer. Even though the extension is currently in preview, it already has many great features that can easily make our lives as a DBA better!
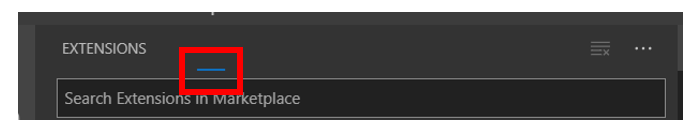
First things first, let’s talk about how to install the SentryOne Plan Explorer extension. Once we have opened Azure Data Studio we will need to open Extensions by either clicking the item on the red box below or go to Extensions under the view menu.

Once there you will need to find the Extension for SentryOne Plan Explorer. It will look like what you see below. One thing I would like to point out, the star in the upper left corner. When an extension has this, that extension is being recommended by Azure Data Studio.

When you click the Install button you will be redirected to the SentryOne website. On this page look for this, ” Visit extensions.sentryone.com” link just a little bit down on the page. Once you click the link you will be asked to login to the SentryOne site. After logging in, find the “Download Plan Explorer Extension” you will be asked to download a .vsix file. This is the file you will need to add the extension to ADS. Place this file in a location of your choosing and then click the “Install Extension from vsix Package”. My suggestion is to put the file in a location that is easy to get to and won’t get over written or deleted accidently Locate the file and click Install.
If you have the Extension window open while it is installing you might see a small bar moving from left to right. This will continue until the extension is fully installed. Once it is installed you will see a popup in the lower left corner of ADS stating the install is complete.
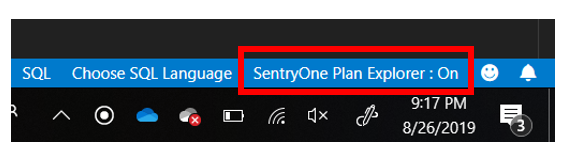
After a quick restart of ADS, you are ready to utilize the SentryOne Plan Explorer extension. In the lower right corner you will see a new item. This will make it very easy to turn the Plan Explorer On and Off. If by chance you are running queries and don’t want to see the execution plans, just click that to toggle it to off. Now you will not see the plans. The best part of this is that it does require me to restart Azure Data Studio like I would have to if I disabled the extension.
So now we have it installed, what’s next. Well…run a query! When you do a new tab will open up and you will see something like below. When you click that new tab you will see this grid. There will be one row for each statement in the batch.

This grid has some great information. The meat of the grid is to the far right. You will see two links, one for the graphical plan and the other the XML.
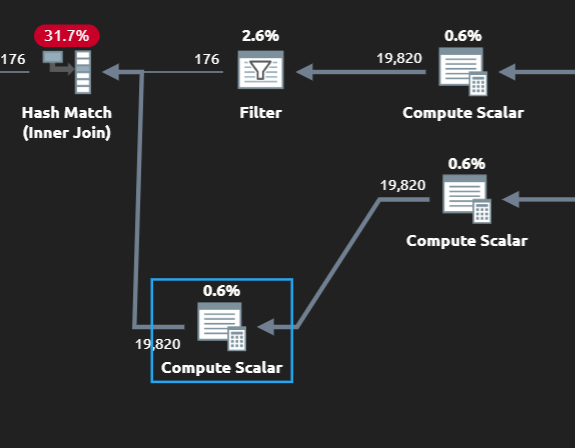
When you click the “View Plan” link, the plan will open up in another tab. Here you will see the familiar SentryOne look to the operators in the plan.
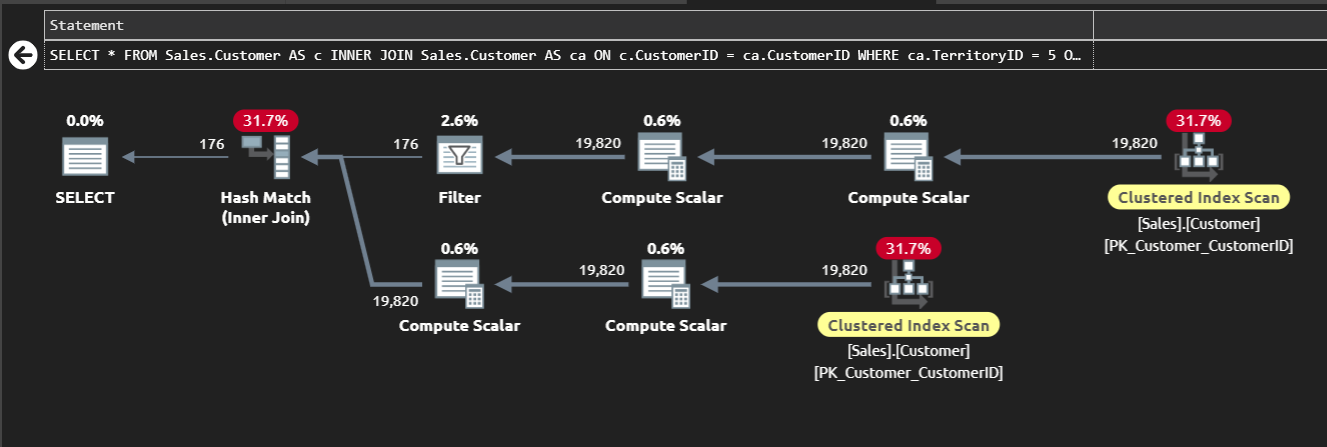
Here is the same plan using SentryOne Plan Explorer. Very few changes to the look and feel of the plan diagram, which I think is a great thing.
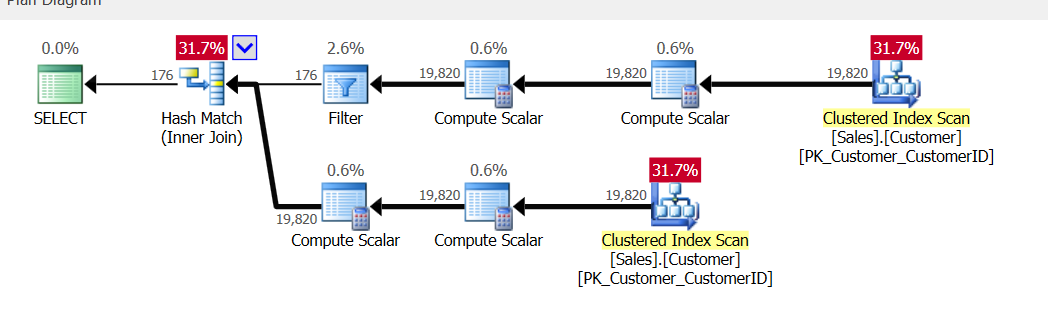
You may notice the arrow in the upper left corner, this will take you back to the grid mentioned earlier. You can still move the operators around by clicking and dragging them to another location as in the image below. Also the selected operator still has the box around it. This is another feature of Plan Explorer that I have always liked.
Another change you will notice pretty quickly is the differences in the properties displayed when you float your cursor over an operator. Initially you may think that a bunch of important properties were left out. They weren’t left out as much as they were moved.
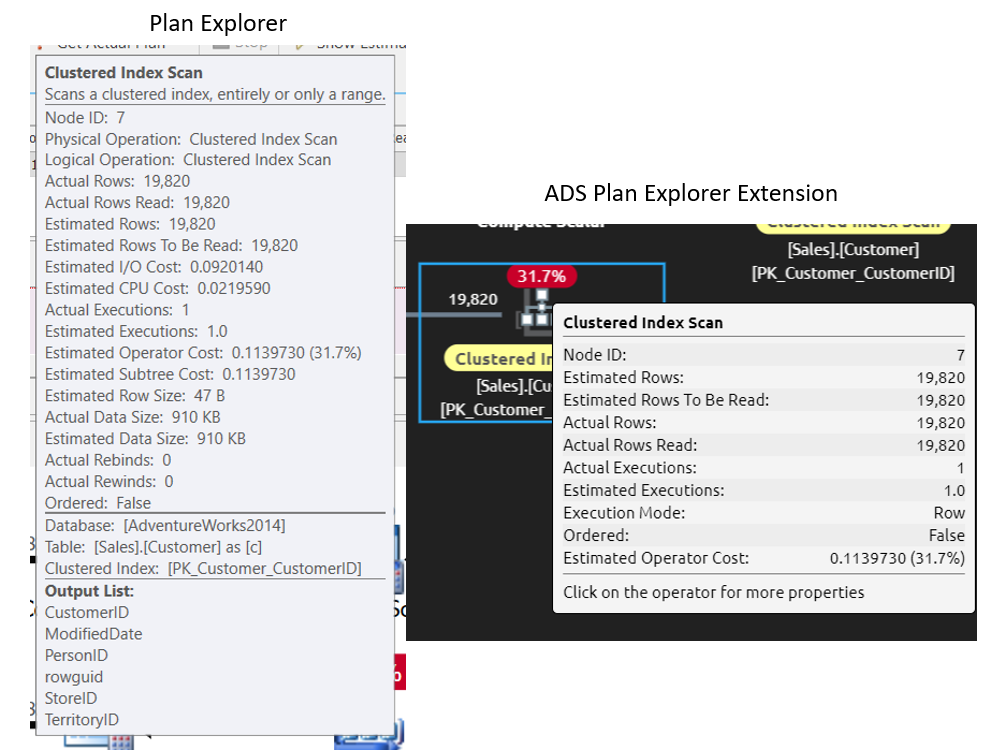
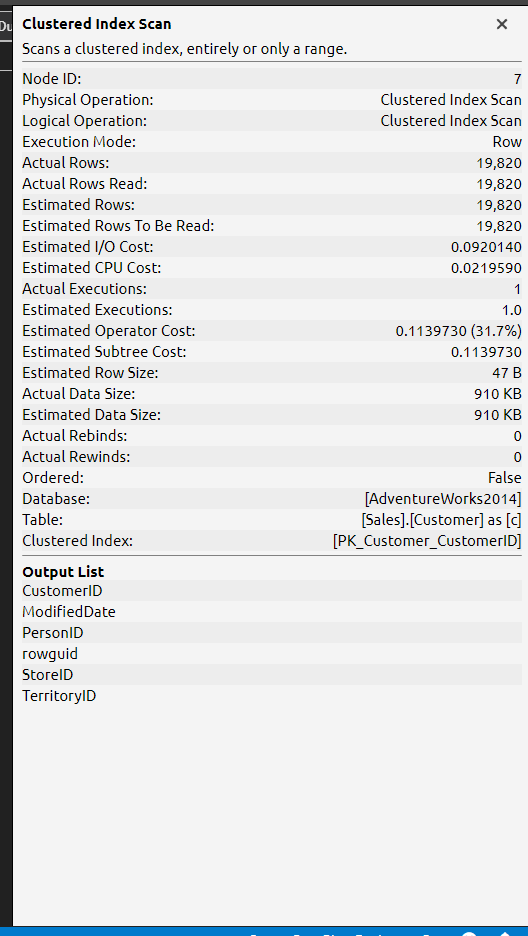
You will get the above pop ups when you float the cursor over the operator. However, if you click on the operator, another larger popup will appear on the right side of the screen. If you compare the properties below and the properties above from Plan Explorer you will see that all the same properties are there. What I like about what SentryOne has done, it allowed for a smaller popup when you float your cursor over the operator allowing for a quicker review of the properties.
In Plan Explorer, we are used to right clicking in the plan and seeing the menu on the right below. You can still right click on the plan, however there are fewer properties displayed. The biggest thing here is that the Zoom feature is still present. The zoom slide bar we are used to at the bottom of the screen isn’t available. I just need something that allows me to zoom in on the larger more complex plans. I really am more concerned that I can zoom if needed, not necessarily how it can be accomplished so although the slider makes it easier to zoom I can live with this.
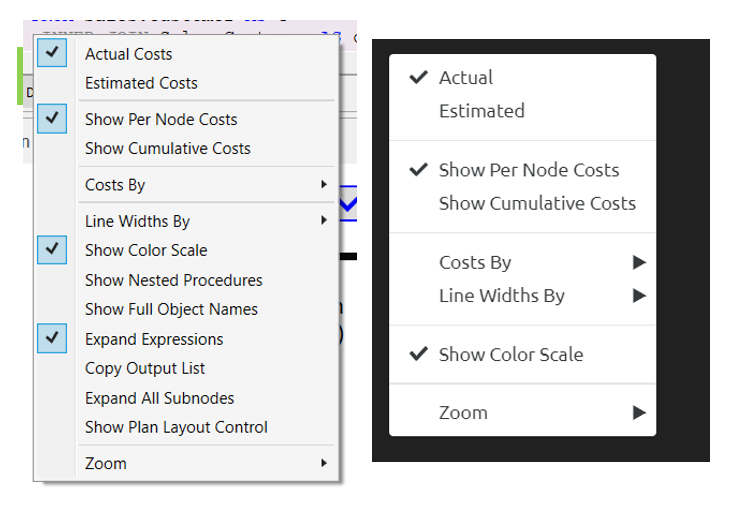
When in Plan Explorer you may be used to see this. It is basically a number of sliders that control various aspects of how the plan is displayed. These can be very useful, but the one I have used far more than the others is Zoom. Sometimes the plan is very complex and have a zoom slider is a very simple way to zoom in on a particular part of the plan. Even though there is still a way to zoom, I really liked this feature.

When I am working in SSMS and I want to save the plan, I just right click and save plan. It will be save with a .sqlplan file extension. Plan Explorer is only different in that the saved file will have a different file extension, pesession. I have saved many plans over my career for a number of reason, to review later or to send to someone come quickly to mind. I clicked on Save As under that file menu and nothing happened. I tried SaveAs and Save both. Same result. This could be more of a limitation of Azure Data Studio than the SentryOne extension.
Even though the plan doesn’t appear to be something we can save, we can click on the “View XML” link and then save the XML. Then find the file and change the extension to .sqlplan. It can then be opened up in either SSMS, SentryOne Plan Explorer or Azure Data Studio. I like that we have three options to view a plan. Each has it’s pros and cons. My plan is to use Azure Data Studio and the SentryOne extension because it keeps me in one application rather than two.
I will have all three applications installed on my computer. Although the Azure Data Studio extension is not as robust as Plan Explorer, it can still be very useful. Even though this extension is still in preview, there are many things I like about it and I would highly recommend that you plan on getting this one if you are going to be using Azure Data Studio.
Thanks for visiting my blog!!!