Extended Events are a very useful tool when trying to troubleshoot performance issues. When setting up an Extended Event session there are multiple options for the storage of the data. One of the most common targets for storage is the event_file target. This type of storage can be used for both an on-prem instance of SQL Server as well as an Azure SQL database.
This post will go over how to read from both locations, on-prem and an Azure storage account. They are similar, but different enough to cover here. The biggest difference as you will see, is setting everything up properly so you will be able to read multiple files with one TSQL statement.
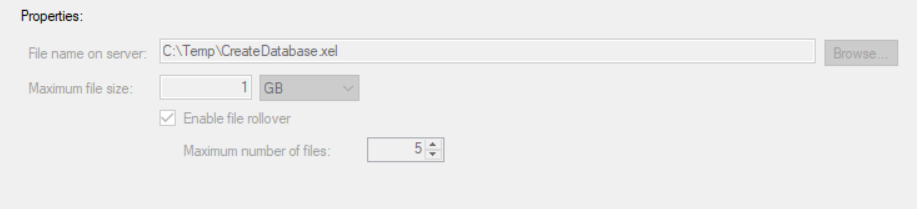
When setting up a event_file there are a few options that can be set. Of course the most logical is the path to the location where the files will be placed. You will also have the opportunity to set the size of the files, maximum number of files as well as whether or not to allow file roll over.
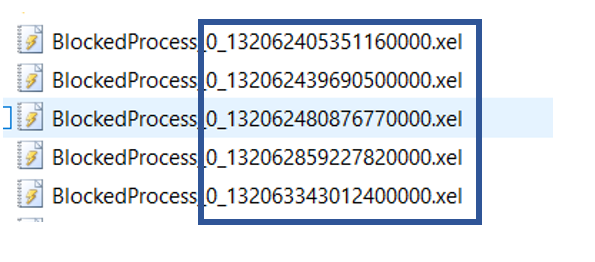
Since you might have more than one file, you may want to read from multiple files with the same query, that is the focus of this blog post. Of course in order to read from a file, the file name is important, even if reading from multiple files. If you look at the image below, you will see that there is a large number attached to the end of the file name. Just a side note, I like to name the file the same as the Extended Event session name. This makes it easier to match the files to the session.
According to Microsoft the number at the end of the file name is calculated using the following method:
“The integer value is calculated as the number of milliseconds between January 1, 1601 and the date and time the file is created.”
Reading On-Prem Files
When reading from a event_file target, the fn_xe_file_target_read_file function is used. The first parameter of this function is the file path, which includes the file name.

Using the two files in the above image as an example, if I want to read from a single file, I would include the full path including the name of the file.
SELECT event_data = CONVERT(xml, event_data)
INTO #eeTable
FROM sys.fn_xe_file_target_read_file(N’C:\temp\ExecutionTImeOut_0_131920765279670000.xel’, null, null, null);
Notice that in order to read from the file, I included the full name of the file. However, there are two files due to the rollover. What do I need to do to read from both files in one query?
In order to do this, there is one simple change that needs to be made. Notice in the code below, the file name has been modified to use the “*” following the name. The number at the end of the file is no longer needed.
SELECT event_data = CONVERT(xml, event_data)
INTO #eeTable
FROM sys.fn_xe_file_target_read_file(N’C:\temp\ExecutionTImeOut*.xel’, null, null, null);
This will now return the data from all the XEL files in the location specified that start with “ExecutionTimeOut”.
Reading from Azure Storage Account
This works great for an on-prem instance of SQL Server, however there are some changes that must be made when quering the file targets of an Azure SQL database.
Before we get into the change that needs to be made, let’s go over a few prerequisites on using Extended Events for an Azure SQL Database and using an Azure storage account. This blog will not get very deep into a few of the prerequisites, however they do need to be mentioned.
The first prerequisites is having an Azure Storage account. When you do this, you will given a few options for the type of storage. This can be obtained in your Azure portal. You will need to decide on a few things as well, including what subscription you will use for the storage account and what region it is in.
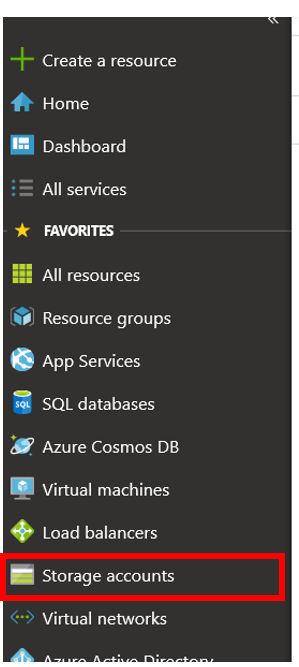
To create the storage account, simply click the “Storage Account” menu item in the Azure portal. You will need to fill in all the requested information.
Now that you have provided all the requested information, you can now utilize the storage. When picking a target type in the Extended Events “wizard”, my preference is the event_file target type.
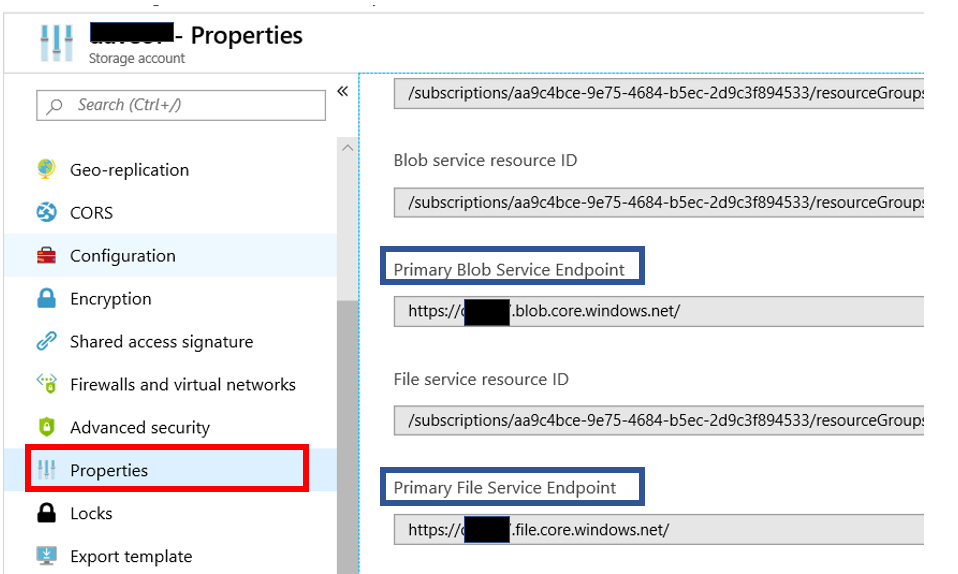
In order to read the Extended Event files, you will also need to get the EndPoint for the storage account. As you can see above, you will need to go to the properties of the storage account. When you do you will then have to capture the Endpoint for the type of storage account you chose. In this case, the option would be between a file storage account or a Blob storage. Notice that the two Endpoints only have one small difference, right before the word “core”, you will see either File or Blog. You just need to copy the path to the clip board. You will need this path when reading the Extended Event files.
The next item you will need is a Shared Access Signature for the storage account. This can be obtained a few different ways. One is to use the Azure Storage Explorer and the other is to use the Azure portal.
To obtain this signature using the Azure portal navigate to the storage account and then click “Shared account Signature”. The screen on the right will then be populated with the settings of the signature. One important setting you want to be aware of is the End option under “Start and Expiry data\time” section. Make sure you pick the appropriate duration. When this data\time has past you will no longer be able to read the files in the storage account. When you tried to read an Extended Event file and the End date has past, you will not receive an error, you will just see no records returned.
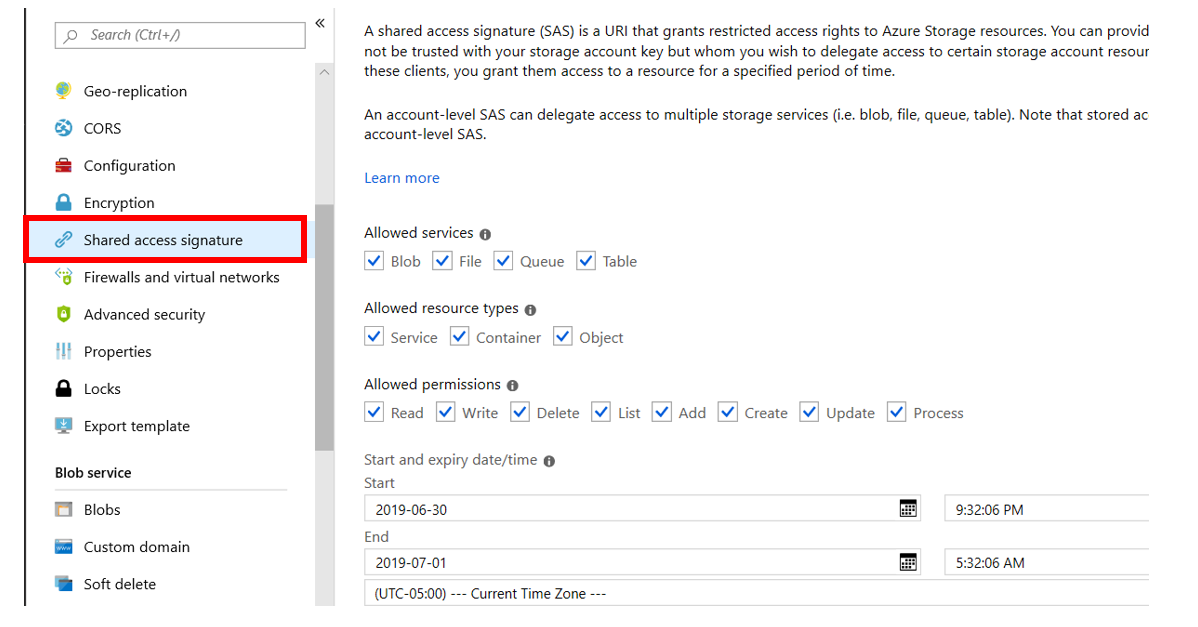
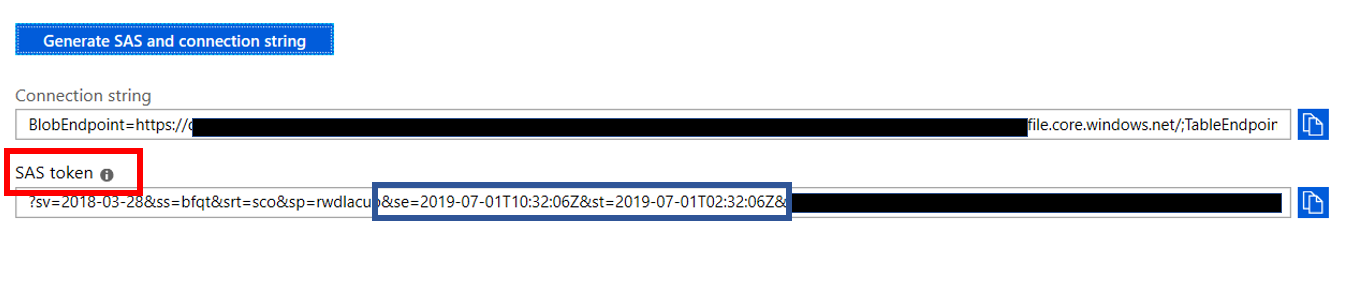
Towards the bottom of the above screen, after you scroll down a bit, you will see a button that looks like the blue button at the top of image below. When you click that, the SAS token will appear. This is what we will need to read the Extended Event files. To capture this, just click the blue button to the right of the box under SAS token. In the blue box below, you will see two date, these are the start and end date for the token. When the end date has past the token will no longer work and your queries to read from the files will not return any data. In addition, you will also not get an error.
We are almost done with the prerequisites. Once you have configured the Extended Event session to use a Storage Account and the session is running, you a ready to read the files. There is a lot of really good information out there on how to create an Extended Event session..
The last requirement is to create a database scoped credential in your Azure SQL Database. To do this, you will need to SAS token mentioned about. However, notice that there is a “?” at the front of it. This “?” you will need to remove prior to creating the credential.
Although not a requirement, I would also highly recommend that you download the Azure Storage Explorer. It is a very nice tool that can make our lives much easier when working with storage accounts.
To create the credential, you will use SQL Server Management Studio. Below you will see the code used to create the credential. First thing to remember is that you must run this code when connected to your Azure SQL Database. Notice the path right after the CREATE line. This is the path to your storage account and must start with HTTPS. When you read this code, you will find the “SECRET”, this is where you place the SAS token you captured earlier. Please remember to take the “?” out before executing the code.
CREATE DATABASE SCOPED CREDENTIAL [https://MyStorageAccountName.blob.core.windows.net/eefiles]
— this name must match the container path, start with https and must not contain a forward slash at the end, in this case, the container is eefiles
WITH IDENTITY=‘SHARED ACCESS SIGNATURE’
— this is a mandatory string and should not be changed
, SECRET = ‘sv=2018-03-28&ss=bfqt&srt=sco&sp=rwdlacup&se=2019-07-01T09:53:56Z&st=2019-07-01T01:53:56Z&spr=tldodr43465kadfuJRsCYUmi1OmYywUjw%3D’
— this is the shared access signature key that you obtained from the portal, this shared access signature has been changes for security reasons
GO
You can run this code querying the sys.database_credentials view to confirm the credential was actually created. Make sure to be connected to your Azure SQL Database.
SELECT * FROM sys.database_credentials
Finally we have all the prerequisites done, now we can move on to actually reading the files.
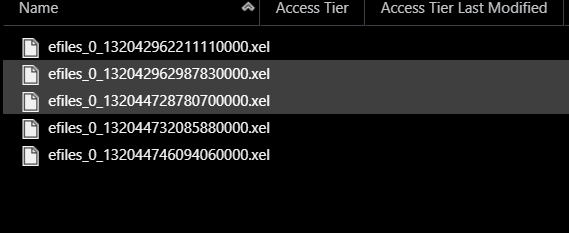
As you can see in the image below, the file names follow the same pattern as an on-prem instance of SQL Server.
Now that we are ready to read the files, one change you will need to make is put the path to your storage account. The code below will read just from the file hard coded in the path.
SELECT event_data = CONVERT(xml, event_data)
INTO #eeTable
FROM sys.fn_xe_file_target_read_file(
‘https://MyStorageAccountName.blob.core.windows.net/eefiles/efiles_0_132044728780700000.xel’,
null, null, null
);;
However, we need to read from all the files. When reading multiple files with an on-prem instance of SQL Server, we simply removed the number at the end of the file name and replaced it will an “*”. Logic would say that should work when reading from an Azure Storage account, but it doesn’t work. You will not get an error either. It will just not return any rows.
This will work, but will not generate an error either, just no rows.
‘https://MyStorageAccountName.blob.core.windows.net/eefiles/efiles*.xel’,
The only change we need to make to the above code, is remove the numbers at the end of the file. Make sure to include the front part of the name and remove the file extension as well.
‘https://MyStorageAccountName.blob.core.windows.net/eefiles/efiles’,
Now, you can read from all the files with one query. However, you need to make sure you are not pulling too much data, it could time out. As it has for me a few times.
Using SSMS Menu items
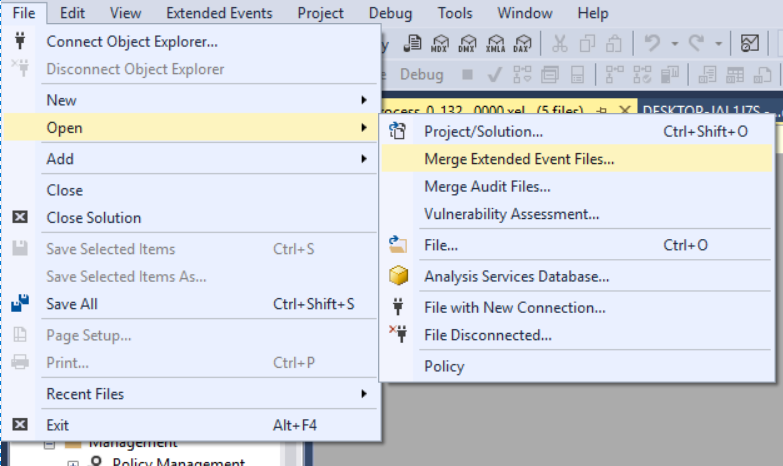
Another way to read from multiple target files is inside SSMS. However, it only works for an on-prem instance of SQL Server. On the File menu, Open you will then see a pop out menu with “Merge Extended Event Files…” item.
When you click, you will have the option to navigate to the location of the files you wish to merge and display the data. You will see the form like the one below.
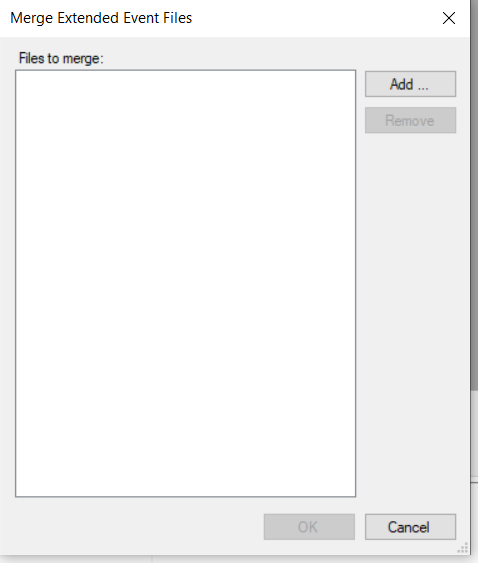
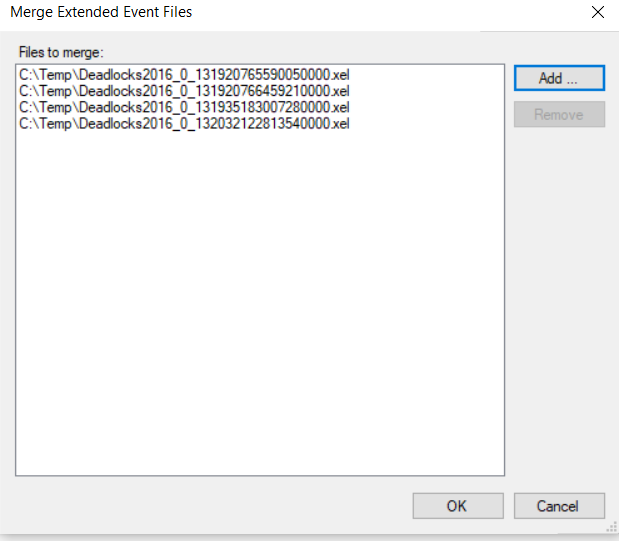
You will then click the Add button and select the desired files. You can use Control+ click to select more than one file. Once you do, the files will be listed and you just click OK for the data to be displayed in SSMS. Remember, this does not work for an Azure SQL Database.
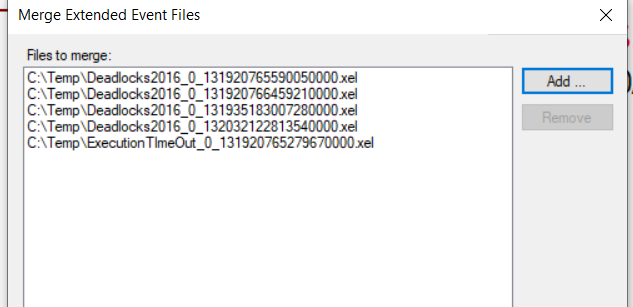
The files don’t have to be from the same session to merge them, although many times they will be. As you can see below there are files from two different sessions, the deadlock session and the ExecutionTimeout session.
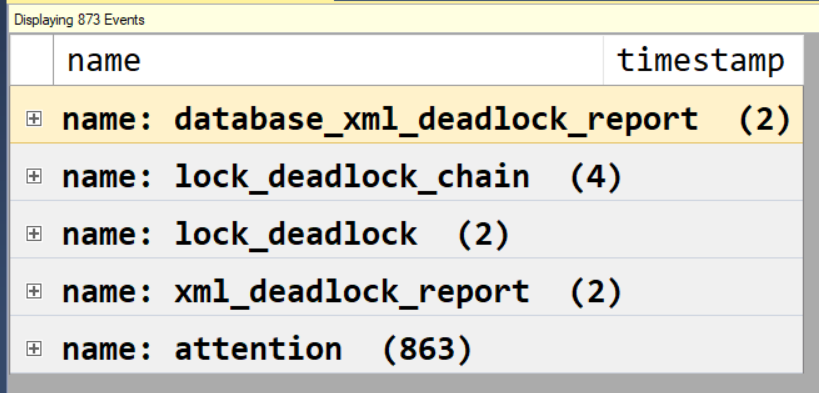
Once the data is merged and displayed in SSMS, you can group the data by event. This can be done by right clicking on the column in the top half of the results and going to “Group by this column”. The results will then look similar to the image below. Notice that the top four rows are from the Deadlock session, while the bottom row, the Attention event, is from the QueryTimeout session.
Additional Code to Read the XML Data
While this post is about how to read mulitple files, I also want to include the code to parse through the resulting XML from the above code. If you look, the above code simply takes the data and converts it to XML. While the code below will parse the XML into a more readable format. You will need to make a few changes. You will need to use your path to your storage account and you will need to update the columns you want to extract from the XML.
If you look at the code below, there are three steps. Well actually only two, the middle step is optional.
–Extract the XML
INTO #eeTable
FROM sys.fn_xe_file_target_read_file(
— Fill in Storage Account name, and the associated Container name.
‘https://Mystorageaccount.blob.core.windows.net/eefiles/efiles’,
null, null, null
);;
ts = event_data.value(N'(event/@timestamp)[1]’, N’datetime’),
[sql] = event_data.value(N'(event/action[@name=”sql_text”]/value)[1]’, N’nvarchar(max)’),
duration = event_data.value(N'(event/data[@name=”duration”]/value)[1]’, N’nvarchar(max)’),
spid = event_data.value(N'(event/action[@name=”session_id”]/value)[1]’, N’int’),
user_nm = event_data.value(N'(event/action[@name=”username”]/value)[1]’, N’nvarchar(max)’),
dbname = event_data.value(N'(event/action[@name=”database_name”]/value)[1]’, N’nvarchar(max)’),
FROM #eeTable
ORDER BY ts
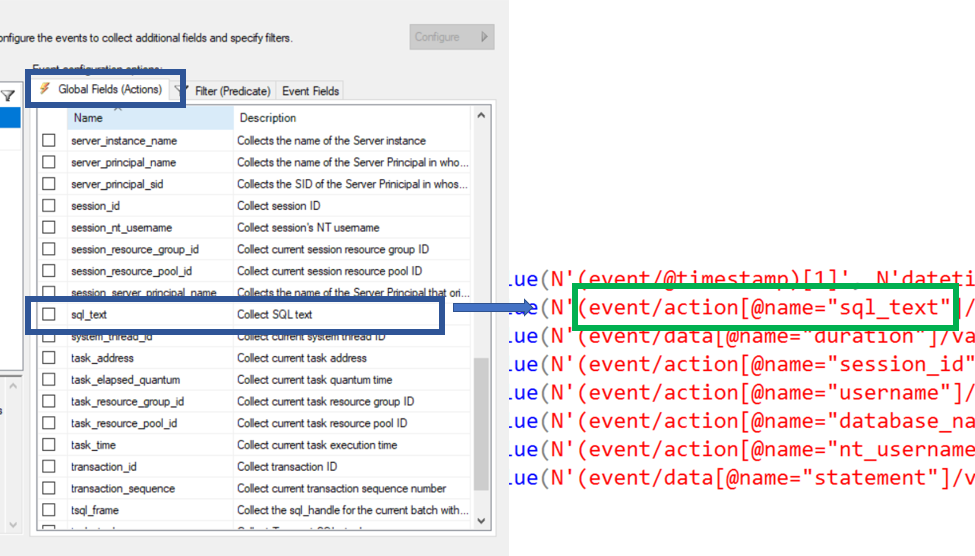
You can get the column names from the Extended Events GUI. When you are looking at the Action tab, you would use ‘event\action’. When you want to pull a column in the “event fields” table. Something to remember, if you misspell a column name, you will not get an error when you run the query. The column will just be NULL for every row.
Here is an example of where to get the Action column names. Notice that they can be found on the Global Fields(Actions) table.
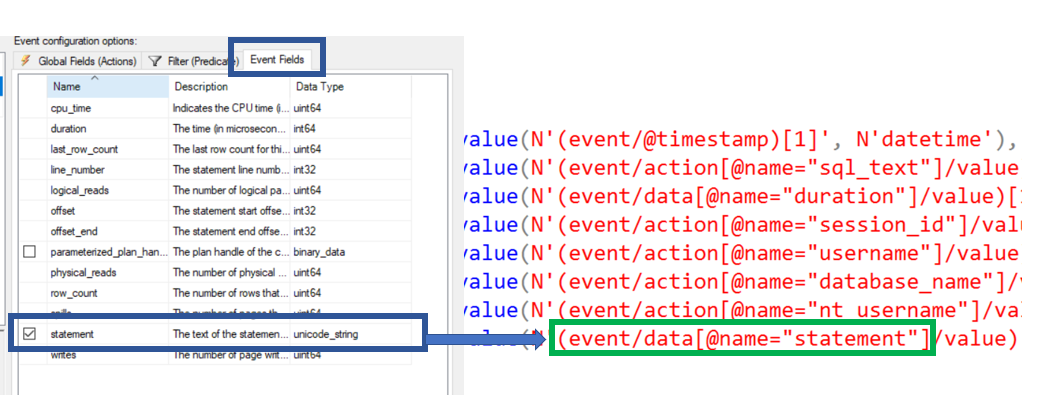
Below is an example of the “Data” fields. Notice that the “Event Fields” tab is that active tab.
Now you can read from multiple Extended Event files with a single statement. This will allow you to take the results, dump the data into a temporary table and then use T-SQL to find the data you are looking for.
Thank you for visiting my blog!!!!