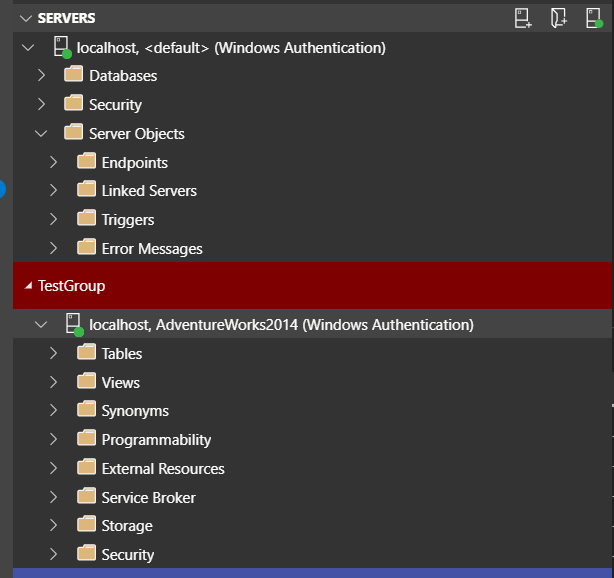
As a DBA creating and managing SQL Server Agent jobs is an essential part of our day to day activity. We have always done this via SQL Server Management Studio or Transact SQL. Both of these are still great options for managing jobs, but what about Azure Data Studio. Unfortunately, the management of agent jobs is not part of the native functionality of Azure Data Studio. If you look at the screenshot below you will see that the SQL Server agent is not available. So does this mean that Azure Data Studio isn’t the proper tool for the management of agent job? The answer to this question is a classic DBA answer, it depends. If you do not install an extension you will not be able to manage jobs.
Before going any further let’s take a few minutes to go over what an extension is. As the name might imply, it extends something. In this case Azure Data Studio has it’s functionality extended to do something that is normal cannot do. An example of this would be the ability to manage SQL Server Agent jobs. Since Azure Data Studio requires an extension to manage jobs, what extension would need to be added? The answer is the Admin Pack for SQL Server extension. There is a SQL Server Agent extension as well, this is part of the Admin Pack for SQL Server. While this extension does more than just job management, we will focus mostly on how manage Agent jobs using Azure Data Studio.
Here is a list of some of the functionality of the Admin Pack for SQL Server extension.
-
- Agent Job management
- Import file wizard
- Deploy and extract dacpacs
- Deploy and extract bacpacs
- Browse Extended Events.
- Other functionality as well
As stated earlier, we will need to install the Admin Pack for SQL Server extension. So where do we get it? Since it was created by Microsoft, you will be able to get it right from inside Azure Data Studio.
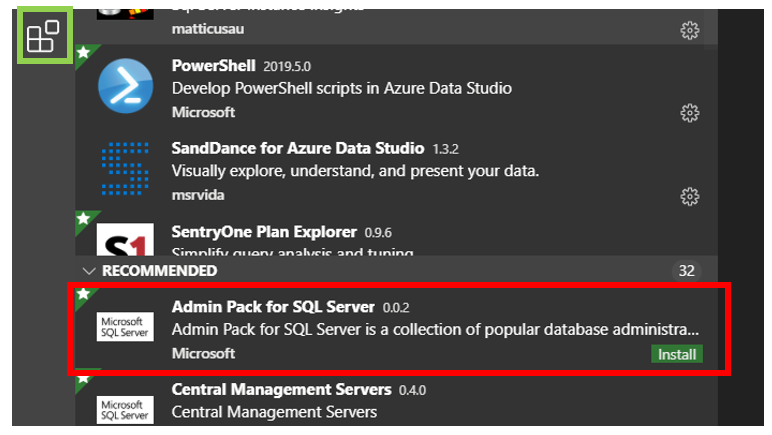
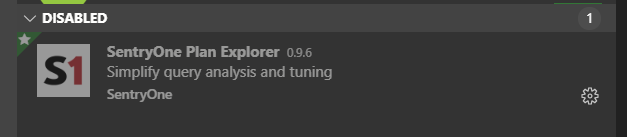
Before installing the extension, we should probably check to see if it is installed already or if it has been disabled. If you click the icon in the green box below, the extension Marketplace will open up. If you see the Admin Pack for SQL Server under the Recommended block, it is not installed. If you see it under Disabled, the extension has been disabled.
List of disabled extensions can be found in the following location. Notice that the extension has been greyed out.
Another way to determine if the extension has been installed is to see if the SQL Agent appears as an option when you are managing the server level. As in the image below the Agent will be present when managing the server. If you do not see SQL Agent, it means either it is not installed or has been disabled. If it is not installed you can go to the MarketPlace and install it from there.

Now that we have confirmed the Agent extension is not only installed, it is also enabled, we are ready to manage the jobs on the server. Let’s do a quick inventory of what a typical DBA would do with jobs. All of these can be completed with Azure Data Studio, however there just a few minor limitations that will be discussed later in this post.
-
-
- Manage jobs history
- Manage operators
- Manage alerts
- Manage proxies
-
To get to the Agent job information in Azure Data Studio, you will need to right click on the server and go to “Manage”. As seen below.
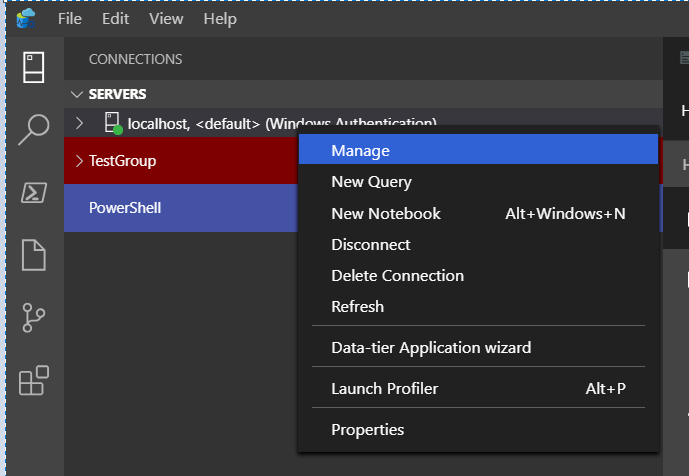
Once you do, you will not only see the SQL Agent but also other Extensions you may have installed in Azure Data Studio.

In the above image, you will see that not only do I have the Admin Pack for SQL Server extension installed, but I also have the extension for sp_whoisactive and a few others. All of which I would recommend that you install.
When you are finally in the proper place to manage the jobs, you will see the same items you will see when using SQL Server Management Studio. You will of course see the job name, last run, enabled status, category and a few others. These are the same items we have been working with for years in SSMS. In the green box in the image below you will be able to click each item and you will be taken to the management area for jobs, alert, operators and proxies.
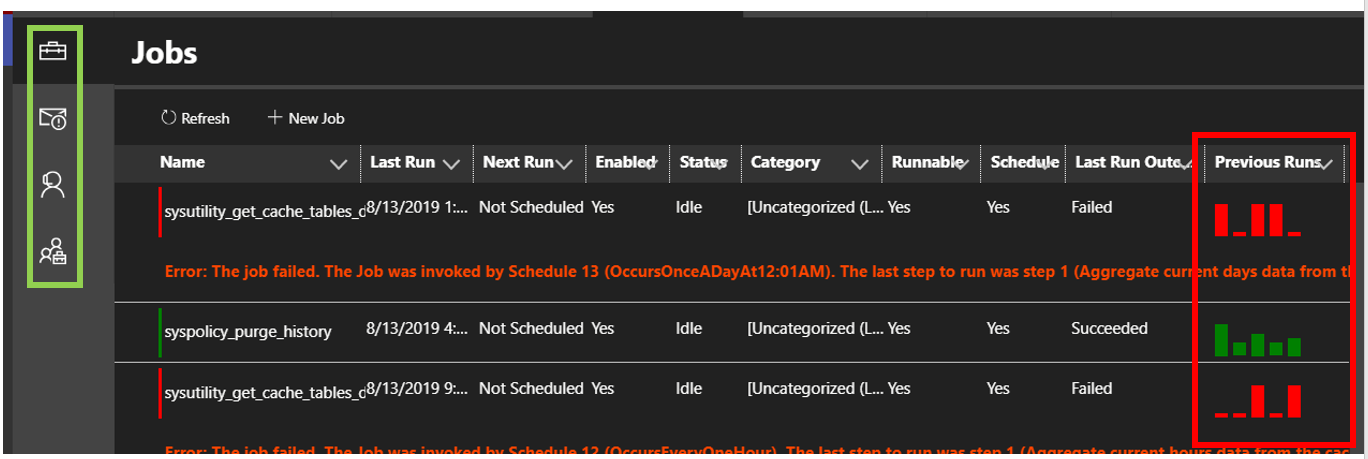
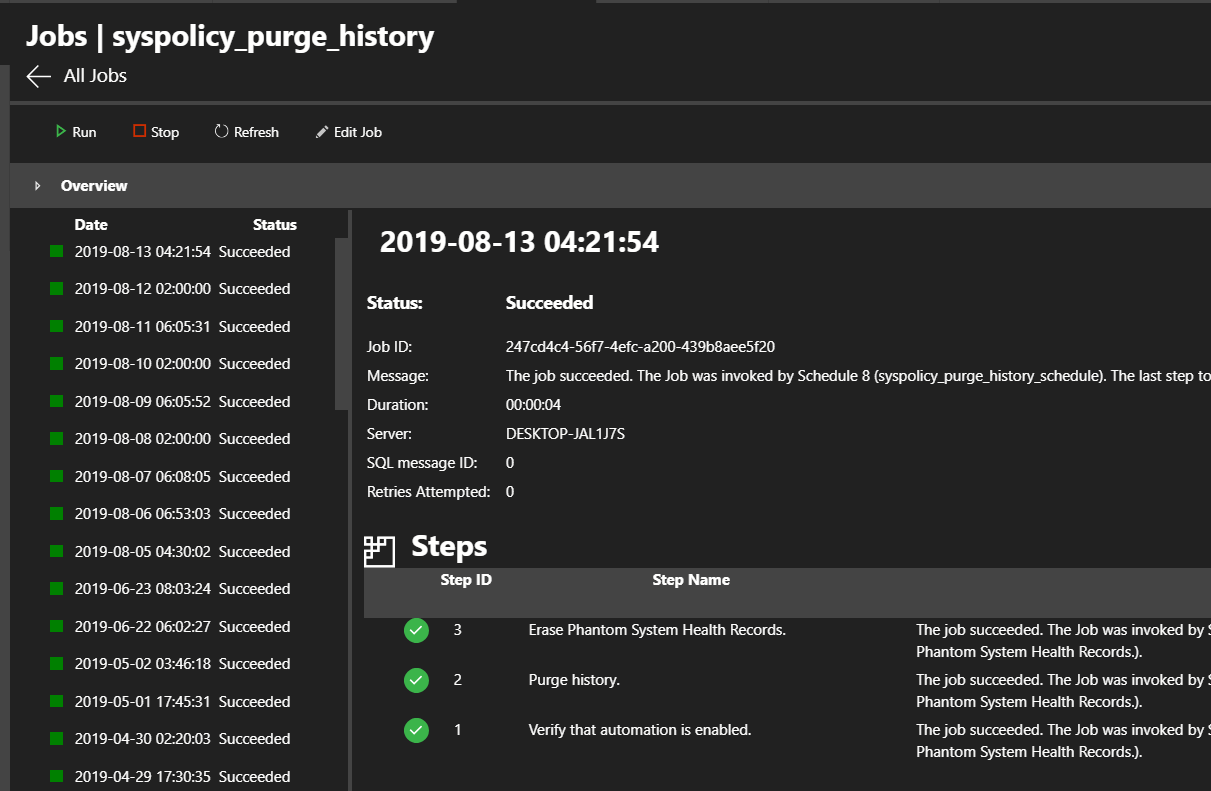
As you can see above, you can sort by any column you would like and it also displays information about the failure if the last execution was a failure. In addition to sorting, when you click the down arrow in the column header, you will also have an option to filter the column, similar to Excel. In the red box above is something that is pretty cool. Each bar represents one of the last five job executions. If you click on the of bars, you will be taken to the details of that execution. The image below is an example of what you will see.
When looking at the jobs you will see the button we can use to create a new job. When creating a new job, all the same information is requested so it is pretty easy to figure out.
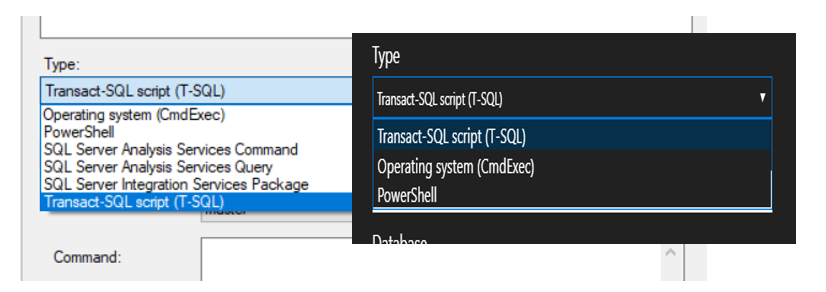
There are a few differences though when creating a new job in Azure Data Studio. Starting with job step type. When working in Azure Data Studio you don’t have the three BI stack related types. The image below shows the job step types for both SQL Server Management Studio on the left and Azure Data Studio on the right.
Another difference is the creation of new job schedules. This can be done using SSMS, but can not be done with Azure Data Studio. You can get use existing shared schedules, just can’t create new ones.
Moving away from jobs, alerts can also be created and modified utilizing Azure Data Studio. All the same information can be entered, however there is one difference. When creating an alert you are asked to chose an alert type. When using SSMS you will have three options:
-
-
- SQL Server Event alert
- SQL Server Performance condition alert
- WMI event alert
-
When using Azure Data Studio, you only have one option, SQL Server Event alert.
While there are a few limitations, Azure Data Studio is still a very good tool. The few limitations in Azure Data Studio for Agent job management can easily be over come simply by using SQL Server Management Studio.
Thanks for visiting my blog!!