Many of us have restored productions databases. Of course no one wants to do it, but we all acknowledge that there are times in which that is exactly what we need to do, restore a database. Have you ever wondered what steps SQL Server actually goes through to complete the restore? Extended Events offers an event that will allow us to see inside the restore process.
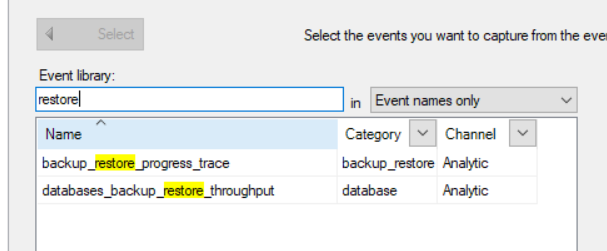
When I did a search of what events are available for restore operations, I found two, backup_restore_progress_trace and databases_backup_restore_throughput. Backup_restore_progress_trace will be the focus of this post.
Backup_restore_progress_trace does exactly what you might think it would do, documents the internal steps of the restore process.
Below are all the steps that Backup_restore_progress_trace picked up during a restore of a very small database. These are also in the order in which the steps took place. These steps are for a restore to a database that does not exist yet.
RESTORE DATABASE started
Opening the backup set
Processing the leading metadata
Planning begins
Effective options: Checksum=0, Compression=0, Encryption=0, BufferCount=6, MaxTransferSize=64 KB
Planning is complete
Beginning OFFLINE restore
Attached database as DB_ID=5
Preparing containers
Containers are ready
Restoring the backup set
Estimated total size to transfer = 2838528 bytes
Transferring data
FileHandleCache: Initial CacheSize: 48
BackupStream(0): Processing MSDA of size 43 extents
6 percent (196608/2838528 bytes) processed
11 percent (327680/2838528 bytes) processed
16 percent (458752/2838528 bytes) processed
20 percent (589824/2838528 bytes) processed
25 percent (720896/2838528 bytes) processed
30 percent (851968/2838528 bytes) processed
36 percent (1048576/2838528 bytes) processed
41 percent (1179648/2838528 bytes) processed
46 percent (1310720/2838528 bytes) processed
50 percent (1441792/2838528 bytes) processed
55 percent (1572864/2838528 bytes) processed
60 percent (1703936/2838528 bytes) processed
66 percent (1900544/2838528 bytes) processed
71 percent (2031616/2838528 bytes) processed
76 percent (2162688/2838528 bytes) processed
80 percent (2293760/2838528 bytes) processed
85 percent (2424832/2838528 bytes) processed
90 percent (2555904/2838528 bytes) processed
96 percent (2752512/2838528 bytes) processed
BackupStream(0): Completed MSDA
Waiting for log zeroing to complete
Log zeroing is complete
BackupStream(0): Processing MSTL (FID=2, VLFID=36, size=65536 bytes)
100 percent (2838528/2838528 bytes) processed
Data transfer is complete
Backup set is restored
Offline roll-forward begins
Processing 8 VLF headers
Processing VLF headers is complete
First LSN: 36:4232:37, Last LSN: 36:4272:1
Stop LSN: 36:4272:1
Offline roll-forward is complete
Database fixup is complete
Transitioning database to ONLINE
Restarting database for ONLINE
PostRestoreContainerFixups begins
PostRestoreContainerFixups is complete
PostRestoreReplicationFixup begins
PostRestoreReplicationFixup is complete
Database is restarted
Resuming any halted Fulltext crawls
Writing history records
Writing history records is complete (elapsed = 58 ms)
MSDB maintenance is complete
RESTORE DATABASE finished
Many these steps are pretty straight forward. They can also easily group the steps into phases.
The first few steps are simply to prepare for the restore. Once SQL Server is done preparing, it then starts the restore. You can see there are a number of steps in this process, including the assigning of a database ID. Then you can see the increments in percent of where the restore stands. Once the restore is complete, SQL Server moves on to the steps in which SQL Server a rolls forward transactions, brings the database online and starts the database. After this, SQL Server the writes the history into the MSDB system tables.
While these steps are for a new database, many of the same steps will take place for the restore of an existing database. The most noticeable additions to the steps are the acquiring of database locks. As you can see below, these are Exclusive locks.
Acquiring X lock on the database
Acquired X lock on the database
SQL Server will spend varied amounts of time on each step. As expected, the most time is spent on the actual transfer of data to the restored database. Below you will see a table with two columns, timestamp for each and the step name for the restored I completed for this test. While this process only took a few seconds, a larger database would obviously take much more time.
| Time Stamp At Start of Step |
Operation |
| 00:11:38.457 |
RESTORE DATABASE started |
| 00:11:38.457 |
Opening the backup set |
| 00:11:38.473 |
Processing the leading metadata |
| 00:11:38.473 |
Planning begins |
| 00:11:38.490 |
Effective options: Checksum=0,
Compression=0, Encryption=0, BufferCount=6, MaxTransferSize=64 KB |
| 00:11:38.490 |
Planning is complete |
| 00:11:38.490 |
Beginning OFFLINE restore |
| 00:11:38.490 |
Attached database as DB_ID=5 |
| 00:11:38.490 |
Preparing containers |
| 00:11:38.577 |
Containers are ready |
| 00:11:38.640 |
Restoring the backup set |
| 00:11:38.640 |
Estimated total size
to transfer = 2838528 bytes |
| 00:11:38.640 |
Transferring data |
| 00:11:38.640 |
FileHandleCache: Initial CacheSize: 48 |
| 00:11:38.640 |
BackupStream(0): Processing
MSDA of size 43 extents |
| 00:11:38.653 |
6 percent (196608/2838528 bytes) processed |
| 00:11:38.657 |
11 percent (327680/2838528 bytes) processed |
| 00:11:38.660 |
16 percent (458752/2838528 bytes) processed |
| 00:11:38.667 |
20 percent (589824/2838528 bytes) processed |
| 00:11:38.687 |
25 percent (720896/2838528 bytes) processed |
| 00:11:38.687 |
30 percent (851968/2838528 bytes) processed |
| 00:11:38.700 |
36 percent (1048576/2838528 bytes) processed |
| 00:11:38.713 |
41 percent (1179648/2838528 bytes) processed |
| 00:11:38.713 |
46 percent (1310720/2838528 bytes) processed |
| 00:11:38.713 |
50 percent (1441792/2838528 bytes) processed |
| 00:11:38.740 |
55 percent (1572864/2838528 bytes) processed |
| 00:11:38.740 |
60 percent (1703936/2838528 bytes) processed |
| 00:11:38.763 |
66 percent (1900544/2838528 bytes) processed |
| 00:11:38.763 |
71 percent (2031616/2838528 bytes) processed |
| 00:11:38.763 |
76 percent (2162688/2838528 bytes) processed |
| 00:11:38.790 |
80 percent (2293760/2838528 bytes) processed |
| 00:11:38.790 |
85 percent (2424832/2838528 bytes) processed |
| 00:11:38.797 |
90 percent (2555904/2838528 bytes) processed |
| 00:11:38.817 |
96 percent (2752512/2838528 bytes) processed |
| 00:11:38.837 |
BackupStream(0): Completed MSDA |
| 00:11:38.840 |
Waiting for log zeroing to complete |
| 00:11:38.877 |
Log zeroing is complete |
| 00:11:38.877 |
BackupStream(0): Processing MSTL (FID=2, VLFID=36, size=65536 bytes) |
| 00:11:38.880 |
100 percent (2838528/2838528 bytes) processed |
| 00:11:38.897 |
Data transfer is complete |
| 00:11:38.910 |
Backup set is restored |
| 00:11:38.957 |
Offline roll-forward begins |
| 00:11:38.957 |
Processing 8 VLF headers |
| 00:11:38.960 |
Processing VLF headers is complete |
| 00:11:38.963 |
First LSN: 36:4232:37, Last LSN: 36:4272:1 |
| 00:11:38.963 |
Stop LSN: 36:4272:1 |
| 00:11:38.967 |
Offline roll-forward is complete |
| 00:11:38.990 |
Database fixup is complete |
| 00:11:38.993 |
Transitioning database to ONLINE |
| 00:11:38.993 |
Restarting database for ONLINE |
| 00:11:39.093 |
PostRestoreContainerFixups begins |
| 00:11:39.097 |
PostRestoreContainerFixups is complete |
| 00:11:39.100 |
PostRestoreReplicationFixup begins |
| 00:11:39.267 |
PostRestoreReplicationFixup is complete |
| 00:11:39.277 |
Database is restarted |
| 00:11:39.297 |
Resuming any halted Fulltext crawls |
| 00:11:39.307 |
Writing history records |
| 00:11:39.367 |
Writing history records
is complete (elapsed = 58 ms) |
| 00:11:39.367 |
MSDB maintenance is complete |
| 00:11:39.370 |
RESTORE DATABASE finished |
Hidden within the steps are some very useful tidbits of information.
-
- Database ID
- Number of Extents
- Number of bytes restored
- Beginning and Ending LSN for the roll forward
- Total time to write history records
While the very small test database took about 60 steps to complete, I was wondering what if the database was bigger. Using the AdventureWork2014 database, I completed a restore and there were many more steps, a total of 114 steps. Below are the steps in order.
backup_restore_progress_trace 2019-06-18 11:17:01.5974587 +00:00 BACKUP LOG started
backup_restore_progress_trace 2019-06-18 11:17:01.5975148 +00:00 Acquiring U lock on the database
backup_restore_progress_trace 2019-06-18 11:17:01.5975471 +00:00 Synchronizing with other operations on the database is complete
backup_restore_progress_trace 2019-06-18 11:17:01.5988528 +00:00 Halting Fulltext crawls
backup_restore_progress_trace 2019-06-18 11:17:01.5994759 +00:00 Acquiring X lock on the database
backup_restore_progress_trace 2019-06-18 11:17:01.5995329 +00:00 Acquired X lock on the database
backup_restore_progress_trace 2019-06-18 11:17:01.6135276 +00:00 Writing a failover checkpoint
backup_restore_progress_trace 2019-06-18 11:17:01.6753875 +00:00 Failover checkpoint is complete
backup_restore_progress_trace 2019-06-18 11:17:01.6755993 +00:00 Failover FlushCache is complete
backup_restore_progress_trace 2019-06-18 11:17:01.6756137 +00:00 Opening the backup media set
backup_restore_progress_trace 2019-06-18 11:17:01.6801075 +00:00 The backup media set is open
backup_restore_progress_trace 2019-06-18 11:17:01.6801651 +00:00 Preparing the media set for writing
backup_restore_progress_trace 2019-06-18 11:17:01.6811968 +00:00 The media set is ready for backup
backup_restore_progress_trace 2019-06-18 11:17:01.6812025 +00:00 Effective options: Checksum=0, Compression=0, Encryption=0, BufferCount=7, MaxTransferSize=1024 KB
backup_restore_progress_trace 2019-06-18 11:17:01.6812297 +00:00 Start LSN: 500:27608:118, SERepl LSN: 0:0:0
backup_restore_progress_trace 2019-06-18 11:17:01.6812385 +00:00 First LSN: 630:28048:1
backup_restore_progress_trace 2019-06-18 11:17:01.6812477 +00:00 Estimated total size = 542920704 bytes (data size = 0 bytes, log size = 542920704 bytes)
backup_restore_progress_trace 2019-06-18 11:17:01.6812508 +00:00 Work estimation is complete
backup_restore_progress_trace 2019-06-18 11:17:01.6812559 +00:00 Last LSN: 663:7624:1
backup_restore_progress_trace 2019-06-18 11:17:01.6812606 +00:00 Scanning filestream data
backup_restore_progress_trace 2019-06-18 11:17:01.6819216 +00:00 Scanning filestream data is complete
backup_restore_progress_trace 2019-06-18 11:17:01.6819294 +00:00 Writing the leading metadata
backup_restore_progress_trace 2019-06-18 11:17:01.6819931 +00:00 BackupStream(0): Writing leading metadata to the device C:\Program Files\Microsoft SQL Server\MSSQL14.MSSQLSERVER\MSSQL\Backup\AdventureWorks2014_LogBackup_2019-06-18_06-16-59.bak
backup_restore_progress_trace 2019-06-18 11:17:01.6821581 +00:00 Copying filestream data
backup_restore_progress_trace 2019-06-18 11:17:01.6905789 +00:00 Copying filestream data is complete
backup_restore_progress_trace 2019-06-18 11:17:01.6905984 +00:00 Copying transaction log
backup_restore_progress_trace 2019-06-18 11:17:01.6907865 +00:00 MediaFamily(0): FID=2, VLFID=630, DataStreamSize=2424832 bytes
backup_restore_progress_trace 2019-06-18 11:17:01.7037592 +00:00 MediaFamily(0): FID=2, VLFID=631, DataStreamSize=16777216 bytes
backup_restore_progress_trace 2019-06-18 11:17:01.7704909 +00:00 MediaFamily(0): FID=2, VLFID=632, DataStreamSize=16777216 bytes
backup_restore_progress_trace 2019-06-18 11:17:01.8050246 +00:00 5 percent (27590656/542920704 bytes) processed
backup_restore_progress_trace 2019-06-18 11:17:01.8396719 +00:00 MediaFamily(0): FID=2, VLFID=633, DataStreamSize=16777216 bytes
backup_restore_progress_trace 2019-06-18 11:17:01.9147575 +00:00 MediaFamily(0): FID=2, VLFID=634, DataStreamSize=16777216 bytes
backup_restore_progress_trace 2019-06-18 11:17:01.9238444 +00:00 10 percent (54853632/542920704 bytes) processed
backup_restore_progress_trace 2019-06-18 11:17:01.9810017 +00:00 MediaFamily(0): FID=2, VLFID=635, DataStreamSize=16777216 bytes
backup_restore_progress_trace 2019-06-18 11:17:02.0323014 +00:00 15 percent (82116608/542920704 bytes) processed
backup_restore_progress_trace 2019-06-18 11:17:02.0498153 +00:00 MediaFamily(0): FID=2, VLFID=636, DataStreamSize=16777216 bytes
backup_restore_progress_trace 2019-06-18 11:17:02.1195952 +00:00 MediaFamily(0): FID=2, VLFID=637, DataStreamSize=16777216 bytes
backup_restore_progress_trace 2019-06-18 11:17:02.1464469 +00:00 20 percent (109379584/542920704 bytes) processed
backup_restore_progress_trace 2019-06-18 11:17:02.1877744 +00:00 MediaFamily(0): FID=2, VLFID=638, DataStreamSize=16777216 bytes
backup_restore_progress_trace 2019-06-18 11:17:02.2570845 +00:00 25 percent (136642560/542920704 bytes) processed
backup_restore_progress_trace 2019-06-18 11:17:02.2573724 +00:00 MediaFamily(0): FID=2, VLFID=639, DataStreamSize=16777216 bytes
backup_restore_progress_trace 2019-06-18 11:17:02.3263001 +00:00 MediaFamily(0): FID=2, VLFID=640, DataStreamSize=16777216 bytes
backup_restore_progress_trace 2019-06-18 11:17:02.3702739 +00:00 30 percent (163905536/542920704 bytes) processed
backup_restore_progress_trace 2019-06-18 11:17:02.3941585 +00:00 MediaFamily(0): FID=2, VLFID=641, DataStreamSize=16777216 bytes
backup_restore_progress_trace 2019-06-18 11:17:02.4635771 +00:00 MediaFamily(0): FID=2, VLFID=642, DataStreamSize=16777216 bytes
backup_restore_progress_trace 2019-06-18 11:17:02.4768947 +00:00 35 percent (190119936/542920704 bytes) processed
backup_restore_progress_trace 2019-06-18 11:17:02.5315044 +00:00 MediaFamily(0): FID=2, VLFID=643, DataStreamSize=16777216 bytes
backup_restore_progress_trace 2019-06-18 11:17:02.5872516 +00:00 40 percent (217382912/542920704 bytes) processed
backup_restore_progress_trace 2019-06-18 11:17:02.6020868 +00:00 MediaFamily(0): FID=2, VLFID=644, DataStreamSize=16777216 bytes
backup_restore_progress_trace 2019-06-18 11:17:02.6732336 +00:00 MediaFamily(0): FID=2, VLFID=645, DataStreamSize=16777216 bytes
backup_restore_progress_trace 2019-06-18 11:17:02.7043113 +00:00 45 percent (244645888/542920704 bytes) processed
backup_restore_progress_trace 2019-06-18 11:17:02.7416025 +00:00 MediaFamily(0): FID=2, VLFID=646, DataStreamSize=16777216 bytes
backup_restore_progress_trace 2019-06-18 11:17:02.8128799 +00:00 MediaFamily(0): FID=2, VLFID=647, DataStreamSize=16777216 bytes
backup_restore_progress_trace 2019-06-18 11:17:02.8199368 +00:00 50 percent (271908864/542920704 bytes) processed
backup_restore_progress_trace 2019-06-18 11:17:02.8834042 +00:00 MediaFamily(0): FID=2, VLFID=648, DataStreamSize=16777216 bytes
backup_restore_progress_trace 2019-06-18 11:17:02.9338510 +00:00 55 percent (299171840/542920704 bytes) processed
backup_restore_progress_trace 2019-06-18 11:17:02.9552501 +00:00 MediaFamily(0): FID=2, VLFID=649, DataStreamSize=16777216 bytes
backup_restore_progress_trace 2019-06-18 11:17:03.0292680 +00:00 MediaFamily(0): FID=2, VLFID=650, DataStreamSize=16777216 bytes
backup_restore_progress_trace 2019-06-18 11:17:03.0524488 +00:00 60 percent (326434816/542920704 bytes) processed
backup_restore_progress_trace 2019-06-18 11:17:03.0999388 +00:00 MediaFamily(0): FID=2, VLFID=651, DataStreamSize=16777216 bytes
backup_restore_progress_trace 2019-06-18 11:17:03.1645396 +00:00 65 percent (353697792/542920704 bytes) processed
backup_restore_progress_trace 2019-06-18 11:17:03.1683370 +00:00 MediaFamily(0): FID=2, VLFID=652, DataStreamSize=16777216 bytes
backup_restore_progress_trace 2019-06-18 11:17:03.2374707 +00:00 MediaFamily(0): FID=2, VLFID=653, DataStreamSize=16777216 bytes
backup_restore_progress_trace 2019-06-18 11:17:03.2742992 +00:00 70 percent (380960768/542920704 bytes) processed
backup_restore_progress_trace 2019-06-18 11:17:03.3044229 +00:00 MediaFamily(0): FID=2, VLFID=654, DataStreamSize=16777216 bytes
backup_restore_progress_trace 2019-06-18 11:17:03.3723517 +00:00 MediaFamily(0): FID=2, VLFID=655, DataStreamSize=16777216 bytes
backup_restore_progress_trace 2019-06-18 11:17:03.4062676 +00:00 75 percent (408223744/542920704 bytes) processed
backup_restore_progress_trace 2019-06-18 11:17:03.4598903 +00:00 MediaFamily(0): FID=2, VLFID=656, DataStreamSize=16777216 bytes
backup_restore_progress_trace 2019-06-18 11:17:03.5105134 +00:00 80 percent (434438144/542920704 bytes) processed
backup_restore_progress_trace 2019-06-18 11:17:03.5290138 +00:00 MediaFamily(0): FID=2, VLFID=657, DataStreamSize=16777216 bytes
backup_restore_progress_trace 2019-06-18 11:17:03.6010196 +00:00 MediaFamily(0): FID=2, VLFID=658, DataStreamSize=16777216 bytes
backup_restore_progress_trace 2019-06-18 11:17:03.6293332 +00:00 85 percent (461701120/542920704 bytes) processed
backup_restore_progress_trace 2019-06-18 11:17:03.6878991 +00:00 MediaFamily(0): FID=2, VLFID=659, DataStreamSize=16777216 bytes
backup_restore_progress_trace 2019-06-18 11:17:03.7633069 +00:00 90 percent (488964096/542920704 bytes) processed
backup_restore_progress_trace 2019-06-18 11:17:03.7636287 +00:00 MediaFamily(0): FID=2, VLFID=660, DataStreamSize=16777216 bytes
backup_restore_progress_trace 2019-06-18 11:17:03.8362761 +00:00 MediaFamily(0): FID=2, VLFID=661, DataStreamSize=16777216 bytes
backup_restore_progress_trace 2019-06-18 11:17:03.8837162 +00:00 95 percent (516227072/542920704 bytes) processed
backup_restore_progress_trace 2019-06-18 11:17:03.9154381 +00:00 MediaFamily(0): FID=2, VLFID=662, DataStreamSize=16777216 bytes
backup_restore_progress_trace 2019-06-18 11:17:03.9883764 +00:00 MediaFamily(0): FID=2, VLFID=663, DataStreamSize=3932160 bytes
backup_restore_progress_trace 2019-06-18 11:17:04.0073959 +00:00 100 percent (542920704/542920704 bytes) processed
backup_restore_progress_trace 2019-06-18 11:17:04.0187093 +00:00 Copying transaction log is complete
backup_restore_progress_trace 2019-06-18 11:17:04.0187231 +00:00 Writing the trailing metadata
backup_restore_progress_trace 2019-06-18 11:17:04.0188013 +00:00 BackupStream(0): Writing trailing metadata to the device C:\Program Files\Microsoft SQL Server\MSSQL14.MSSQLSERVER\MSSQL\Backup\AdventureWorks2014_LogBackup_2019-06-18_06-16-59.bak
backup_restore_progress_trace 2019-06-18 11:17:04.0188753 +00:00 Writing the end of backup set
backup_restore_progress_trace 2019-06-18 11:17:05.1136445 +00:00 Resuming any halted Fulltext crawls
backup_restore_progress_trace 2019-06-18 11:17:05.1145570 +00:00 Writing history records
backup_restore_progress_trace 2019-06-18 11:17:05.1570406 +00:00 Writing history records is complete (elapsed = 43 ms)
backup_restore_progress_trace 2019-06-18 11:17:05.1571172 +00:00 BACKUP LOG finished
backup_restore_progress_trace 2019-06-18 11:17:05.1846587 +00:00 Acquiring U lock on the database
backup_restore_progress_trace 2019-06-18 11:17:05.1846855 +00:00 RESTORE DATABASE started
backup_restore_progress_trace 2019-06-18 11:17:05.1846983 +00:00 Acquiring X lock on the database
backup_restore_progress_trace 2019-06-18 11:17:05.1847096 +00:00 Acquired X lock on the database
backup_restore_progress_trace 2019-06-18 11:17:05.1848243 +00:00 Opening the backup set
backup_restore_progress_trace 2019-06-18 11:17:05.1929402 +00:00 Processing the leading metadata
backup_restore_progress_trace 2019-06-18 11:17:05.1941467 +00:00 Planning begins
backup_restore_progress_trace 2019-06-18 11:17:05.2423481 +00:00 Effective options: Checksum=0, Compression=0, Encryption=0, BufferCount=6, MaxTransferSize=1024 KB
backup_restore_progress_trace 2019-06-18 11:17:05.2423558 +00:00 Planning is complete
backup_restore_progress_trace 2019-06-18 11:17:05.2426545 +00:00 Beginning OFFLINE restore
backup_restore_progress_trace 2019-06-18 11:17:05.8613121 +00:00 Preparing containers
backup_restore_progress_trace 2019-06-18 11:17:05.9191974 +00:00 Preparing FileStream container: c:\data\imoltp_mod1
backup_restore_progress_trace 2019-06-18 11:17:06.1012537 +00:00 Prepared FileStream container: c:\data\imoltp_mod1
backup_restore_progress_trace 2019-06-18 11:17:06.1013026 +00:00 Containers are ready
backup_restore_progress_trace 2019-06-18 11:17:06.1842403 +00:00 Restoring the backup set
backup_restore_progress_trace 2019-06-18 11:17:06.1842624 +00:00 Estimated total size to transfer = 2909552640 bytes
backup_restore_progress_trace 2019-06-18 11:17:06.1855198 +00:00 Transferring data
backup_restore_progress_trace 2019-06-18 11:17:06.1856031 +00:00 FileHandleCache: Initial CacheSize: 48
backup_restore_progress_trace 2019-06-18 11:17:06.1883666 +00:00 BackupStream(0): Processing MSDA of size 8288 extents
backup_restore_progress_trace 2019-06-18 11:17:07.5410761 +00:00 5 percent (145752064/2909552640 bytes) processed
backup_restore_progress_trace 2019-06-18 11:17:08.9161089 +00:00 10 percent (291504128/2909552640 bytes) processed
backup_restore_progress_trace 2019-06-18 11:17:10.3224426 +00:00 15 percent (437256192/2909552640 bytes) processed
backup_restore_progress_trace 2019-06-18 11:17:11.4572357 +00:00 BackupStream(0): Completed MSDA
backup_restore_progress_trace 2019-06-18 11:17:11.4580438 +00:00 BackupStream(0): Processing PH6(filestream) data
backup_restore_progress_trace 2019-06-18 11:17:11.5794020 +00:00 BackupStream(0): Completed PH6(filestream) data
backup_restore_progress_trace 2019-06-18 11:17:11.5894867 +00:00 Waiting for log zeroing to complete
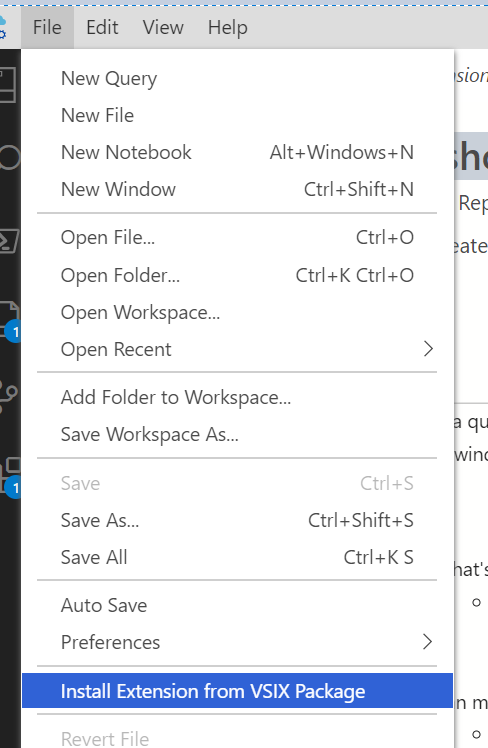
There are a lot more steps to a restore than I ever thought there would be. If you are interested, here is the code I used to create the Extended Event session. If you decide to use this, please make sure you change the name to something that works for you and change the path for the target files.
CREATE EVENT SESSION [RestoreDatabase] ON SERVER
ADD EVENT sqlserver.backup_restore_progress_trace(
ACTION(sqlos.worker_address,sqlserver.client_hostname,sqlserver.nt_username,sqlserver.sql_text))
ADD TARGET package0.event_file(SET filename=N‘RestoreDatabase’)
WITH (MAX_MEMORY=4096 KB,EVENT_RETENTION_MODE=ALLOW_SINGLE_EVENT_LOSS,MAX_DISPATCH_LATENCY=30 SECONDS,MAX_EVENT_SIZE=0 KB,MEMORY_PARTITION_MODE=NONE,TRACK_CAUSALITY=OFF,STARTUP_STATE=ON)
GO
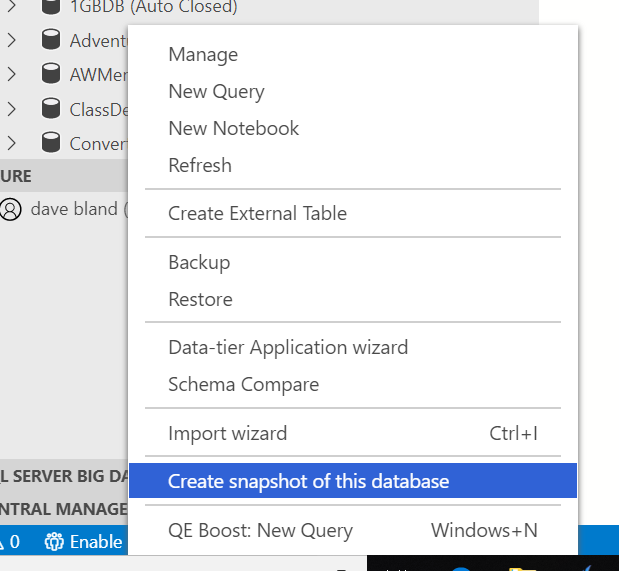
To read the data, you can utilize SSMS or use TSQL. If you use SSMS, once you right click on the target and view the data, you can then go to the Extended Events menu item and at the bottom, you will see an option to Export the data. With this, you can export the data to a table so you can then use TSQL to view the data.
Or you can use the code below. If you place the .xel file in a different location than the default, you will need to update the path to the files in the function, fn_xe_file_target_read_file.
SELECT event_data = convert(xml, event_data)
INTO #eeTable
FROM sys.fn_xe_file_target_read_file(N’RestoreDatabase*.xel’, null, null, null);
SELECT * FROM #eeTable
SELECT
ts = event_data.value(N'(event/@timestamp)[1]’, N’datetime’),
[StepDescription] = event_data.value(N'(event/date[@name=”trace_message”]/value)[1]’, N’nvarchar(max)’)
FROM #eeTable
ORDER BY ts
DROP TABLE #eeTable
Thanks for stopping by my blog!!!


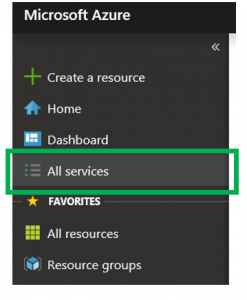
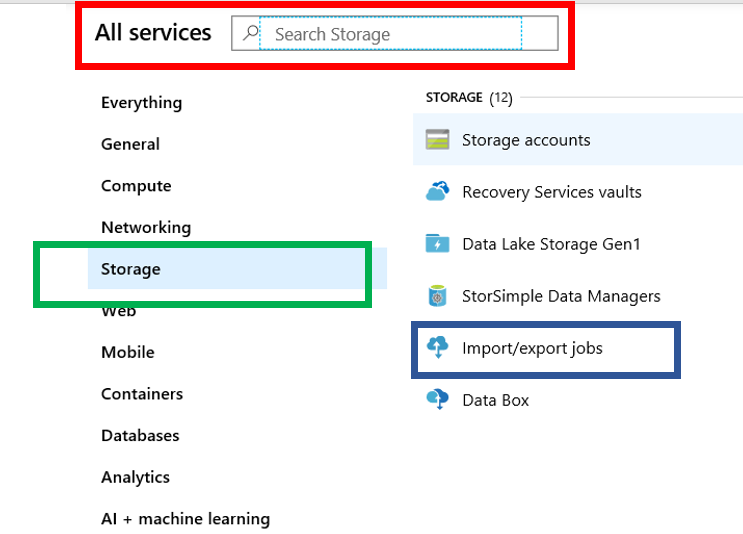
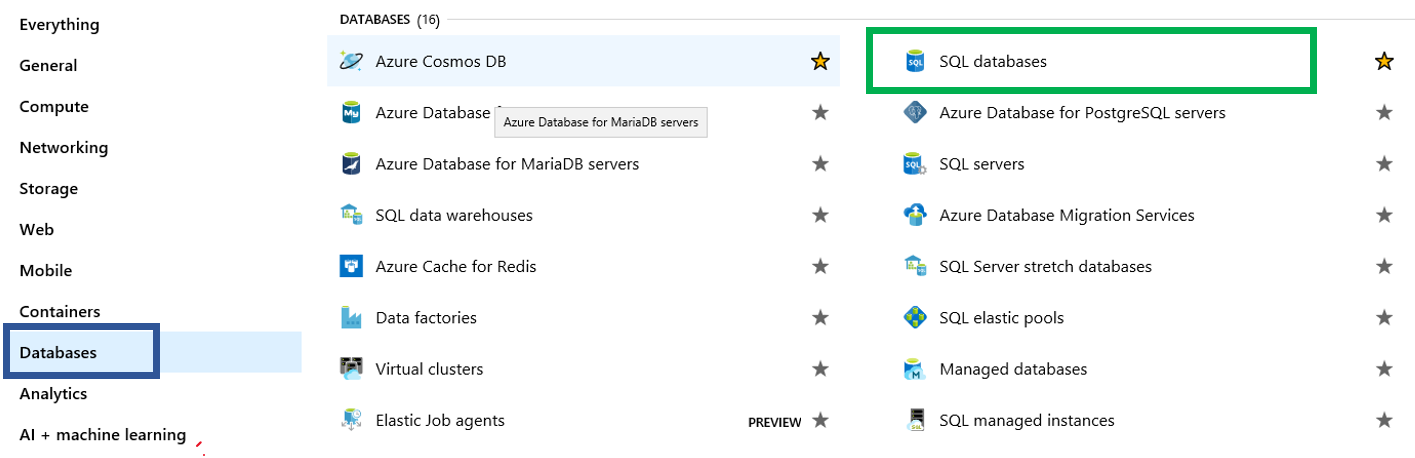
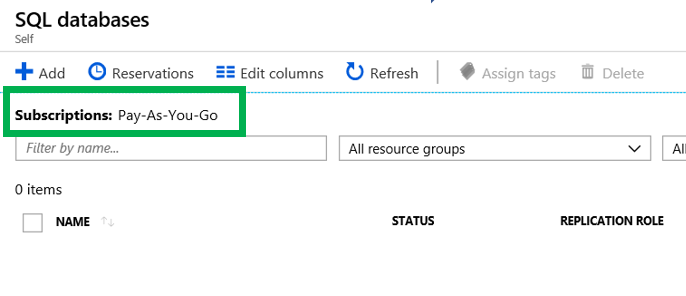
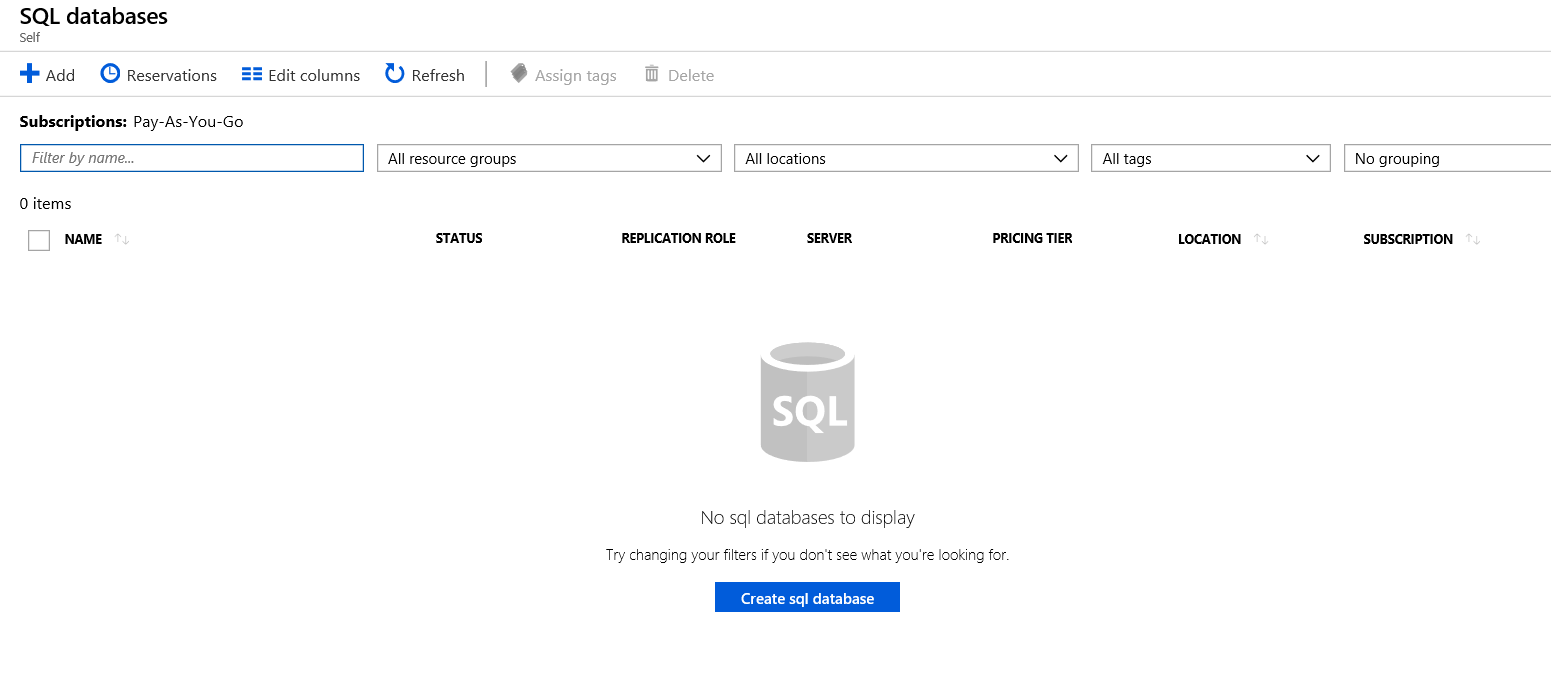 Before we move on, I would also like to point out that there are several methods to reach this page. Most notably is by using the menu item on the left. Then you will need to create the database, you can click the “SQL Databases” option. This will take you to the part of the portal that will allow you to create a database, as you see in the image above.
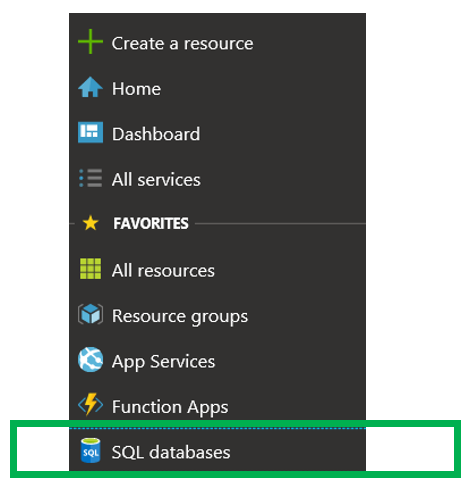
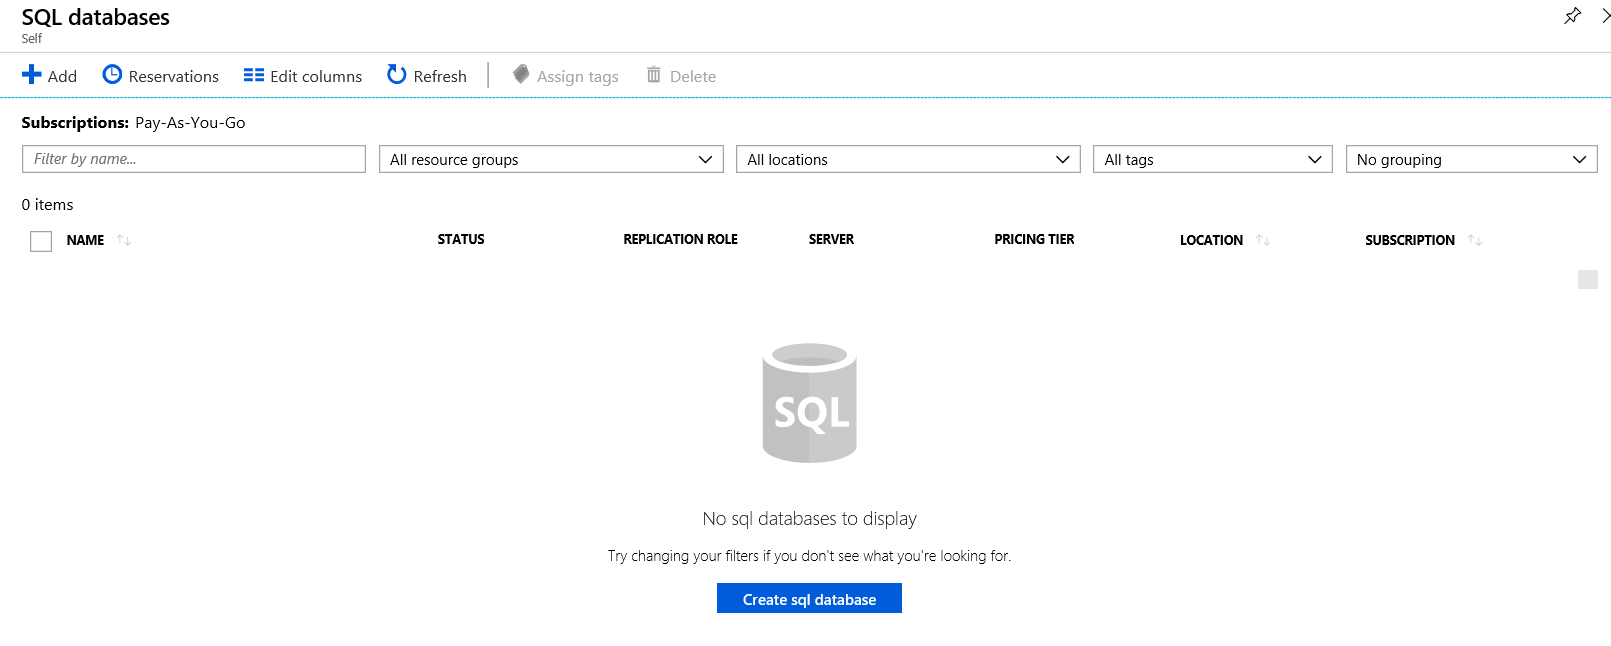
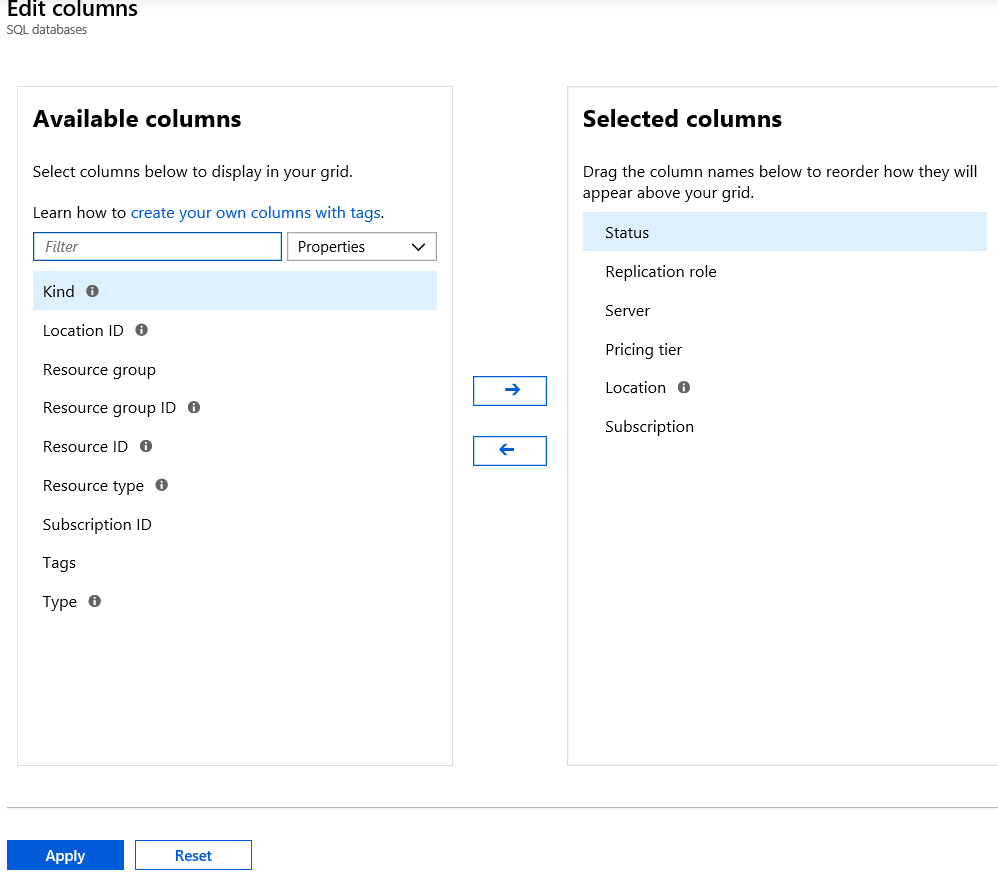
 You also have the ability to change the columns that you see in the list. You simple click “Edit Columns”. You can also click “Refresh” to see new items if they do not appear.
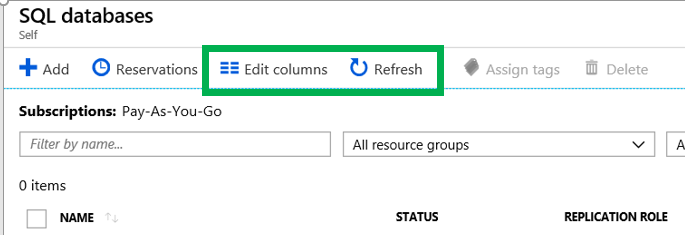

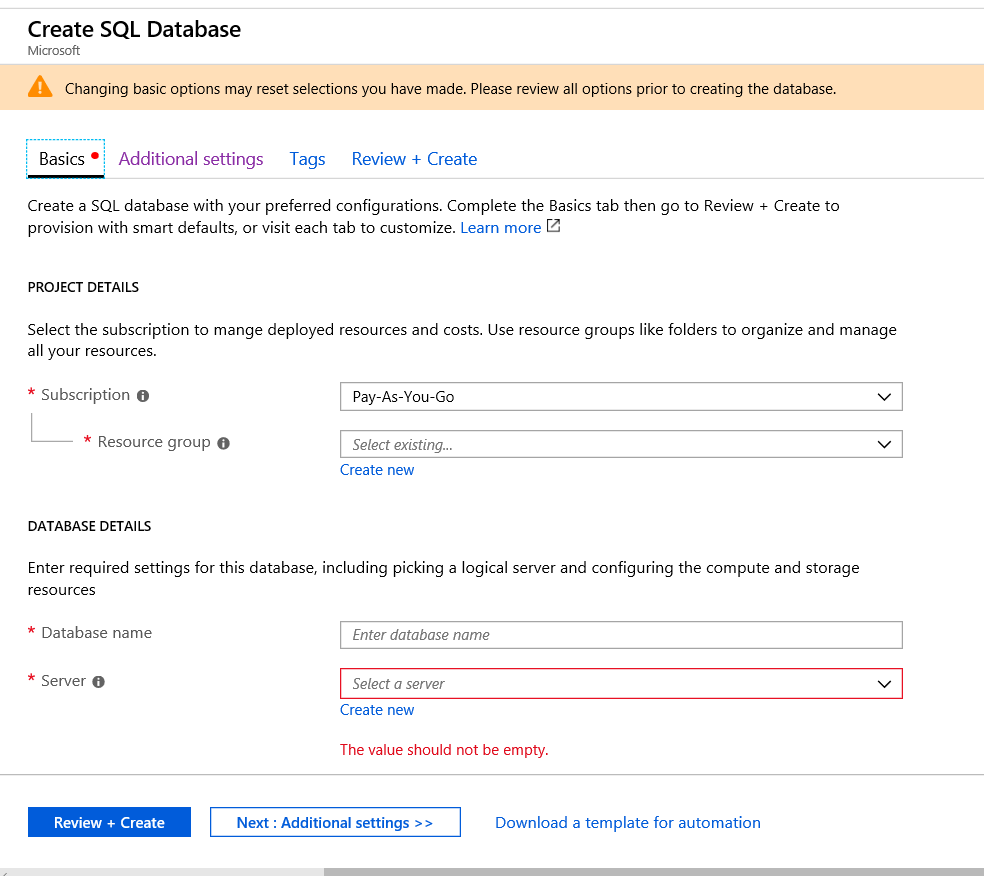
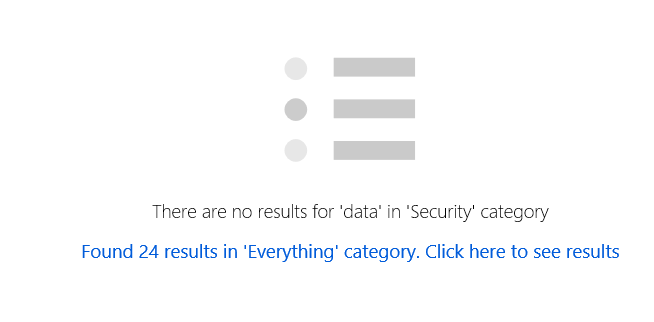
 If you violate one of the rules, Azure will tell you. Just as seen below.
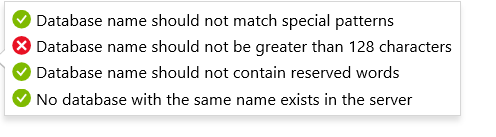 Now that we have provided a name for the database, the next step is to assign it to a server.
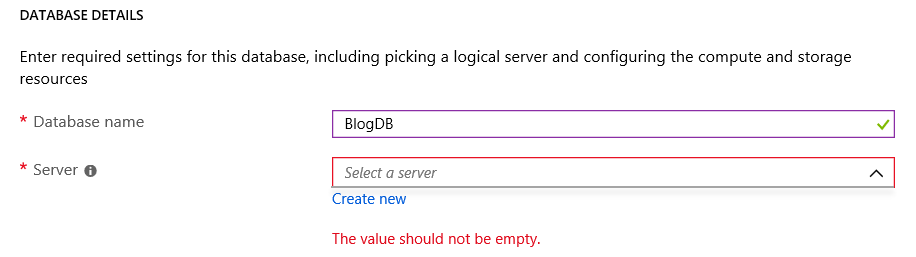 If you have not created a server yet, you can simply click the “Create New” link. A server for Azure SQL Database is a logical container for your SQL Databases and provides a centralized point for administration. Here is a link to Microsoft’s
 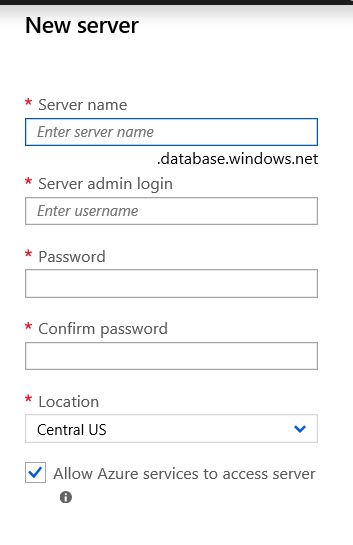 Once you have click the “Select” button and filled out all the information, it may look like you are done, but you are not. We need to provide additional information. By clicking on the “Additional Setting” item towards the bottom we will see the what else we need to provide.
 The first item we need to address is the Data Source. Here you have three options.
 The rest of the options are pretty straight forward, however should be carefully be reviewed before creating the database.
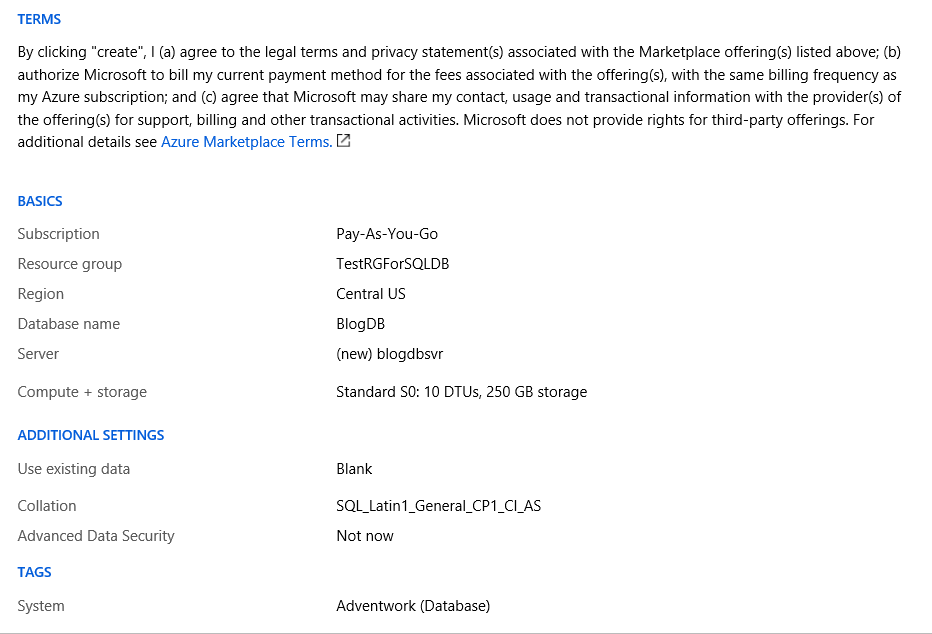
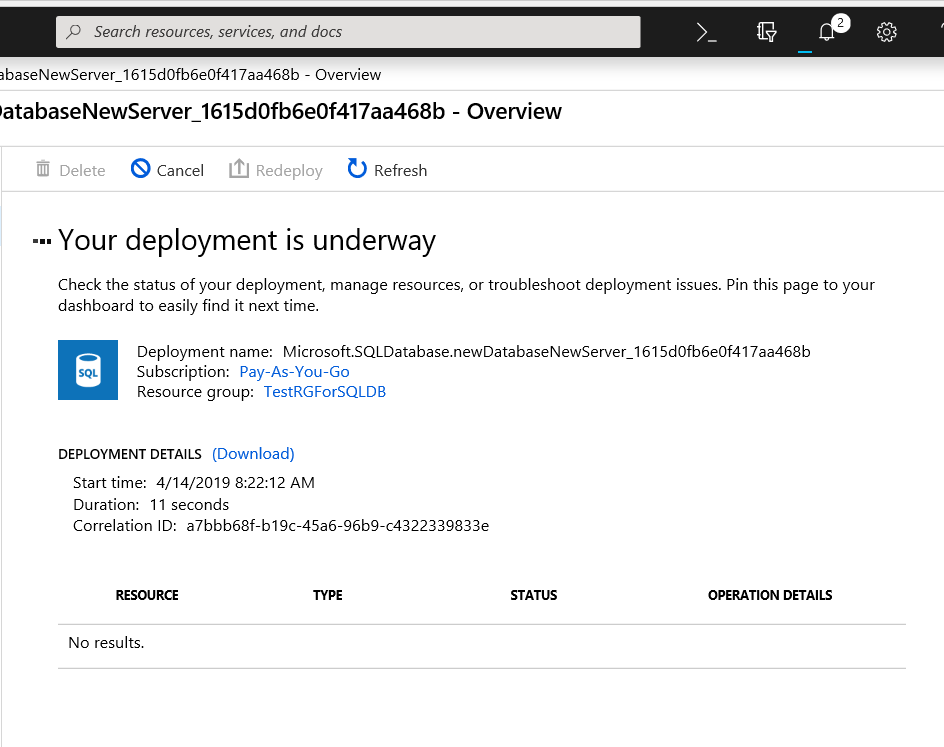 Once the deployment is complete, Azure will tell you as seen below.
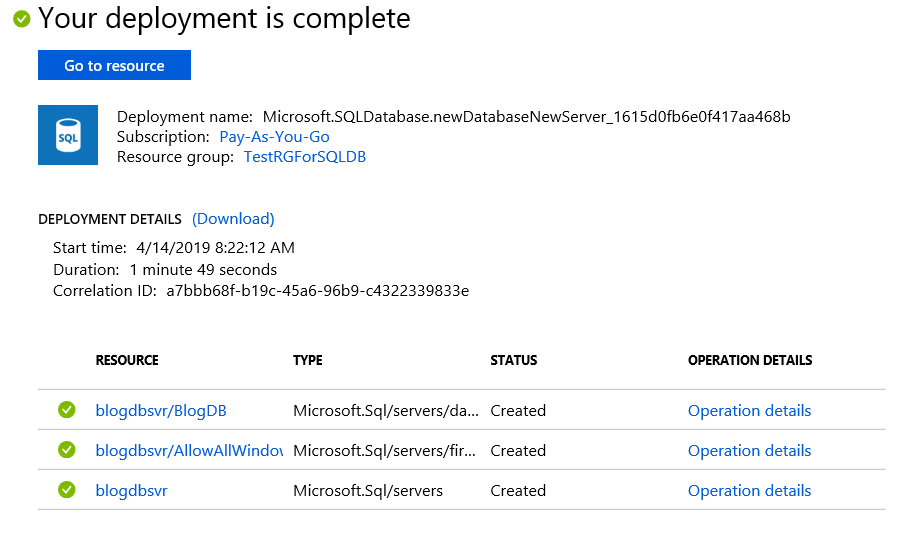
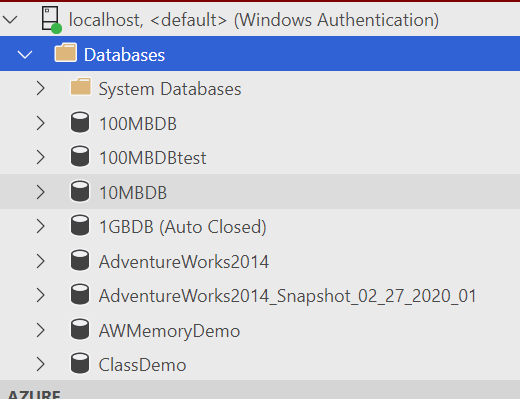
 Notice that our new database is listed.
 If you click the drop down arrow you will see this and the tags that was created. By clicking the box next to Adventwork, the list will only show items that have a tag of Adventwork.
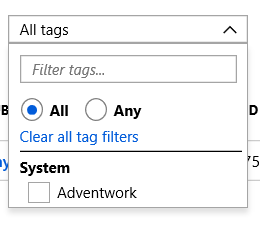 Connecting to the Database
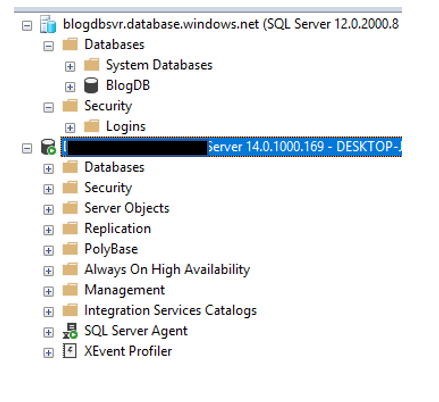
 Once on the clipboard, it is time to open SSMS. You will connect just as if you were connecting to an On-Prem SQL Server using SQL Authentication.
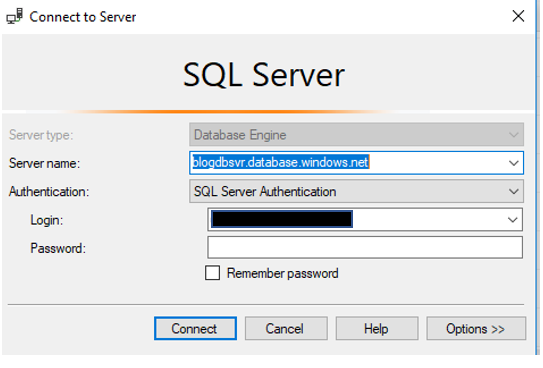 Once you enter a user name and password, you click Connect. This is where you will begin to see a few differences. You will be asked to login into your Azure account as well as a few screens about your IP address.
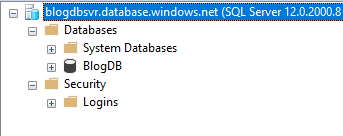
 Listing all the differences is outside the purpose of the post, however there is a lot of really good information available. I may cover some of these differences in future blog posts. Once you are in SSMS, you can do many of the same things you have done with an on-prem instance. Including creating objects, writing queries and working with security. Please keep in mind that there are some differences on how security is set up, however that is for another time.