When working with the Settings in Azure Data Studio, you have a few options on how you will see them. The two options available at this point are the “user interface” and “JSON”. While it is usually easier to modify the settings using the UI, you might prefer to use the json instead. I feel that anyone that uses Azure Data Studio on a regular basis should learn the basics of JSON.
These are my reasons why I think we should learn the basics of JSON.
-
-
- Some settings must be changed in JSON
- One of the export options for a result set is JSON
-
The first reason is where the focus of this post is. Many settings can easily be modified using the user interface, however not all can.
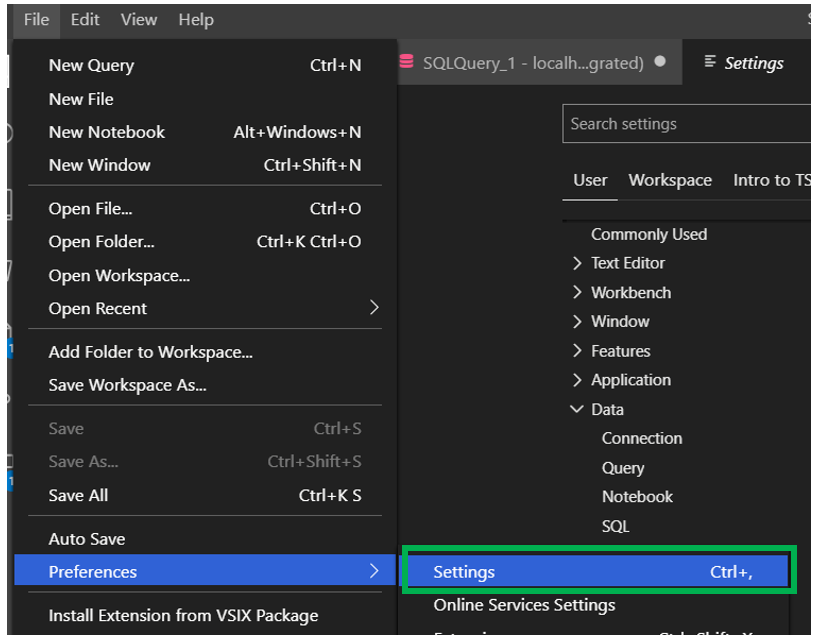
The settings can be found under the File menu or you can use the keyboard shortcut of “Ctrl + ,”. Under the File menu is you will find Preferences. It is in the pop out menu that the Setting menu item can be found.
Once in settings you will quickly see that there are many settings. Most of these you will not have a need to change, but it is good to know what can be changed. Once in the Settings, the user interface is quite easy to navigate around. You can even search for specific key words on the top.
As you scroll through the various settings you might notice that not all the options can be changed in the UI. Some must be changed using the JSON file.
The settings.json file can be found in this location.
C:\Users\<<UserProfileName>>\AppData\Roaming\azuredatastudio\User
Notice that “azuredatastudio” does not have any spaces. When you navigate to this location “C:\Users\<<UserProfileName>>\AppData\Roaming” you may see two folders, both named Azure Data Studio. One will have spaces, the other will not. The settings.json file is found in the folder without spaces in the name.

Now that we know the location of the settings.json file, let’s return to the editor. As mentioned earlier, the settings can be changed in two places, the editor UI and the JSON file.
This is what you will see if the setting can be modified in the UI. Depending on the setting, you may see a dropdown box, a text box or a check box.
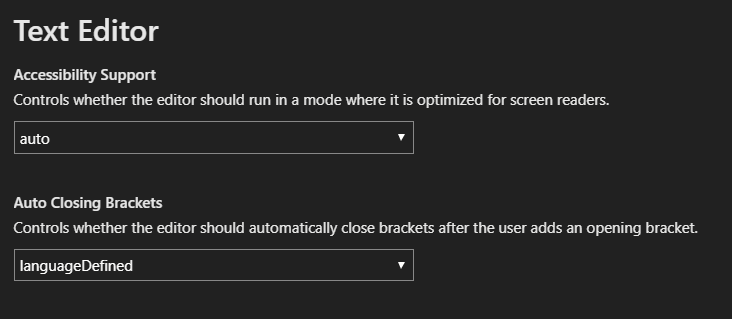
If you see something like what is in the green box below, the setting must be modified in using the settings.json file.

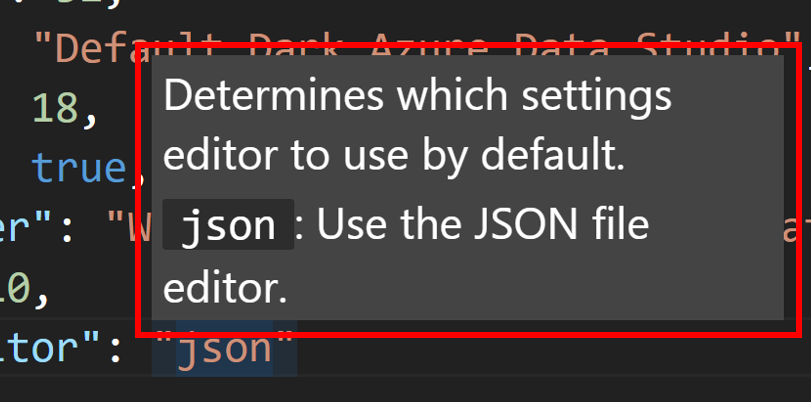
When using the UI, you have both options. However, there is an setting that will allow you to use only the settings.json file. This setting can be found in the Workbench group.
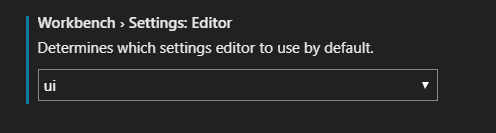
The dropdown box will have two options, ui and json. When set to json, the settings.json file will open when you attempt to look at the settings. Keep in mind, when you change this to json, you will not get a warning and it will be saved automatically by default.
With it set to json, as expected the settings.json file will open instead of the user interface.
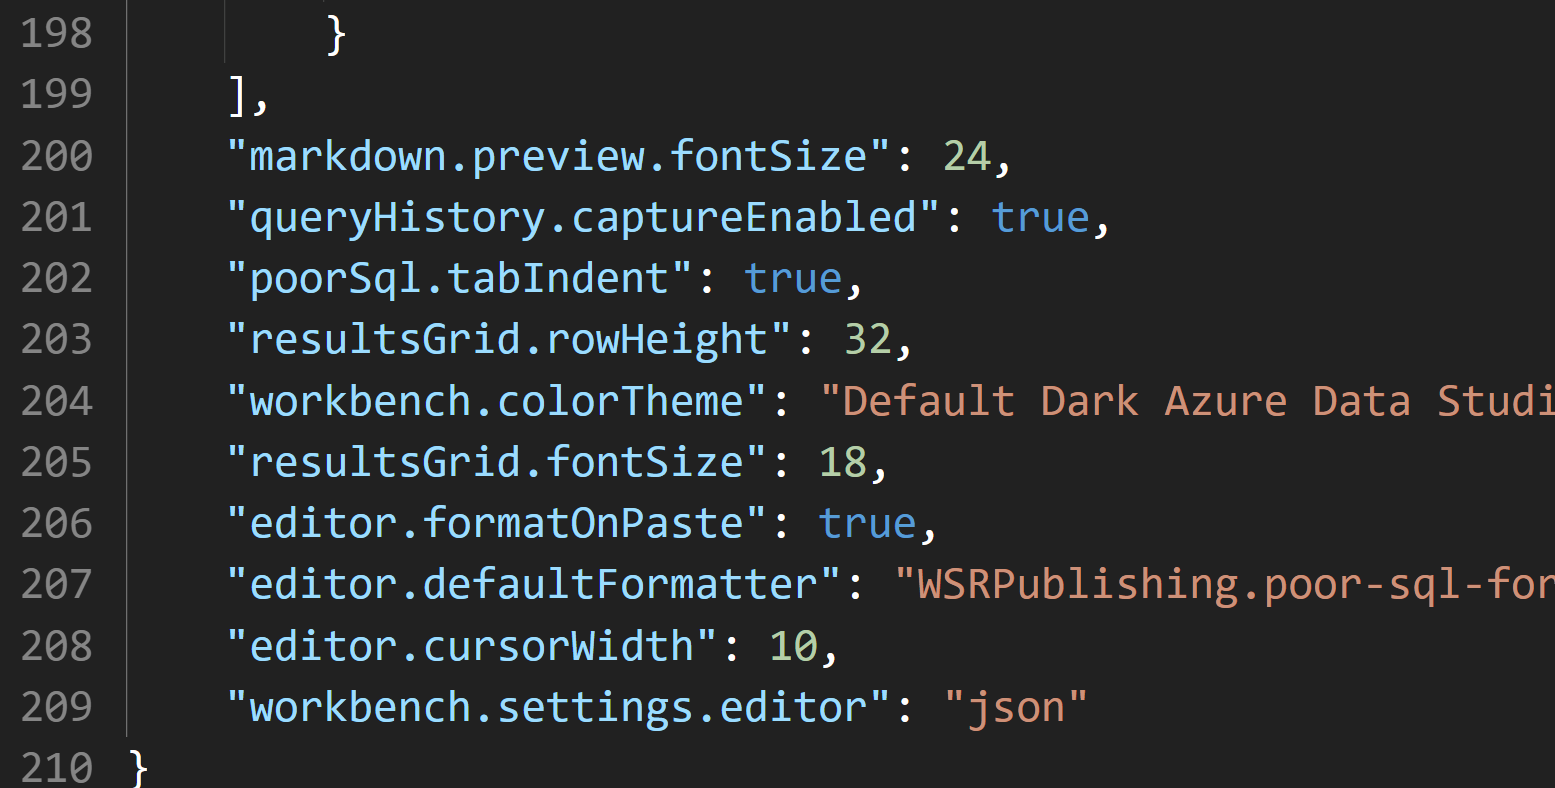
You might be asking, how can I change it back? This is quite simple. Look for the “workbench.settings.editor” setting and change it back to “ui”. Remember there are only two option, “ui” and “json”. Make sure to keep the quotes. As you can see in the above image, it is on line 209 on my instance, although will probably be different for your instance of ADS.
When in the json file, if you float your mouse pointer over one of the settings a pop up will appear that may provide a bit of information about the setting. Something like what is in the red box below.
While I prefer to use the ui, it is nice to have this option if I wanted to change.
If you are not using Azure Data Studio on a regular basis, my suggestion is to take a look at it. The price is right, it is free and has many great features.
Thanks for visiting my blog!!