In SSMS Options – Part 1, I went over several options, including the color theme, track changes, line number and how to get to the options screen. This post is a continuation of that post. We will cover a few more options that could be helpful to you when using SQL Server Management Studio.
This post will cover these options
- Select\Edit
- Surround object names with brackets
- Automatically populate Find What with text from the Editor
- Show Errors
SELECT\EDIT
If you right click on a table in the Object Explorer, you will see a number of options, as seen below. I would like to show how to use Options to change two of these, Select Top 1000 Rows and Edit Top 200 Rows.
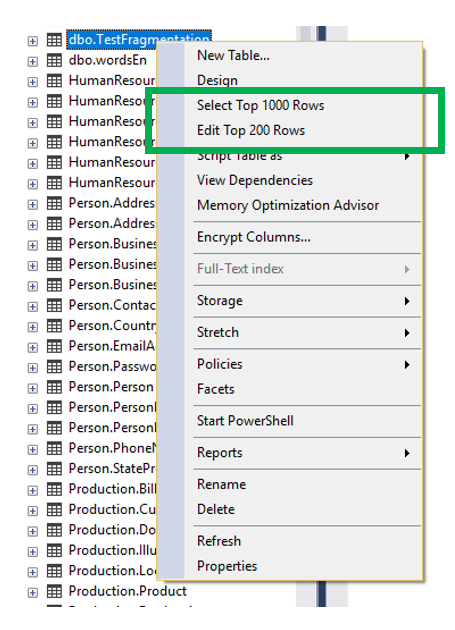
These two options do exactly as they say, Select and return rows that you can edit. Although, these options are here, I will still prefer and recommend that you write the DML statements needed instead.
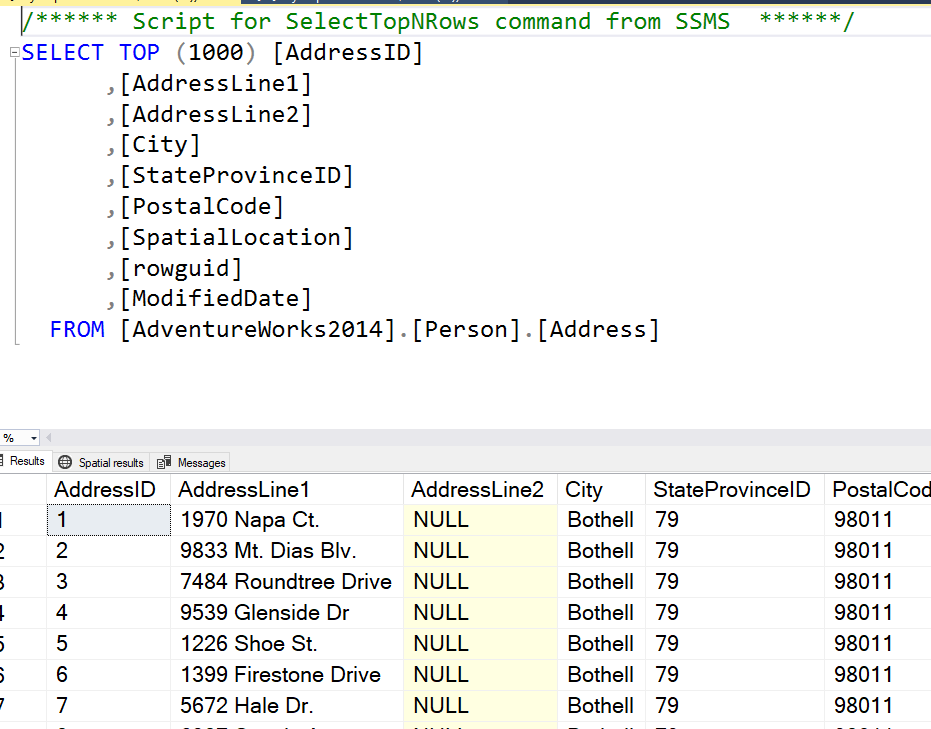
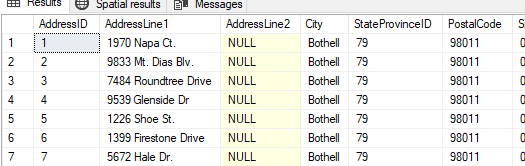
When you use the “Select” option you will see something similar to what is below. SSMS writes the DML statement for you and includes a comment at the top. The results will be returned to you in a grid format. However, it will return only the number of rows indicated. In this case, 1000 rows. You cannot edit these rows in SSMS without writing the proper DML statement.
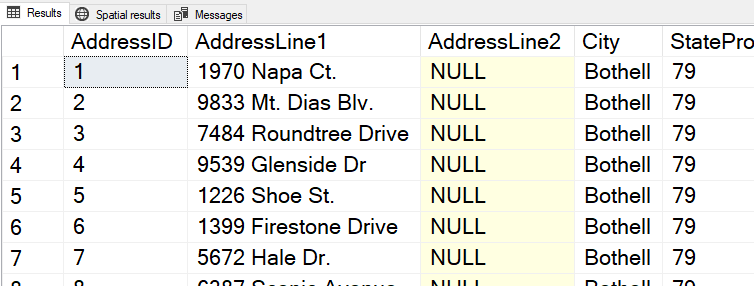
However, if you click the “Edit….” menu item you can edit the data in the grid by clicking in the cell you would like to edit. Although, as I stated before, I would recommend that you use the proper TSQL DML statement to complete data modifications. When you do this, you will see the grid below. You can now begin editing data.

When you do start editing you will see a small pencil just to the left of the first column. Once you move to another record or close the table, the record will be saved.

Again, I would recommend that you use the proper DML statements to modify your data. This looks like it might be a nice short cut…but I wouldn’t do it because the modification can fail.
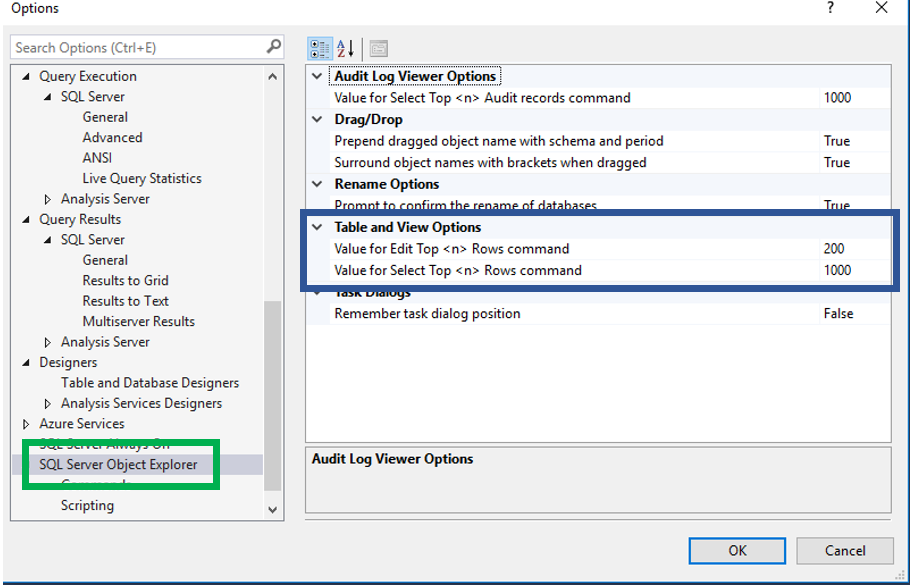
The question you may have is, how do I change these values? You will find the answer below. Change these to what you feel is appropriate. Notice that both state the TOP keyword, yet we cannot specify the column to do the order by.
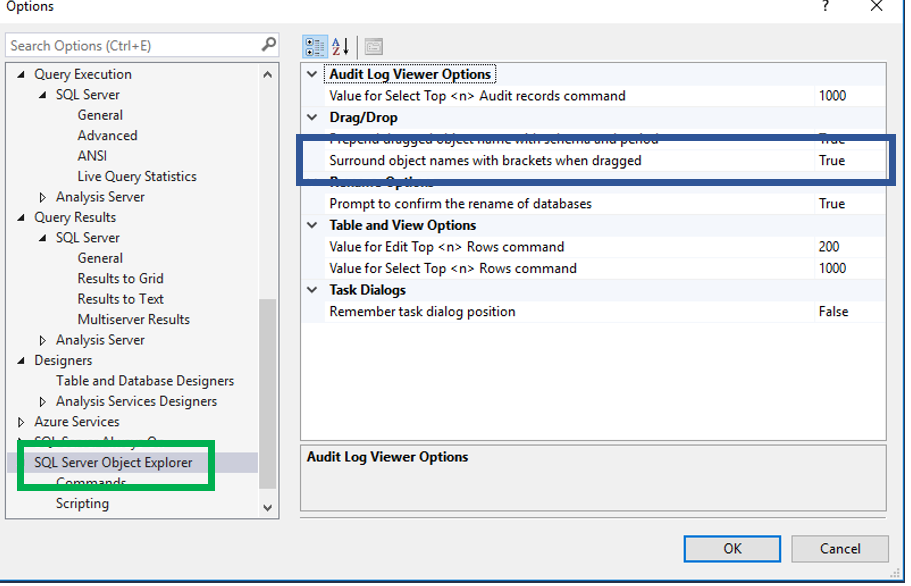
Surround object names with brackets……
As you may know, when you drag an object name or a column name from the Object Explorer to the query window, SSMS will drop the name. This setting will determine is SSMS place brackets around the name or not.
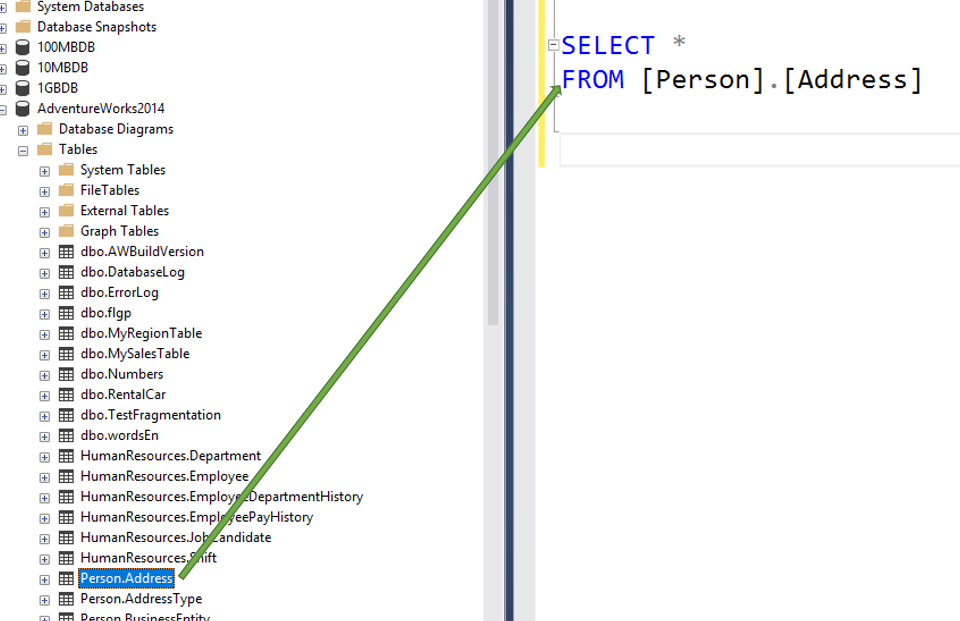
This option can be found, just above the two settings talked about earlier. The values can either be True or False.
As expected, the results are below.

Automatically populate Find What with text from the Editor
This setting actually can make our lives just a little bit easier. When this is turned on, SSMS will populate the Find What box with what is selected in the text editor. You can find this setting in the location below.
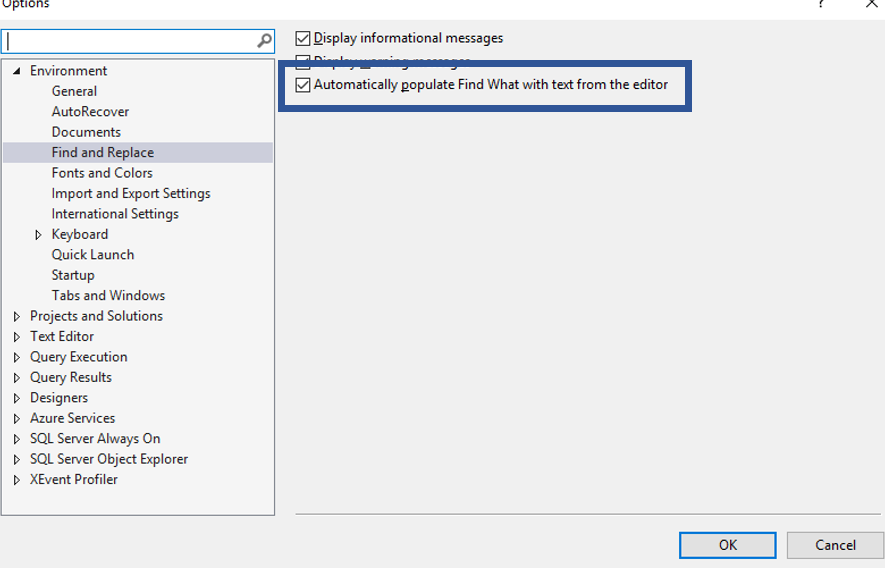
If you click “Find and Replace” under the Edit menu, the box highlighted below will appear. In the box will be what every you have selected in the text, as seen below.

Show Errors
This options can make it easier to locate the errors in your code. First of all, if can be found under “Text Editor”.
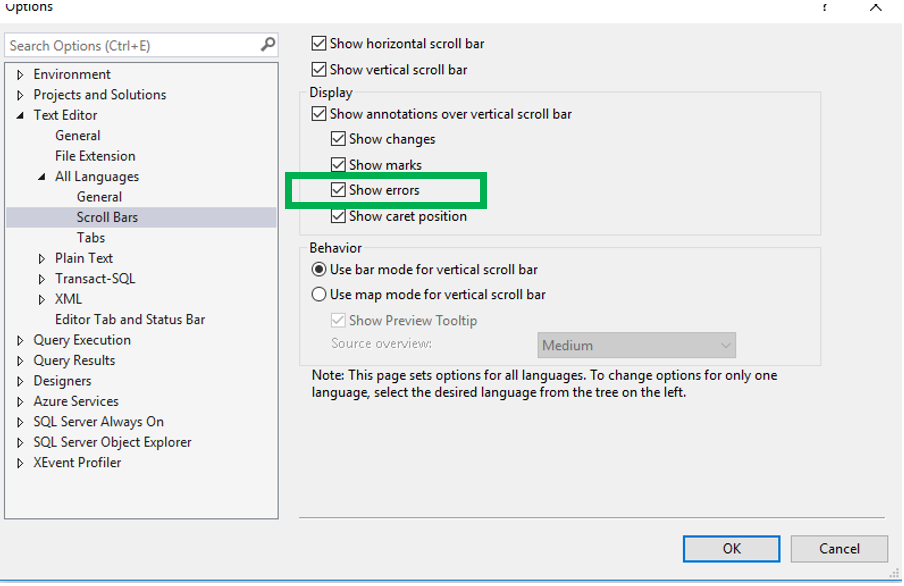
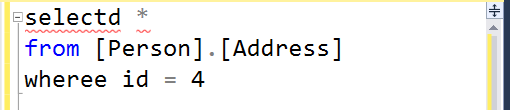
When this is enabled, you will see a red indicator near the right scroll bar when there is an error. Notice that it is actually on the line below the line that actually contains the error.
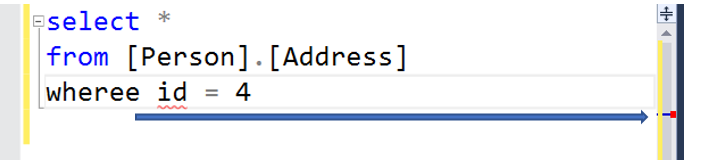
That is if there is one error. Well, what happens if there are two or more errors. The statement below contains two errors, if you notice, the error indicator is on the line below the first error.

When the Show Errors option is turned off, you will not see it, just like in the image below.
Thanks for stopping by my blog!
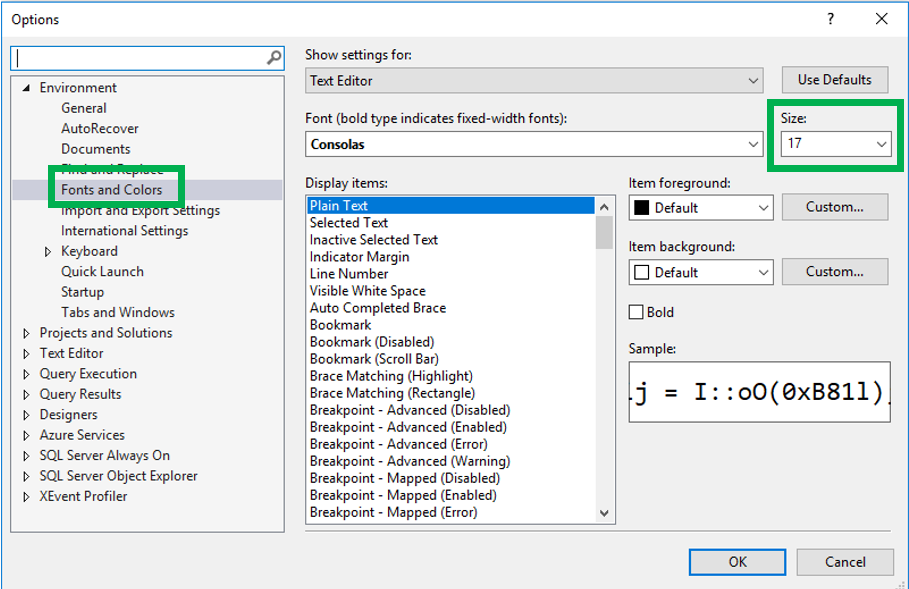
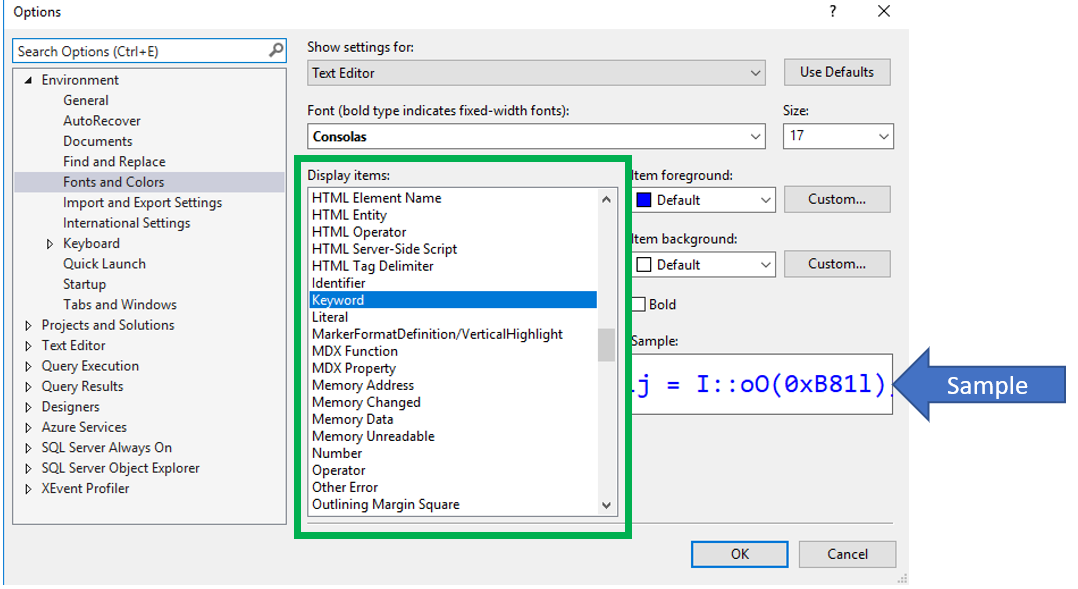
 If you decide you would like to change the colors of fonts, you can do so by selecting the proper word type, inside green box below, and then modifying the settings. This screen also gives you an example of what the text will look like.
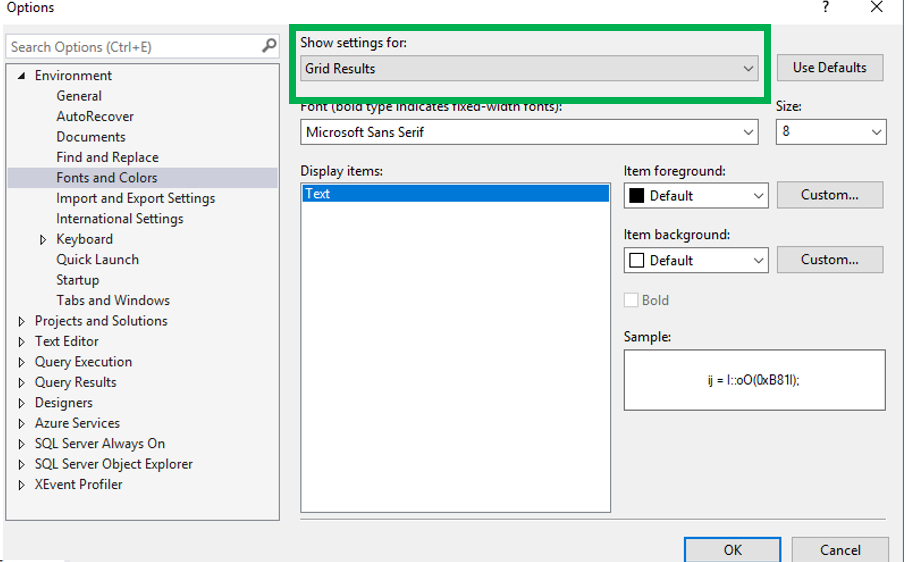