As the industry moves more and more activity to the cloud, I thought it would be a good idea to put together a post on how to create an Azure SQL database. There are a ton of advantages to using an Azure SQL database. One of the biggest is that I do not have to purchase a SQL Server license for a single database. This is my first post on any Azure product. I am hoping to have more in the future.
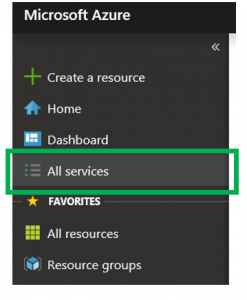
First of all, lets go over what Azure is. Azure is a collection of many different cloud based technologies that Microsoft offers. To see the services that are being offered, once in your Azure portal just click the “All Services” option on the left side.
This will bring up many, if not all the services that you can utilize. Just remember to be careful to not do more than needed on a production server. It is very easy to take advantage of many of the great features of Azure. If you don’t monitor the cost, you could potentially have a very large bill at the end of the month.
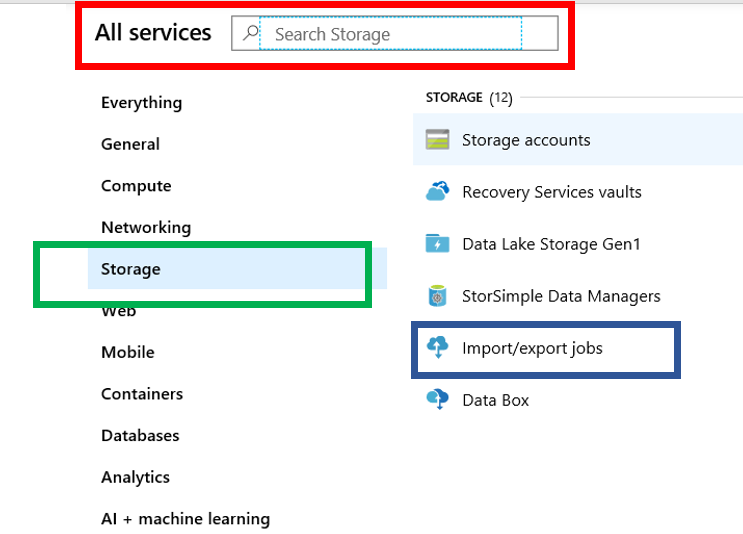
Once you click on the services option you will see something similar to what you see below.
The red rectangle identifies where the SEARCH options can be found in Azure. The green box is where the groups of services can be found, while the blue box represents the service. There are many services to choose from. You just need to identify what you need to pick the appropriate services.
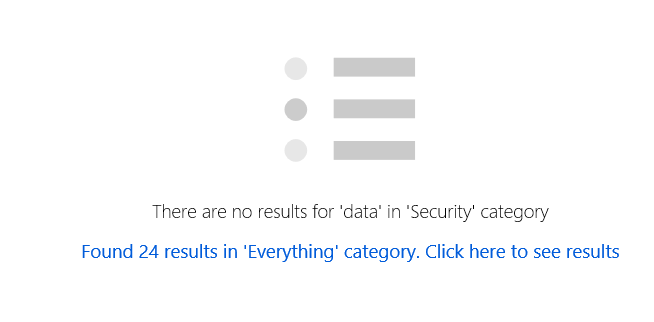
When searching the services you can enter a value into the Search box and Azure will search as you type. If you select a group on the left and then do a search, it will only search that group. However, when you do searching in a group and the query returns no results and there a items in other categories you will see this message. This is simply telling you that there is nothing in the current category that matches your search criteria, how ever there are other services that do.
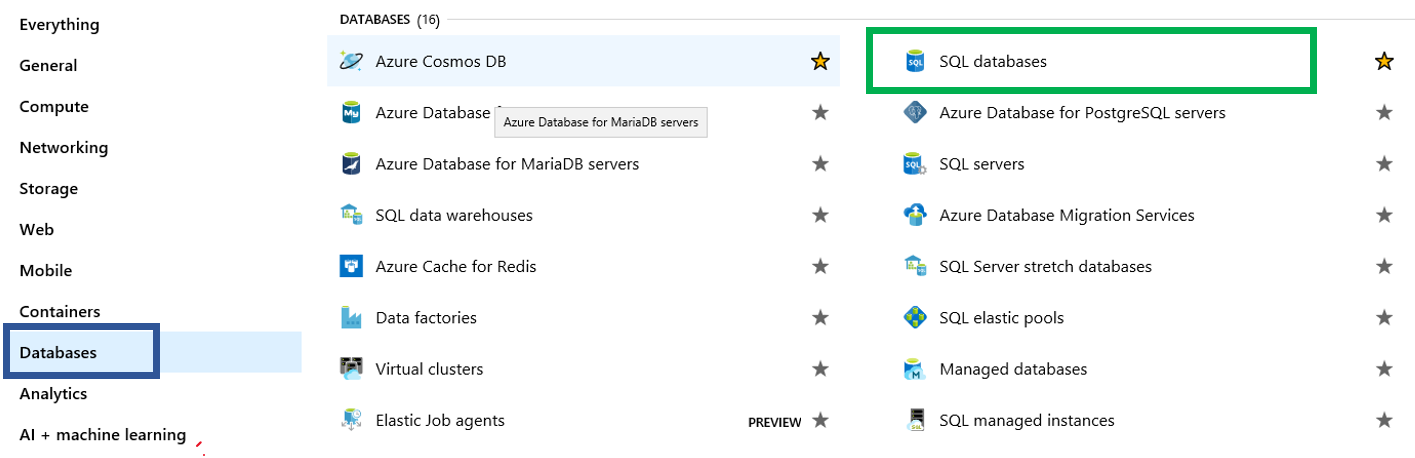
Since this post is about Azure SQL Database, we will focus on that service. There are several ways to get to the point of creating a database, this is one of them. The blue box below is the group of services and the green box is the service, in this case, SQL databases.
Microsoft defines “SQL Database” as “Azure SQL Database is a general-purpose relational database-as-a-service (DBaaS) based on the latest stable version of Microsoft SQL Server Database Engine“. Notice that the definition states that it is based on the latest stable version of SQL Server. This means no SQL Server upgrades or patches, Microsoft takes care of those.
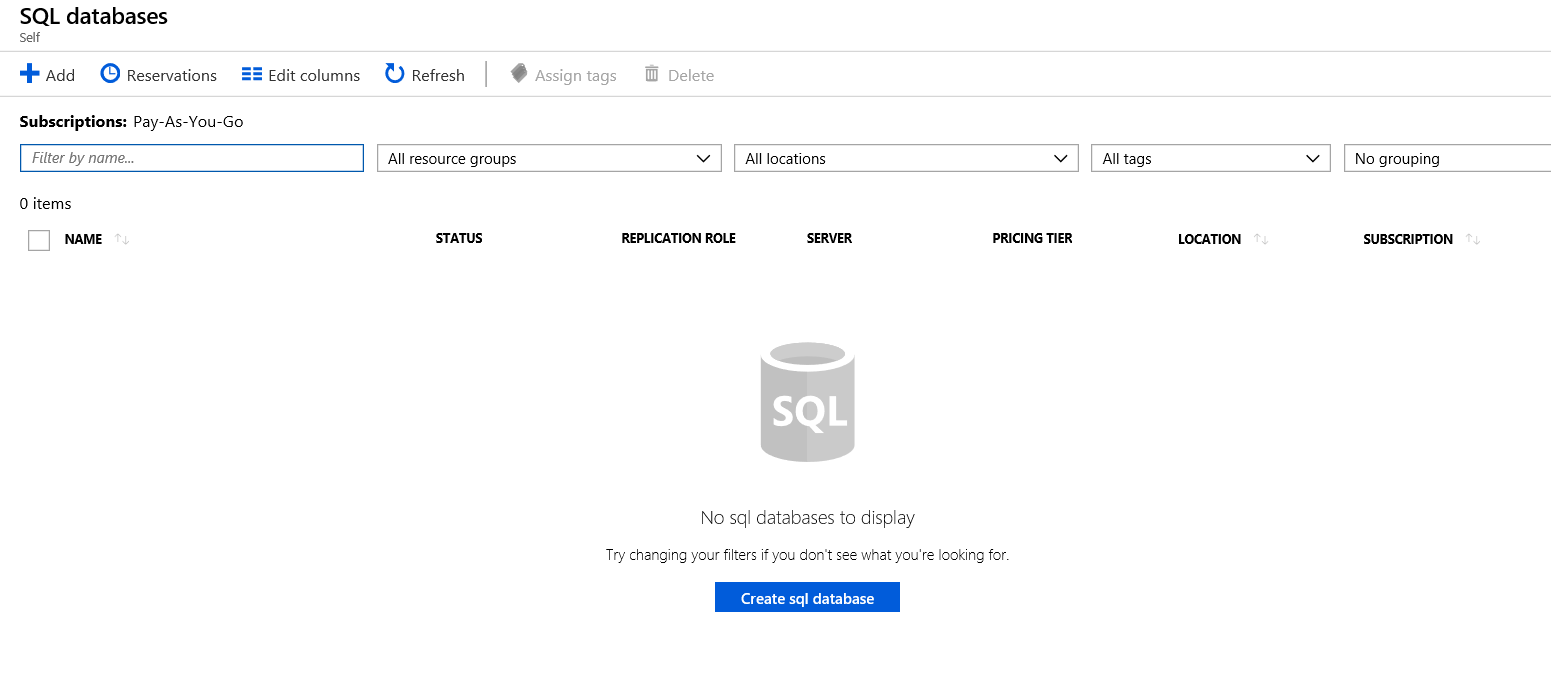
Once you click on “SQL Databases” Azure will take you to this page. If there already SQL Databases, you will see them listed here.
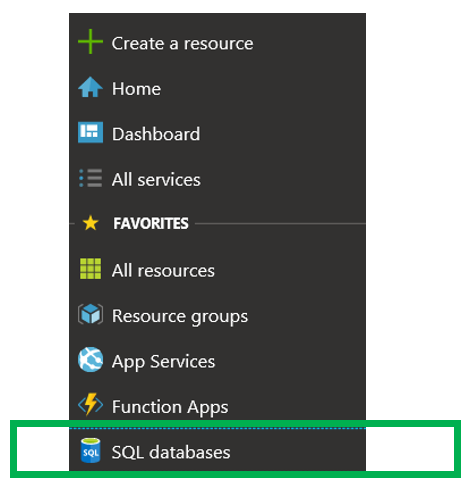
 Before we move on, I would also like to point out that there are several methods to reach this page. Most notably is by using the menu item on the left. Then you will need to create the database, you can click the “SQL Databases” option. This will take you to the part of the portal that will allow you to create a database, as you see in the image above.
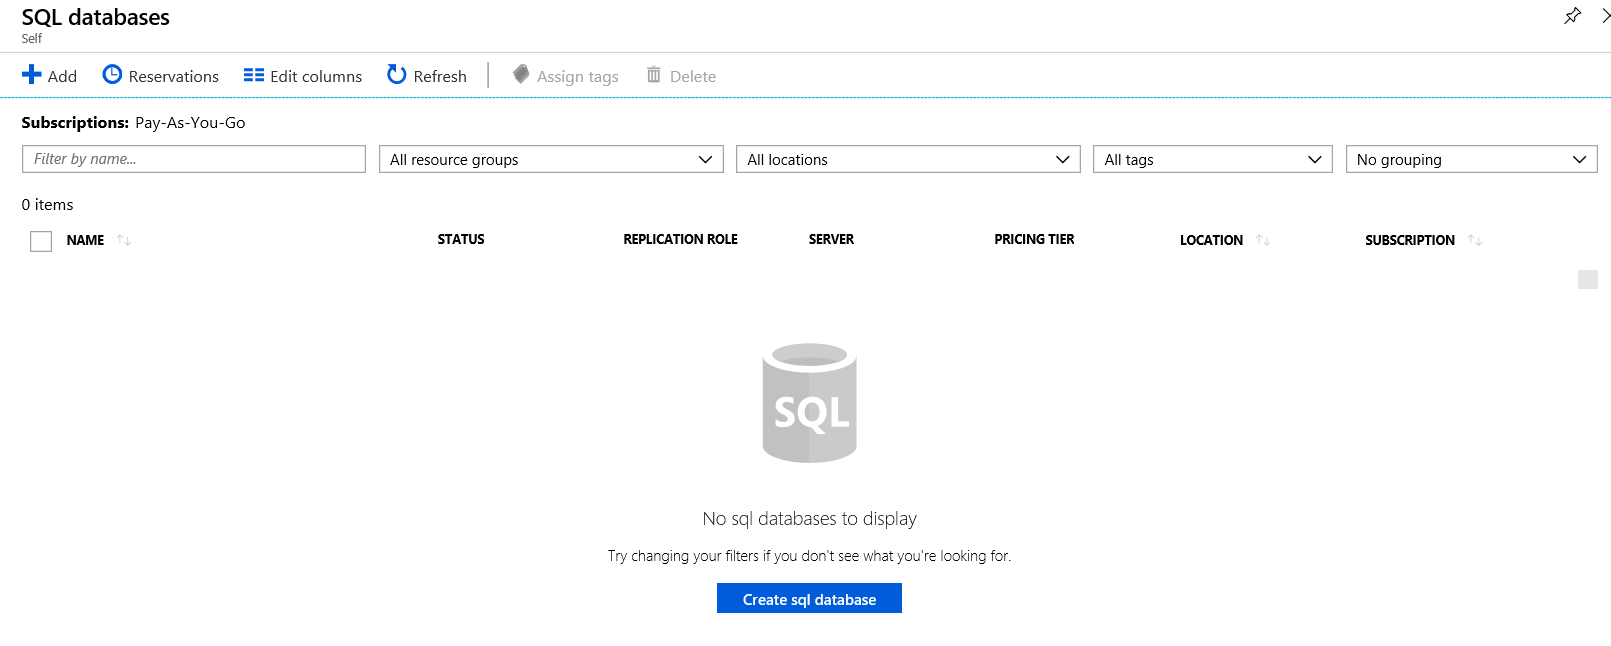
Let’s take a tour of what we are seeing. Your interface should look like below.
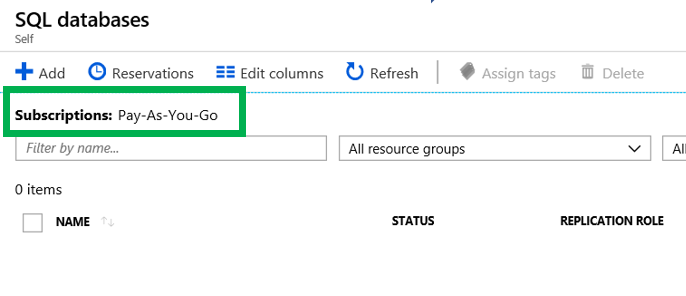
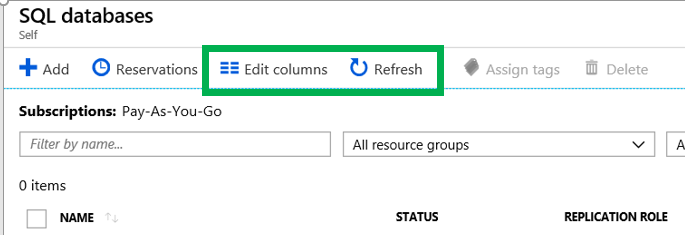
This first thing I would like to point out is the Subscription. Below you can see that the name of the subscription I am using is Pay-As-You-Go. This is the default name you will see when you first create the subscription. You can rename it if you like. Be cautious when adding items to Azure, if you are not careful, you could end up with an unexpectedly large bill. Just be aware of the potential cost before creating items in Azure.
 You also have the ability to change the columns that you see in the list. You simple click “Edit Columns”. You can also click “Refresh” to see new items if they do not appear.
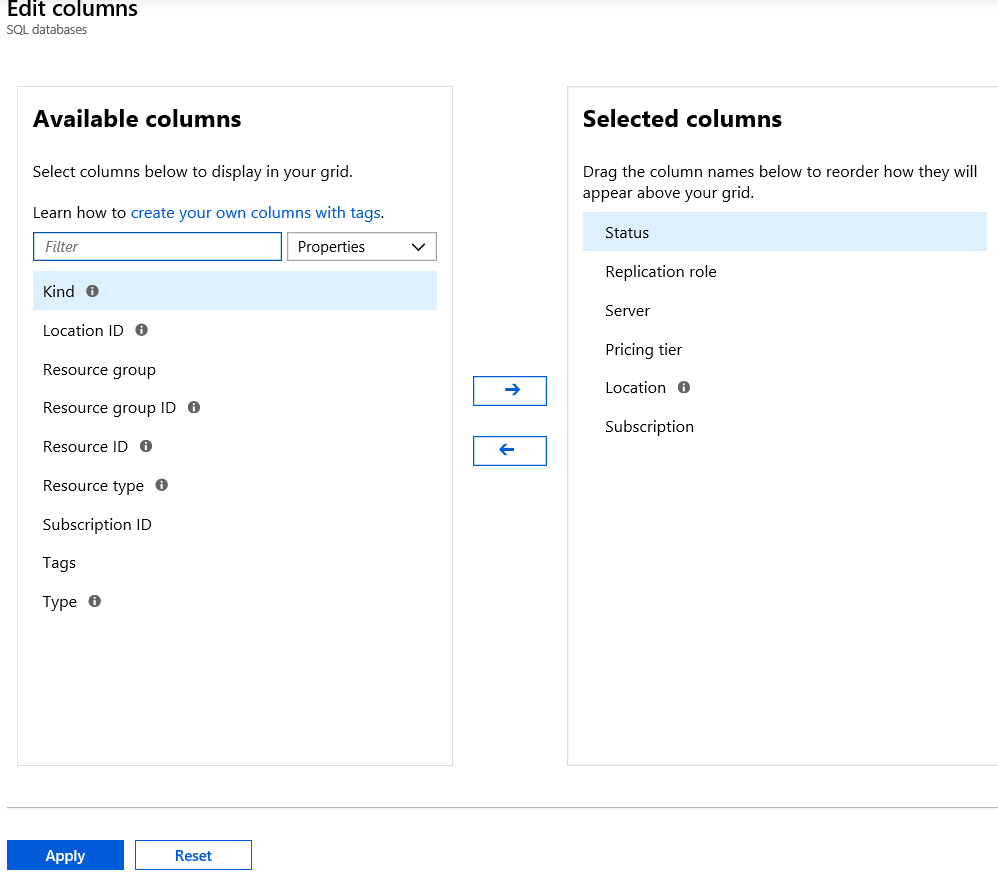
Once you click “Edit Column” you will see the form below. This is very similar to most products that have the ability to change the columns in a list. As you can see below you can move columns back and forth.
The list will identify all the SQL databases you currently have in the subscription. As you can see, I currently do not have any databases.

Regions
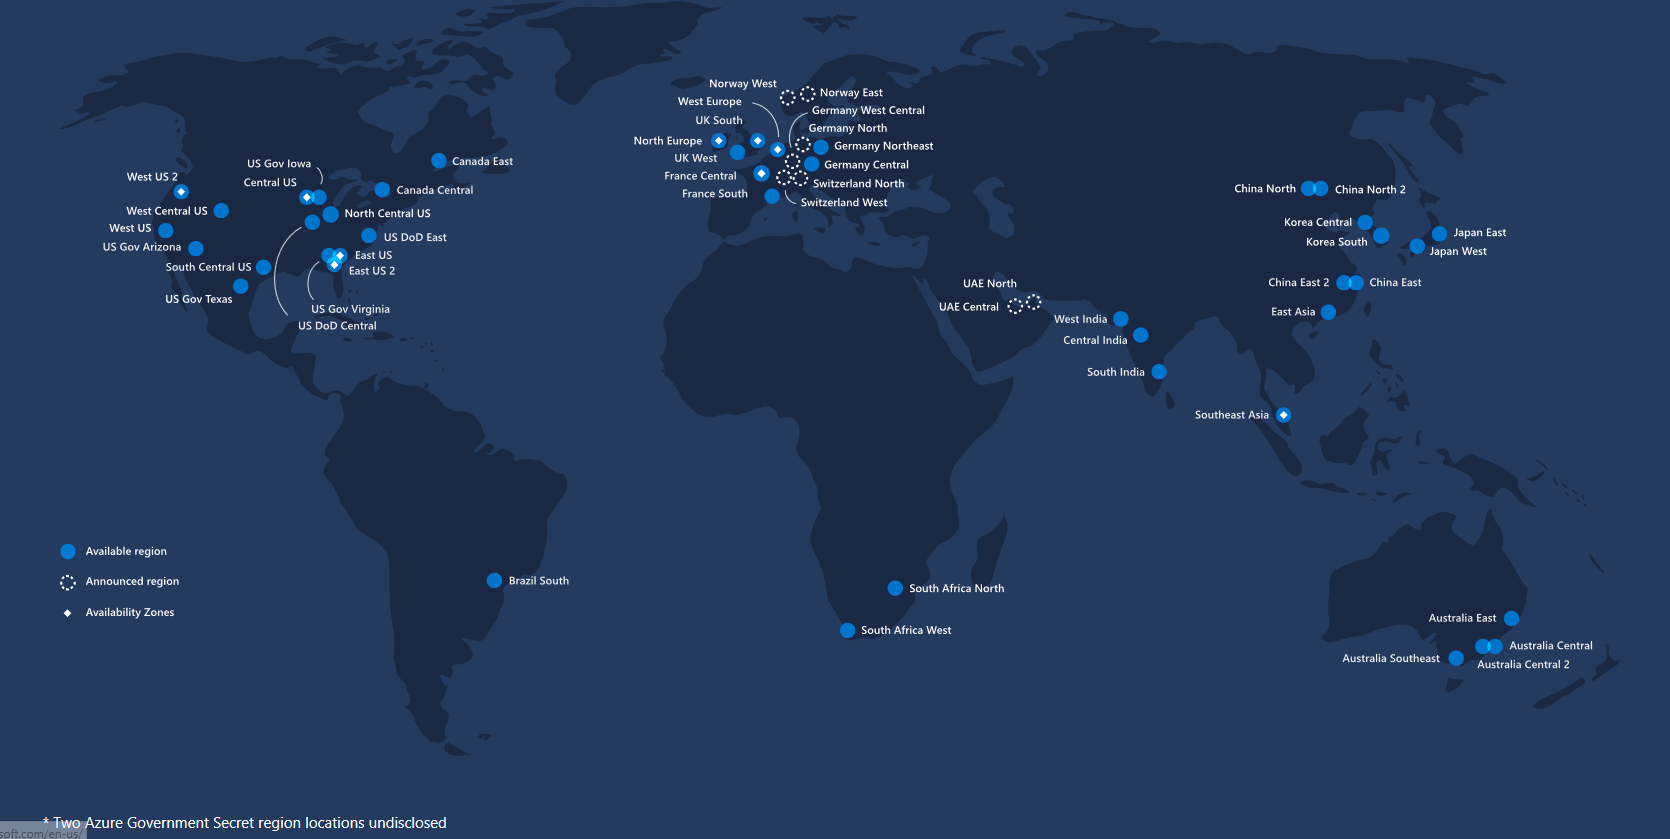
Before going into how to create an Azure SQL Database, I thought I would take a moment to talk about what a Region is. A region is nothing more than a geographic location of where you want you resources to reside. It is also important to note that not all services are available in all regions. Here is the link to Microsoft’s page on Regions. Ideally you would like to have the resources in the closest region. As part of the database creation process, you will need to place a few resources in regions.
Here is a map and a link of the current regions:
Creating the Database
Now that we have gone over how to get to the point where we can create a database, let’s create one.
When you first click the “Create Database” button you will see this.
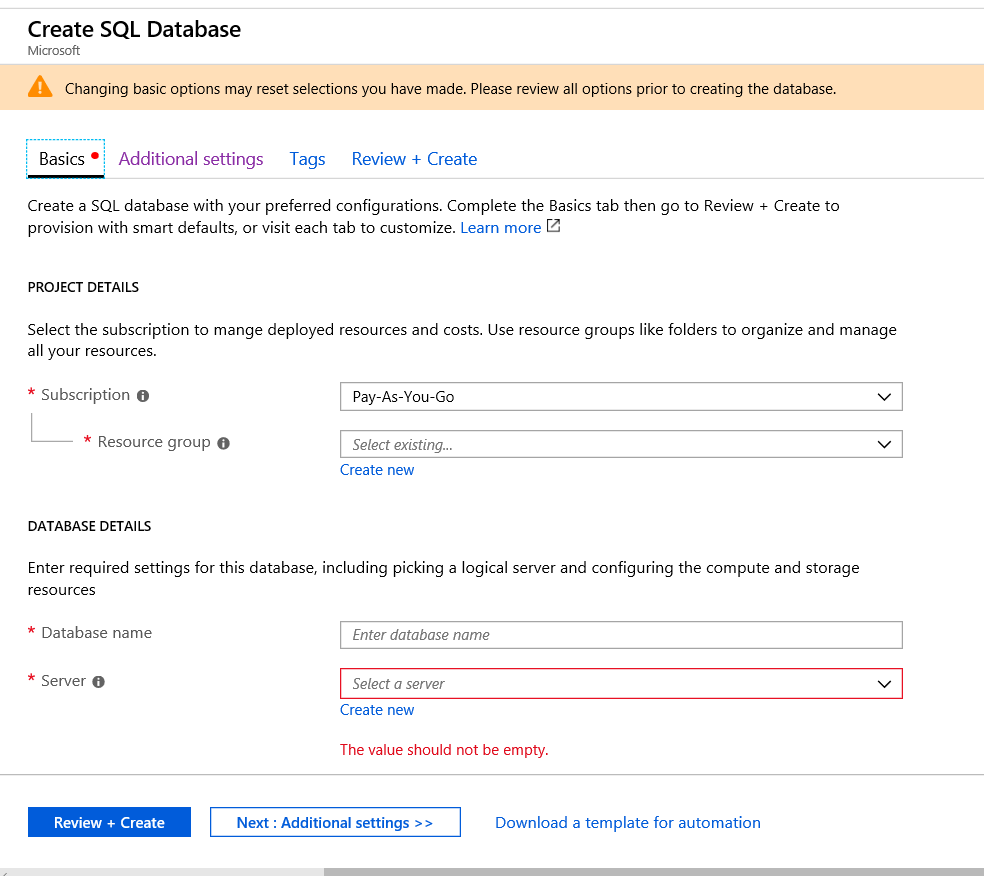
The first bit of information you will need is which subscription you will be adding the database to. In my case, I just have the one so Azure has defaulted to that one.
The next item is the Resource Group. Let’s take a moment to get to know exactly what a resource group is.
Microsoft defines as Resource Group as:
“A container that holds related resources for an Azure solution. The resource group includes those resources that you want to manage as a group. You decide how to allocate resources to resource groups based on what makes the most sense for your organization”
Here a few rules around Resource Groups:
- A resource can only exist in one Resource Group.
- A resource can be moved to another Resource Group at any time
- A resource in one group can interact with a resource in another group
- A Resource Group can contain resources from different regions
- Ideally, the Resource Group and the resources should be placed in the same region
The link above to Microsoft has the rules listed.
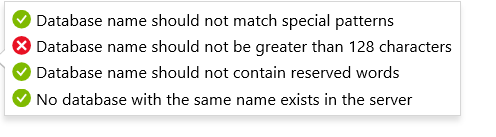
Now that we have gone over regions and Resource Groups, it is time to create the database. The first thing we need to do it give the database a name. Just as in an On-Prem SQL Server, there are rules around how you name your database. What is nice is that Azure will pop up and tell you if you are violating one of the rules. Just as with an On-Prem instance, the rules are pretty straight forward.
 If you violate one of the rules, Azure will tell you. Just as seen below.
 Now that we have provided a name for the database, the next step is to assign it to a server.
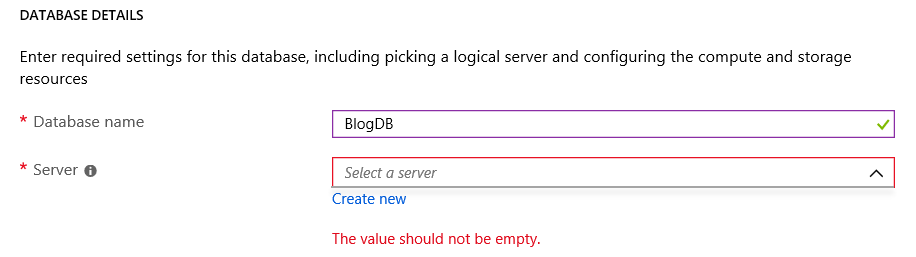 If you have not created a server yet, you can simply click the “Create New” link. A server for Azure SQL Database is a logical container for your SQL Databases and provides a centralized point for administration. Here is a link to Microsoft’s documentation on Server.
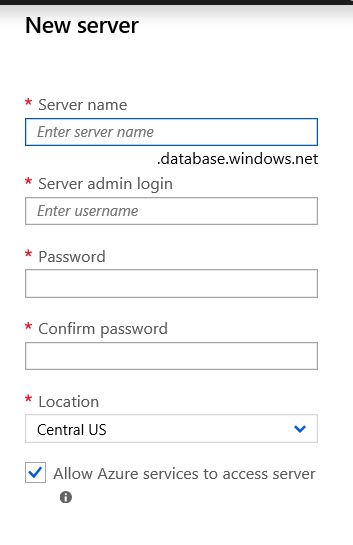
When creating a server, you will also need to create an account that will be used as the administrator account. You will also need to provide a password and a region. When providing a name, the name cannot be the same as the database. Notice that under the server name, you will see, “.database.windows.net”. This will be important information you will need when connecting to your database with SQL Server Management Studio.
 Once you have click the “Select” button and filled out all the information, it may look like you are done, but you are not. We need to provide additional information. By clicking on the “Additional Setting” item towards the bottom we will see the what else we need to provide.
 The first item we need to address is the Data Source. Here you have three options.
- Blank
- Restore from Backup
- Sample
There is only one option at this point for the sample database, AdventureWorksLT. If you chose None, this is simply a blank database and you will need to review the Collation to see if it appropriate for your needs.
The next item you will look to look at are the tags. Tags are not required, but can be useful when grouping your databases. For example, if you have a system that uses more than one database, you can take them with the name of the system. Just a note, keep in mind cross database queries are not allowed in Azure SQL Database.
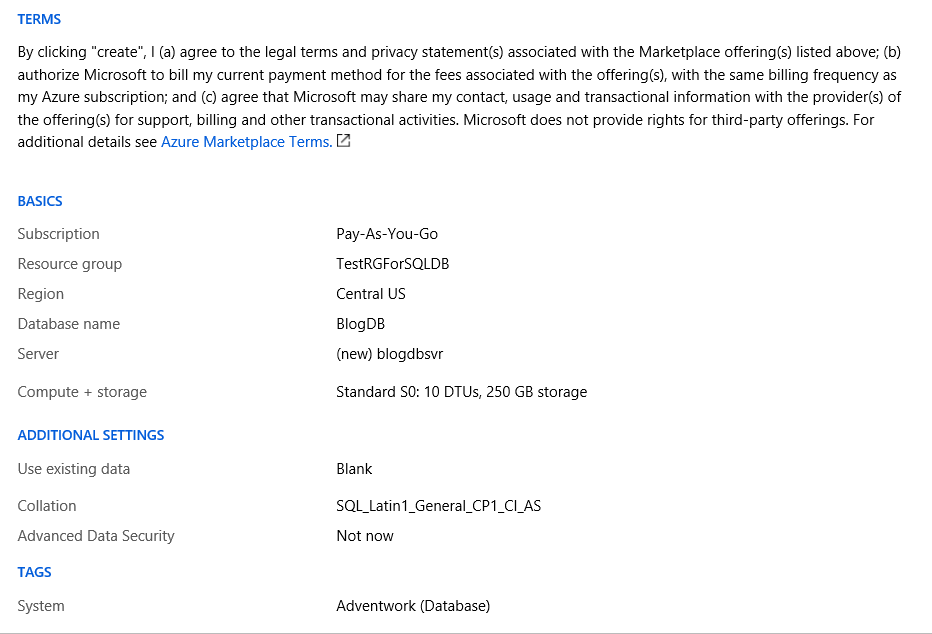
Now that we have provided all the required information it is time to review before creating the database. You will want to pay close attention to the Product Details section. Notice that it has an estimated cost per month.
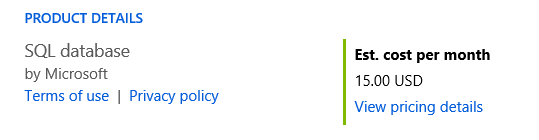 The rest of the options are pretty straight forward, however should be carefully be reviewed before creating the database.
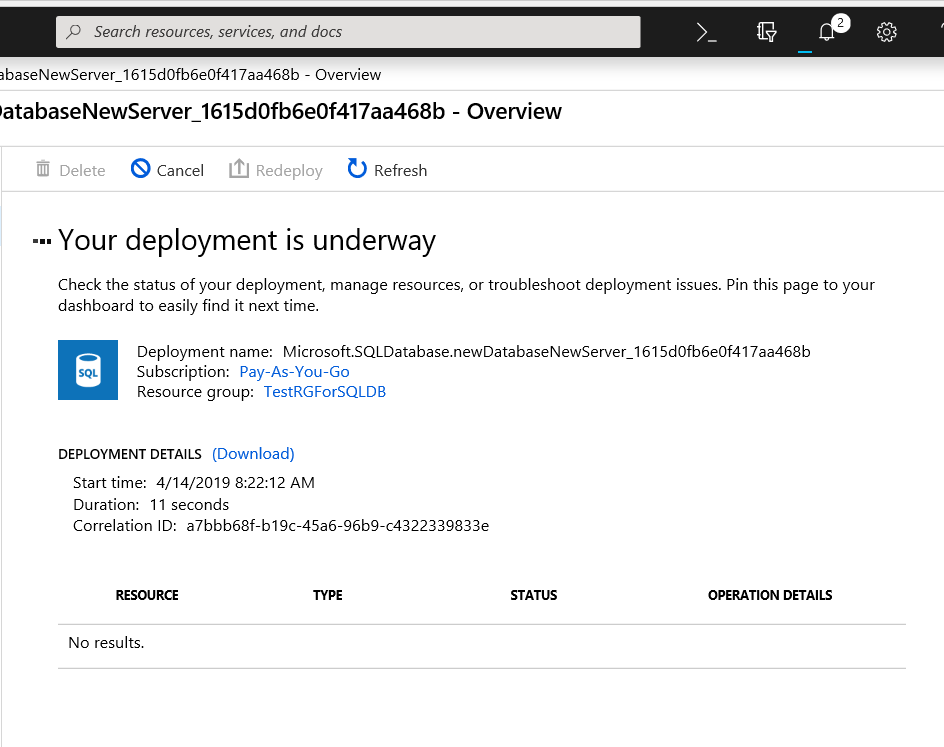
Once you click “Create” you will see this. If you look in the upper right corner of the image, you will see something that looks kind of like a bell. This is the notifications and you will see the blue line under it move from the left to the right while the deployment is in progress.
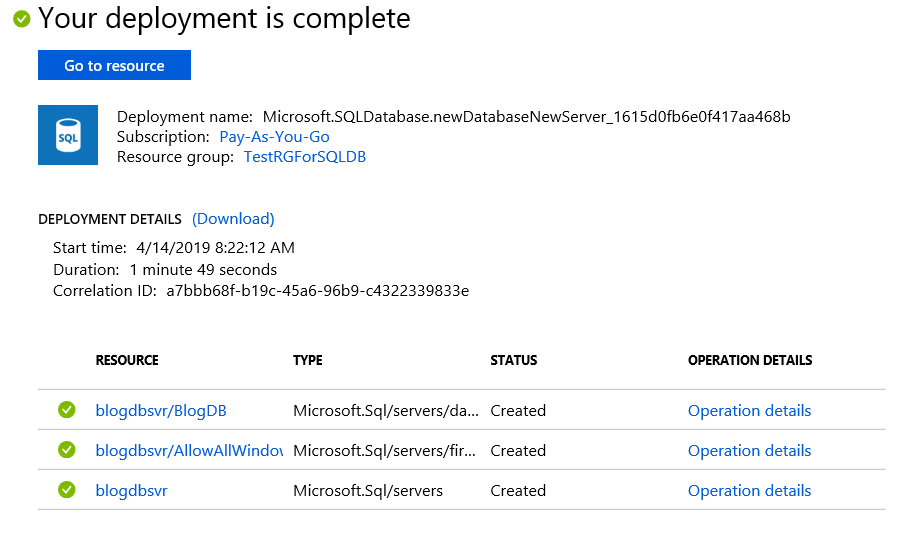
 Once the deployment is complete, Azure will tell you as seen below.
Now that we have created the database, we can confirm it by returning to the list we talked about earlier. Just click the SQL Database menu item on the left and you will be returned here.
 Notice that our new database is listed.
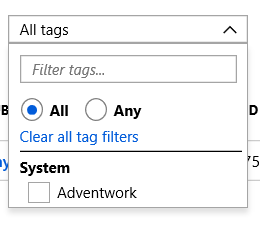
I would also like to point out the Tags. You will see this list along the top.
 If you click the drop down arrow you will see this and the tags that was created. By clicking the box next to Adventwork, the list will only show items that have a tag of Adventwork.
 Connecting to the Database
Although this post was mostly about how to create an Azure SQL Database, I would also like to go over how to connect to your newly created database. If you click the database name in the list, you will be taken to a page that will list all the important information about your database. This includes the subscription name, database name, status, location as well as a number of other usefully bits of information.
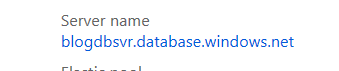
However, in order to connect there is one thing we need to copy, that is the Server Name. In my case, blogdbsvr.database.windows.net. If you move your mouse just to the right of it, you will be able to copy it to the clipboard.
 Once on the clipboard, it is time to open SSMS. You will connect just as if you were connecting to an On-Prem SQL Server using SQL Authentication.
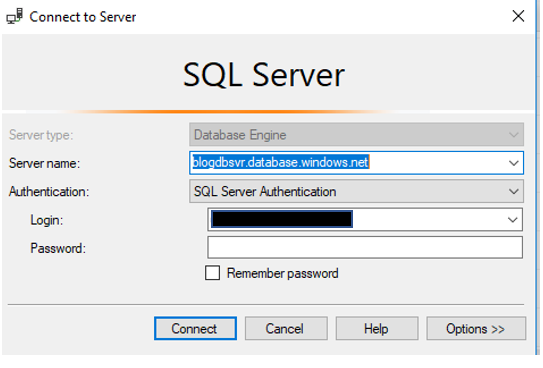 Once you enter a user name and password, you click Connect. This is where you will begin to see a few differences. You will be asked to login into your Azure account as well as a few screens about your IP address.
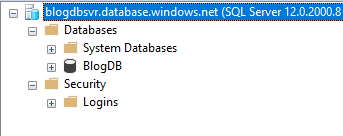
Once connected you will see a few significant differences from an On-Prem instance of SQL Server. Notice that the SQL Server agent is no longer present. As a DBA, this is a huge difference because so much of our on going maintenance is dependent on the Agent. No worries there, Microsoft has provide a number of ways for us to schedule maintenance jobs.
Below you will see many more differences.
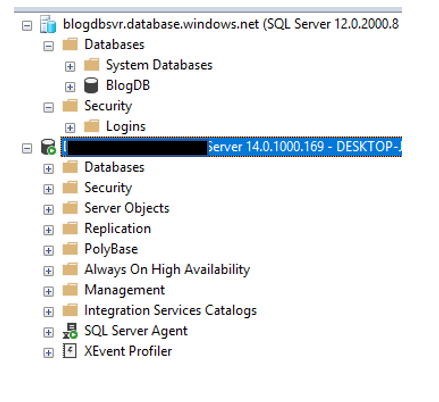 Listing all the differences is outside the purpose of the post, however there is a lot of really good information available. I may cover some of these differences in future blog posts. Once you are in SSMS, you can do many of the same things you have done with an on-prem instance. Including creating objects, writing queries and working with security. Please keep in mind that there are some differences on how security is set up, however that is for another time.
Thanks for reading the long post on how to create an Azure SQL Database. This is the longest blog post I have done so far. Hopefully you found it useful.