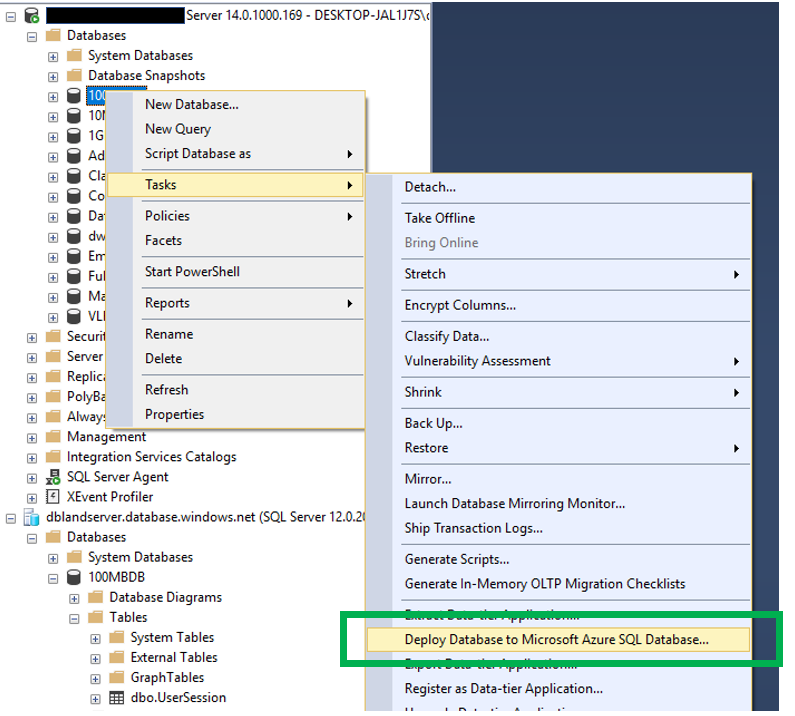
When moving the enterprise to a cloud based solution such as Azure SQL Database, we will need to find a way to migrate existing database to the cloud. I already completed a post on how to create an Azure SQL database. This post will focus more on how to migrate an existing on-prem databases to an Azure SQL Database. There a several options that you can use, use the “Deploy Database to Microsoft Azure Database…” option in SQL Server Management Studio, Data Migration Assistant tool or use the Azure Database Migration Service. During this post I will cover all three options.
Deploy Database to Microsoft Azure Database…
After opening SSMS, move to the database you wish to move to Azure SQL Database and right click on it. When you do, you will see this:
After clicking the first next in the wizard, you will then be asked to provide some detailed information about what you are attempting to migrate to Azure SQL Database.
This information includes the following:
- Server Connection – this is the Azure location you are attempting to migrate to
- New Database Name – this will default to the name of the database you right clicked on, but can be changed in Azure SQL Database if you have a need to change it
- Azure SQL Database Settings – these will not be active until you identify a Server Connection
-
- Edition of SQL Server
- Maximum Database size
- Service Objective
- Temporary File Name – This is the name and location of the .bacpac file.
What is a .bacpac file? Since you may not have worked with this before, I thought I would take a few minutes to go over exactly what a .bacpac file is. It is considered a Data Tier Application that can be used for deploying databases from one location to another. This file will contain both schema, object definitions and data. There is also a .dacpac file type. The only difference between the .bacpac and .dacpac is that the .bacpac is the only file type that also contains the data.
This is what the screen will look like.

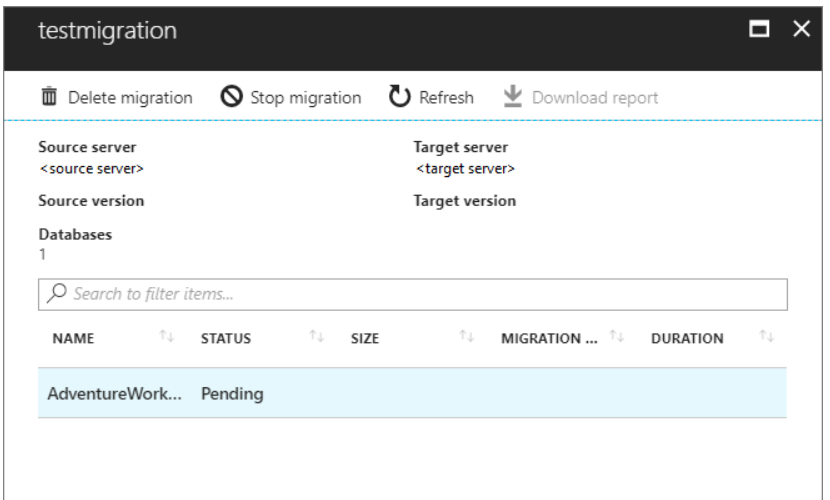
When you click “Next”, you will have an opportunity to review all the settings before clicking “Finish”. When you do, you will see the progress of the migration, step by step.
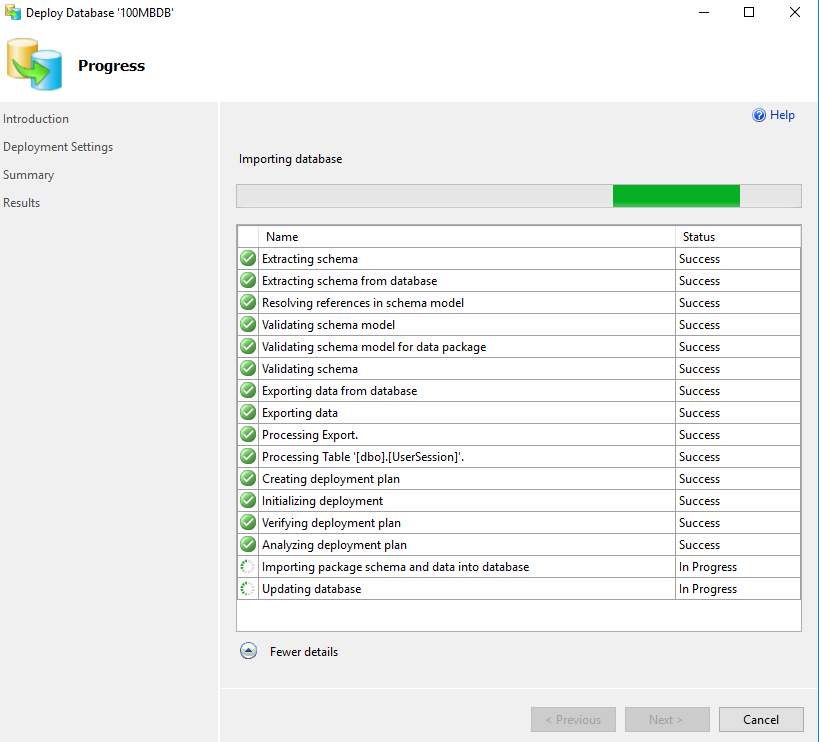
As you can see above, there are number of steps. You can also see that there is a step named “Processing Table”. This step will show each table as it is processed and migrated to Azure SQL Database. Once the migration is completed, you will now see the database in both locations, the original SQL Server and in Azure SQL Database.
Data Migration Assistant
This is a relatively easy tool to use. It really has two purposes. One to assess an on-prem database to identify what challenges you might encounter when migrating at database to Azure and the other to actually complete the migration.
This is a tool the must be downloaded and installed before using. To download it you can go here. Download DMA. Once downloaded and installed you will find it list as “Microsoft Data Migration Assistant” in the Start menu, not under the SQL Server items.
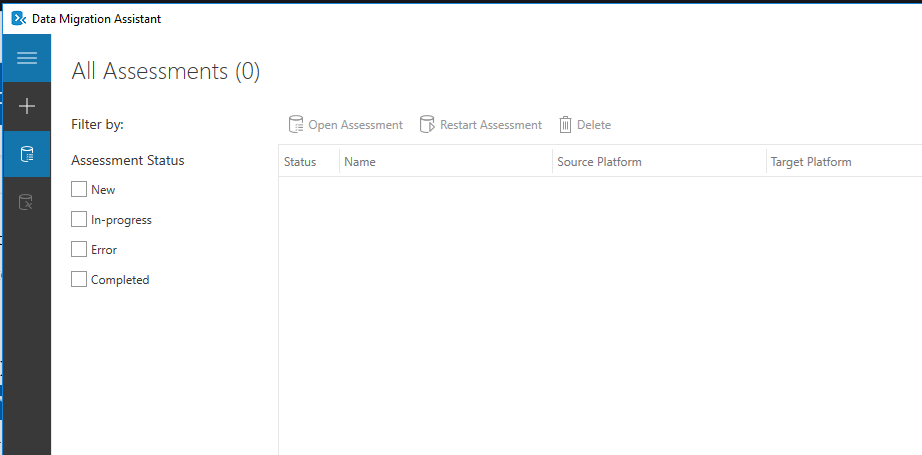
Below you will see the opening screen in the DMA. As you can see there are two options, completed an assessment or do a migration. By clicking the “+” on the left side you will have an option to chose what you would like to do. Notice that there are also options to restart an assessment or open an assessment. These are exactly what you might think they are. When you complete an assessment you will be able to save the results or save the configurations of the assessment that you can restart if you like.
When you click the “+” sign you will then see a few options that you can chose from. Here you will be able to chose to complete an assessment or a migration.
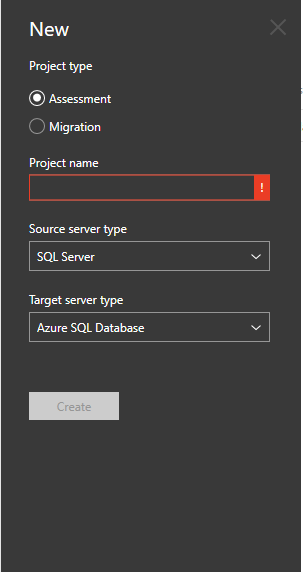
Both of which will require a project name, a source and target server type.
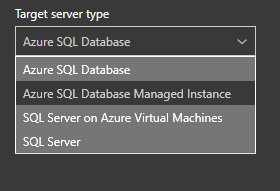
You will have several options for a target as you can see in the image below. Since this blog post is about the migration of a database, we will focus on that target.
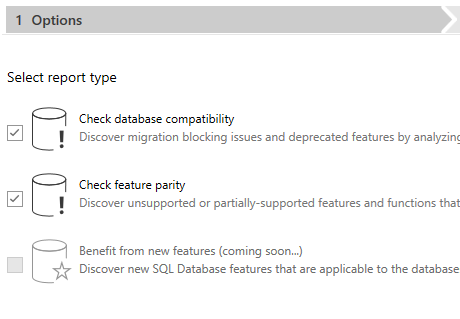
Once you pick you source and target, you will then be able to click the “Create” button. Once you did, you will see this. You will see three options, although only two are available at this time. The two options that are available are Check Database Compatibility and Check Feature Parity.
 Once you click “Next” you will then be asked to identify a source. Since this post is about migrating an on-prem SQL Server database to Azure SQL Database, the source will be a local instance of SQL Server. You will have to provide an authentication method and then the database(s) you would like to complete the assessment on. Once you have provided all the information you can click the “Start Assessment” button.
Below is an example of the results of the assessment. There were a few things that were expected, especially the Agent jobs not being supported in Azure SQL Database.
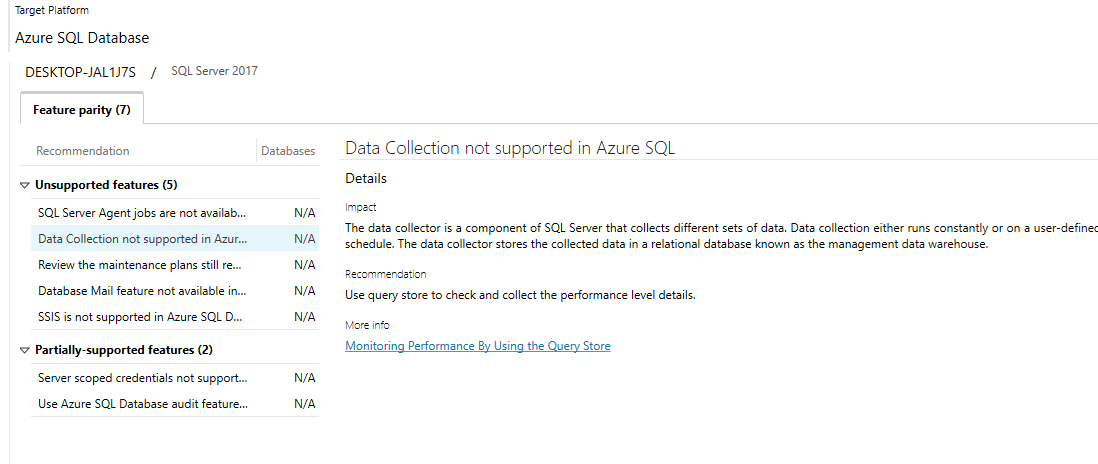
Fortunately Microsoft has also included links to each of the topics that will allow us to gather more information easily.
Make sure you look at both groups of items, SQL Server feature parity and the Compatibility issues. In this case not compatibility issues were found.

Now that we have completed an assessment and addressed all the blocking issues, we can now use the same tool to perform the migration. As expected you will also have to provide a project name, a source and a destination type. This will also include the connection information for the target.
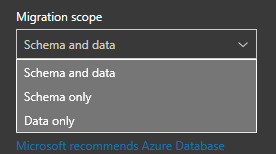
The migration scope has three options.
-
-
- Schema and data
- Schema only
- Data only
You just need to decide which is best for what you attempting to accomplish. In this case, we will pick Schema and Data.
Once you provide all the information, you will be able to click the “Create” button. As part of the migration, there are six steps. These are list in the image below.
 Selecting a source if the obvious starting point for a migration. Once you do, you will then have an opportunity to pick which database you would like to migrate.
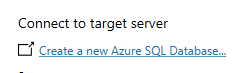
It this is a new database in Azure SQL Database, make sure to click the “Create a new Azure SQL Database…” link.
 When you do, make sure you click the Connect button so the list of databases refreshes.
The next step will allow you to identify which objects you would like to migrate.
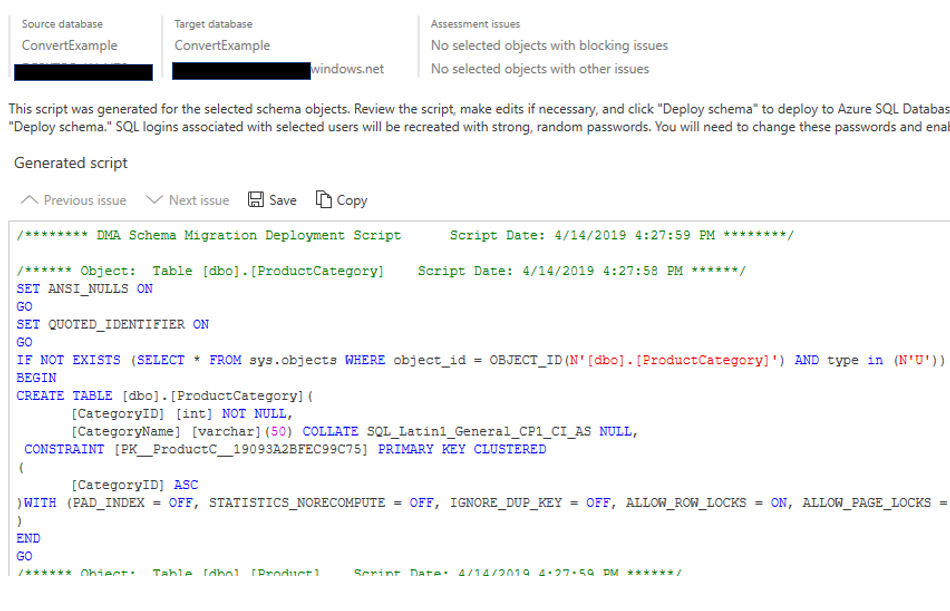
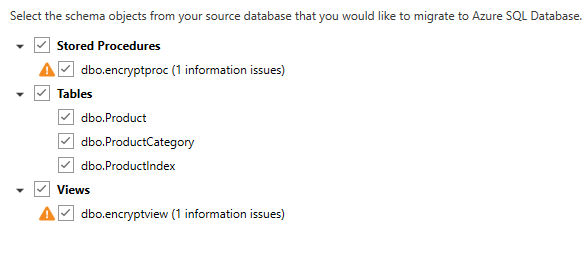 In this case there are still a few issues that will need to be address, most due to encryption, so I will not migrate those objects. The next step is to generate the scripts. Once the scripts are generated, you can save it or copy it. Note below you the DMA tool will also identify items with assessment issues.
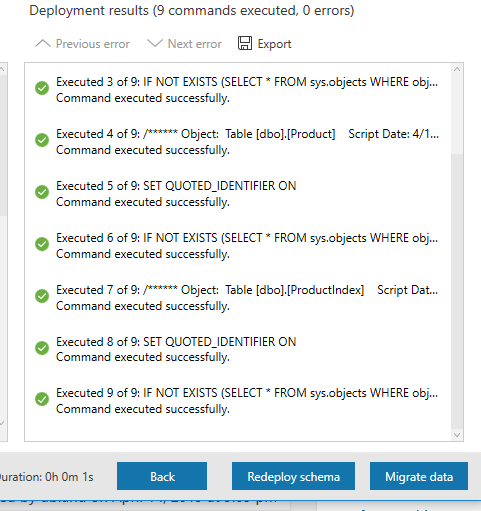
At this point the database has been created in Azure SQL Database and all the objects have been created. However, we have not reached the point of migrating the data yet.
In order to migrate that data, all we have to do is click the “Migrate Data” button.
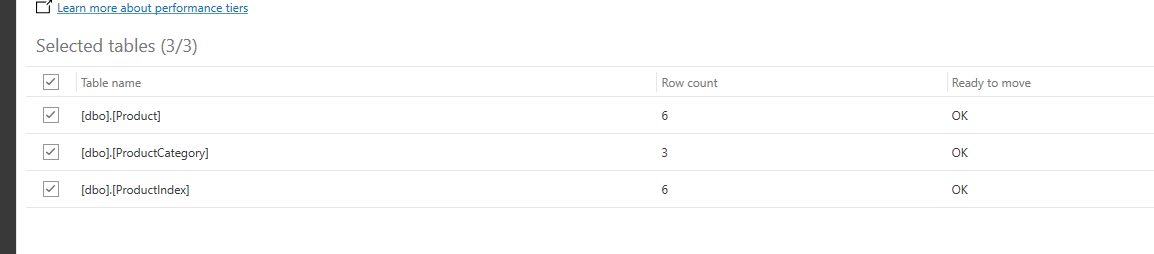
We will now have the option to decide which tables we would like to have the data migrated as well. As you can see below, we can see the tables listed. This list include the number of rows and whether or not the table is ready to move or not.
Once you have confirmed the information, click the “Start Data Migration” button. What I like about this part of the tool is that it tells me the progress of each table and the status of each migration of data.
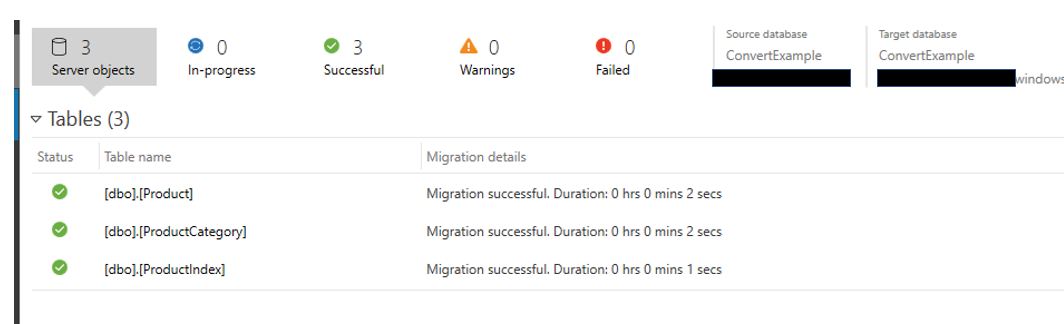
Now were are done. Not only have the objects been migrated, but the data as well.
Both of these migration options take place on your computer, one with SSMS and the other the downloadable Data Migration Assistance. In my opinion, I think they are both pretty easy to work with. The third option is done in the Azure portal. There is a server called Azure Data Migration Service. There are a number of required steps to utilize this service.
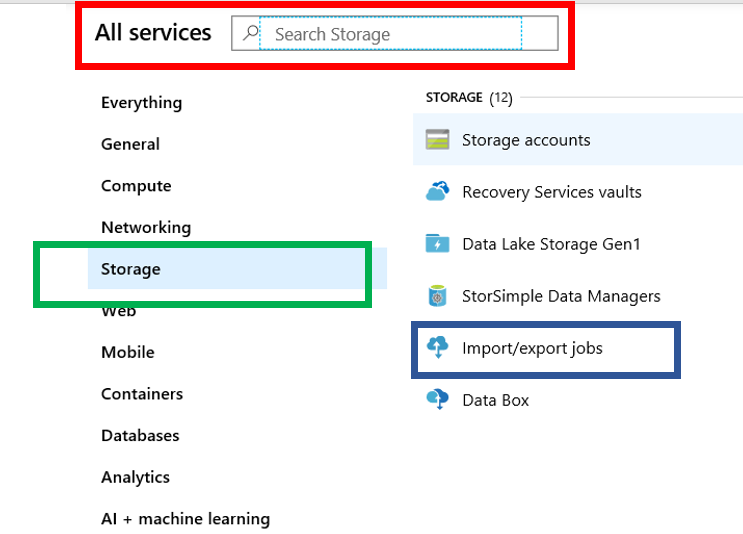
Azure Data Migration Services
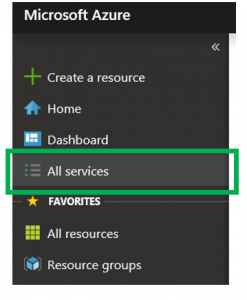
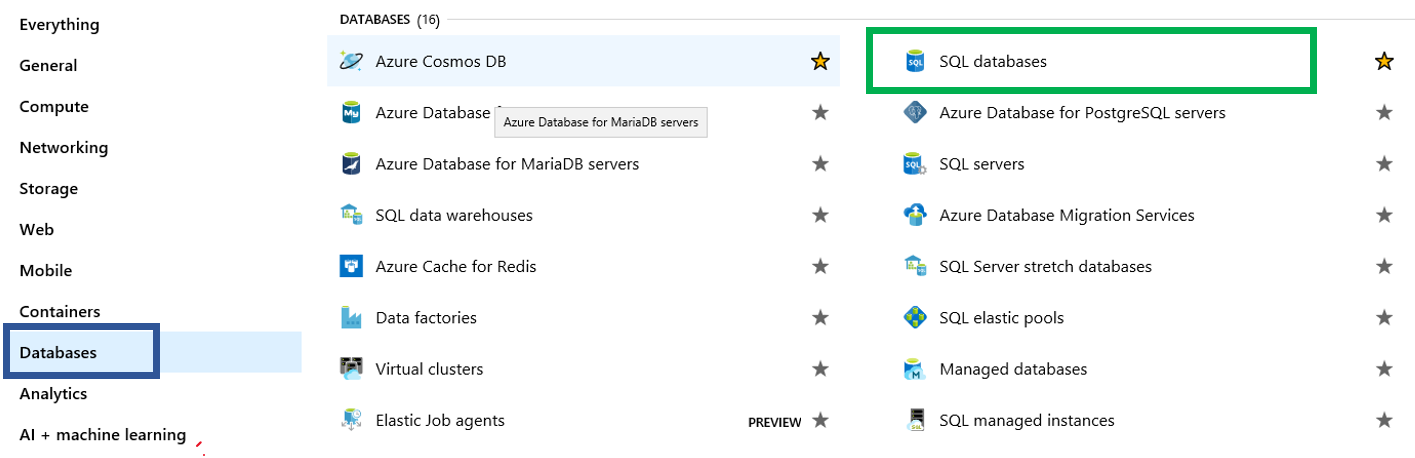
As the name implies, this is a service in the Azure Portal. When looking at all the services, the Azure Database Migration Services can be found either by doing a search or looking in the Databases group.

Once you click the Azure Database Migration Service, you will see what is below. However, if you already have one of this service type running, you will not have to go through this step again.
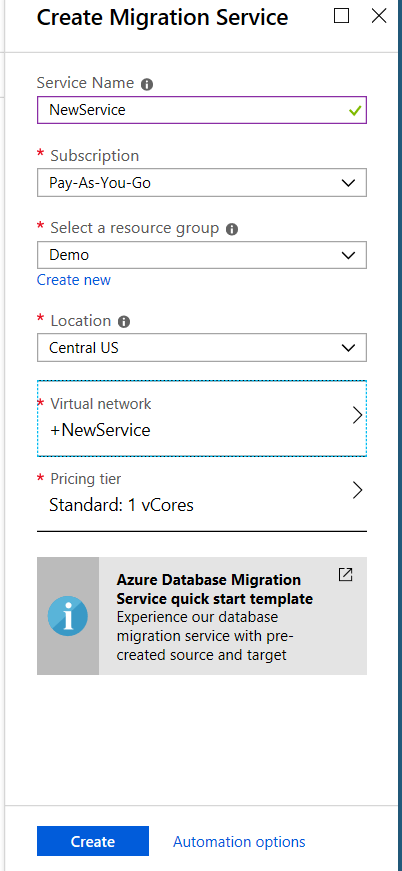
For this method, you will need to provide a service name, a location(region) as well as a Virtual Network. Yes, you will need to create a virtual network. This will include the creation of a virtual NIC.
If you already have the service created you can go to the All Resources list in the portal and click that service. Once you do, you will see this.
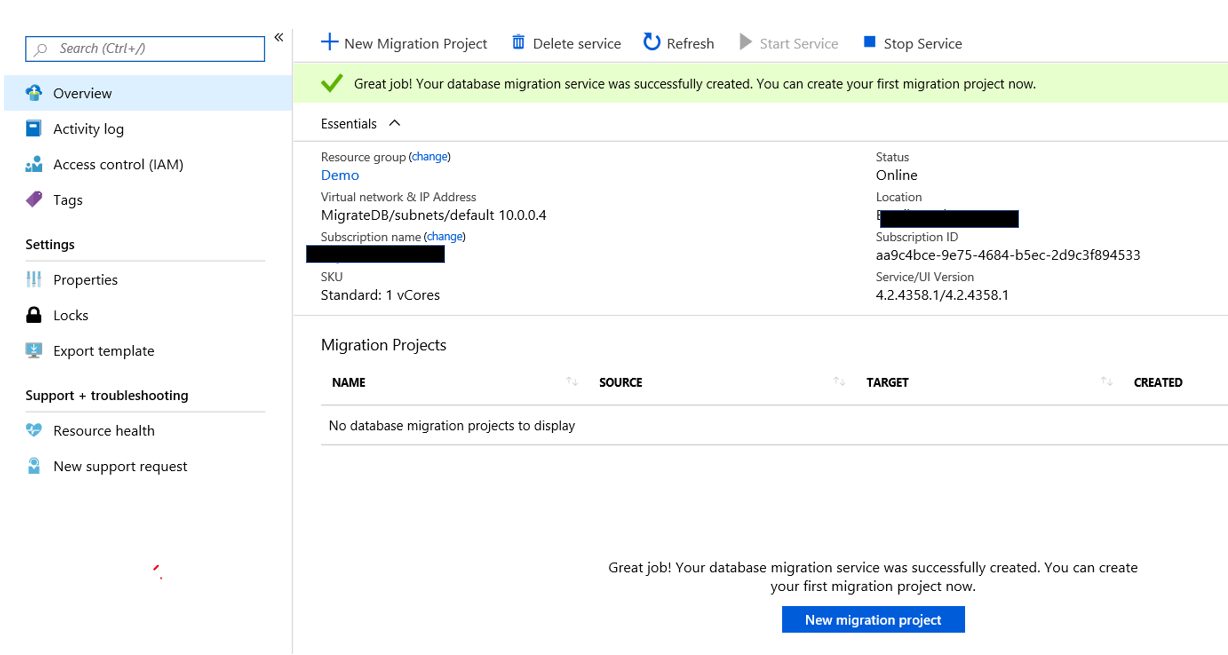
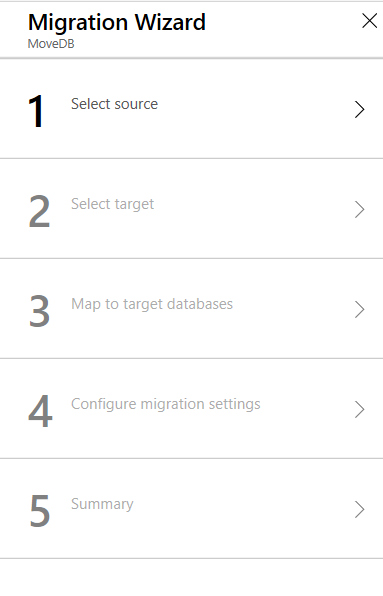
The next step is to click the “New Migration Project” button. At this point you will pick a data source and a target.
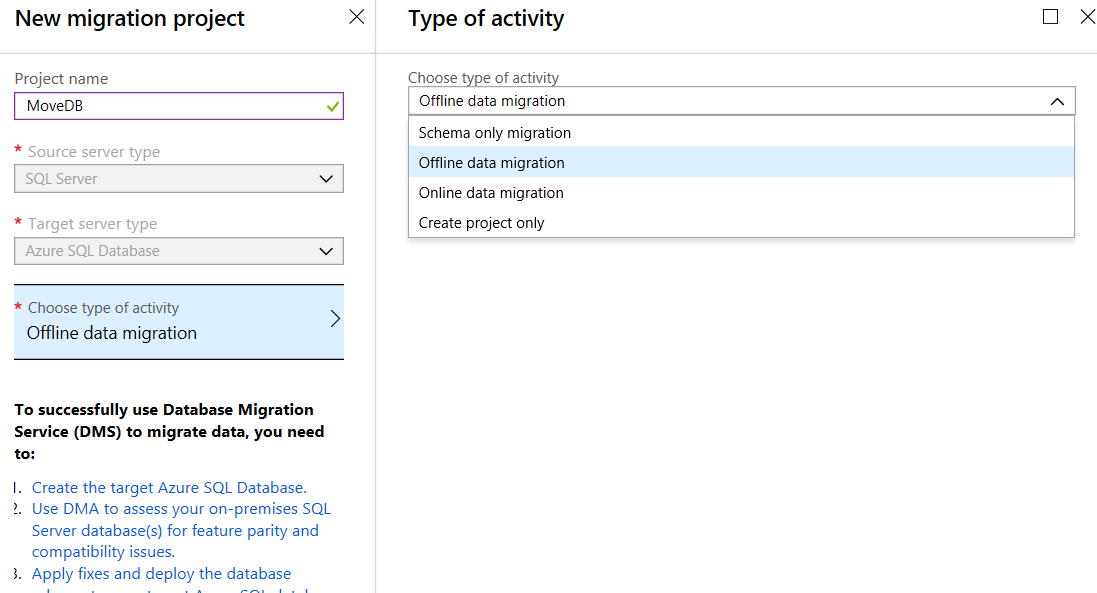
The options for Type of Activity are:
-
- Schema Only migration
- Offline data Migration – this is to be used for source databases that will NOT be changed during the migration.
- Online data migration – For systems that will be modified during the migration
- Create project only
If you chose the Online Data Migration type, Azure with provide you with a list of rules that must be followed in order for the migration to be successful.
 Also, if you chose Online Data Migration, it will require a higher level of SKU. You must have Premium, which I currently do not have. I received this warning what I tried to use Online Data Migration.
 Given this I changed the type of activity to Offline Data Migration. You will have to complete several steps to be successful in the migration. These steps are fairly basic and expected. Identify a source, a target, map to target database, configure migration options and a summary.
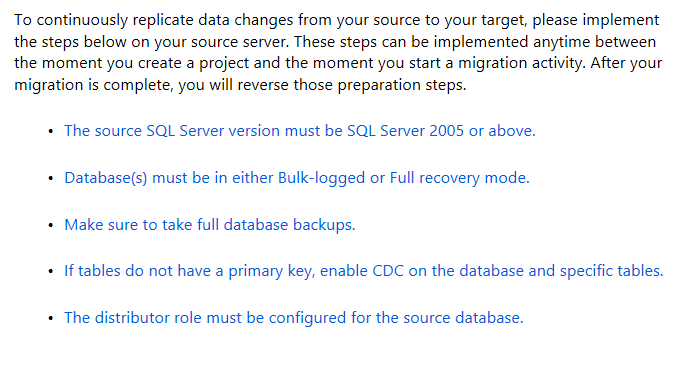
 There are a number of network and security steps that must be completed prior to utilizing this service. This is a good description of what is required, click here.
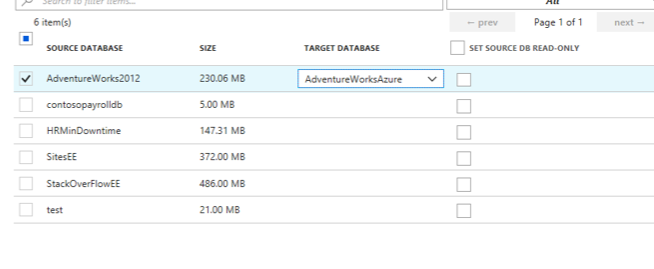
As expected the source and the target require the usual information. What is a bit different is the third step, mapping target databases. Below is a screenshot of the mapping step that is on the above Microsoft site. As you can see below, you simple map the source databases that you would like to migrate to a destination database in your Azure SQL database portal.
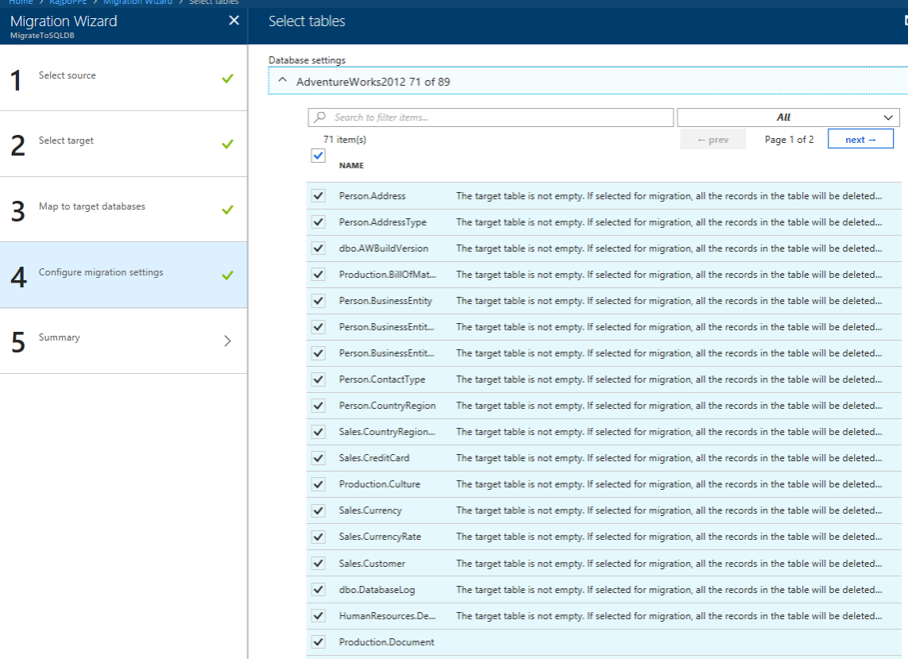
The settings step is simple telling the service what tables you would like to migrate. Below is also from Microsoft’s site.
Finally, once you have provided all the required information and you can then begin the migration. Once you do, Azure will provide progress status that will look like this, also from Microsoft’s site.
It is always good to have options. In this case we have three different options. Two you can run from your computer and one that must be done in the Azure portal. Personally, I like the options of running the migration through an on-prem computer. They appear to be less involved and I don’t need to involve other teams, such as the network or security team.
When migrating databases to Azure SQL Database, it is important to complete an assessment on the database first using the Data Migration Assistant. This will allow you to identify what your obstacles might be. You can then address them before starting the migration.
Thank for stopping by my blog and I hope you learned something.


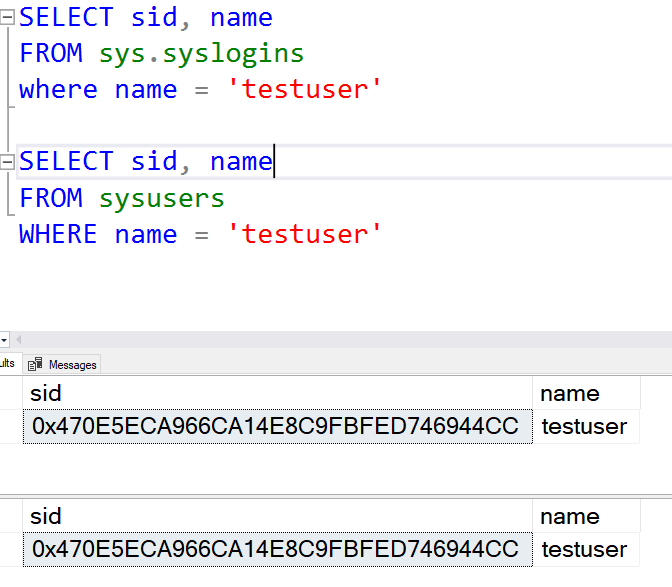 As you can see, the SIDs for both the user account and the login are the same. So that rules out an orphaned account.
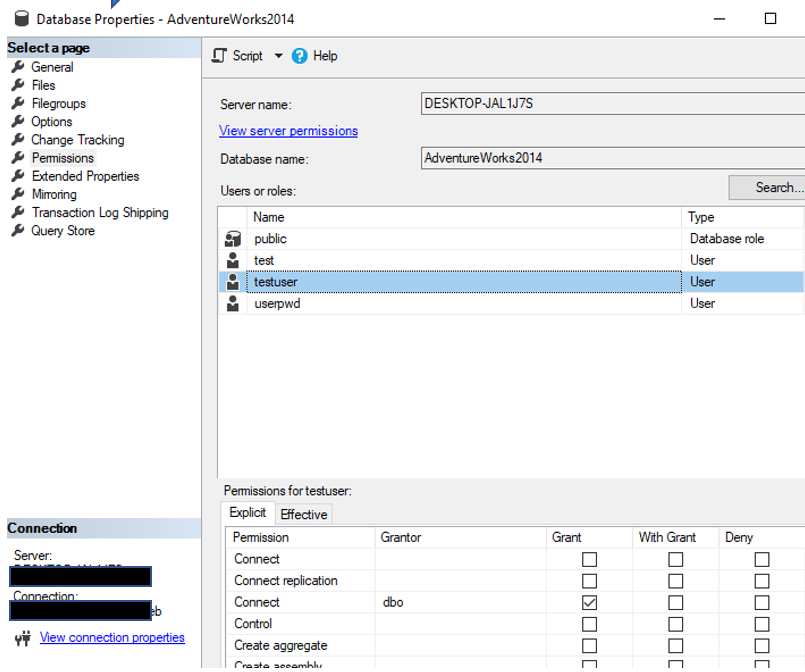
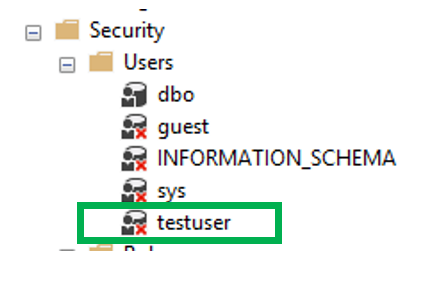 Once you grant the Connect permissions for the user account, the red “x” goes away and all should be good. Unless of course there are other issues.
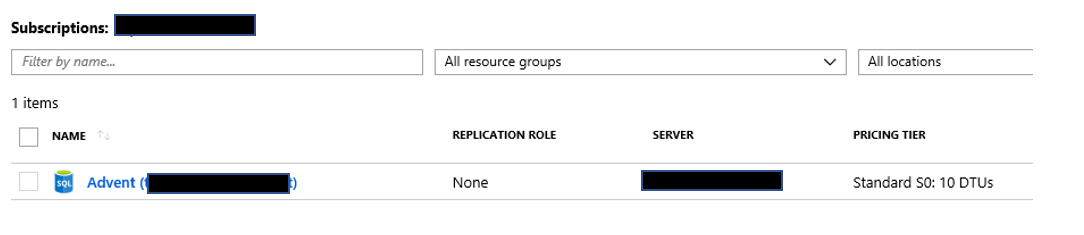 When you do, you will be taken to the administration page for the database. On the left side you will see the “Query editor” link. You will also notice that this is a feature that is still considered to be in preview.
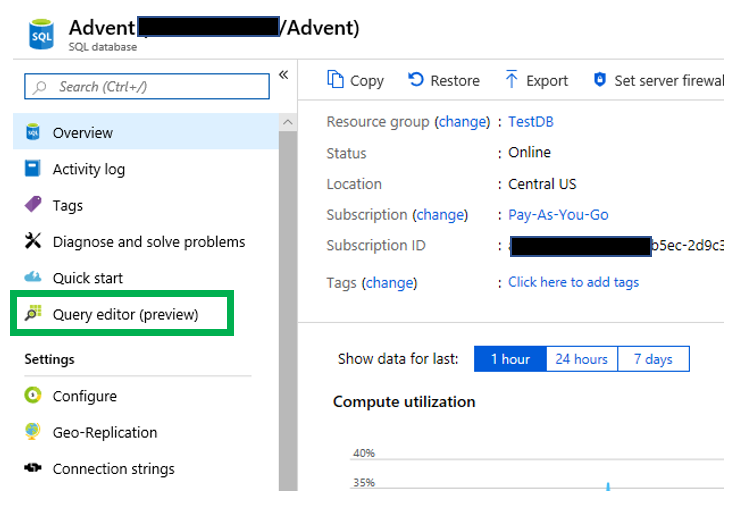 When I did a Google search on the Query editor in the Azure portal, I found posts from as far back as 2017. Despite that, I still wanted to complete a blog post on it. Once you click it, you will be taken to a login page similar to below.
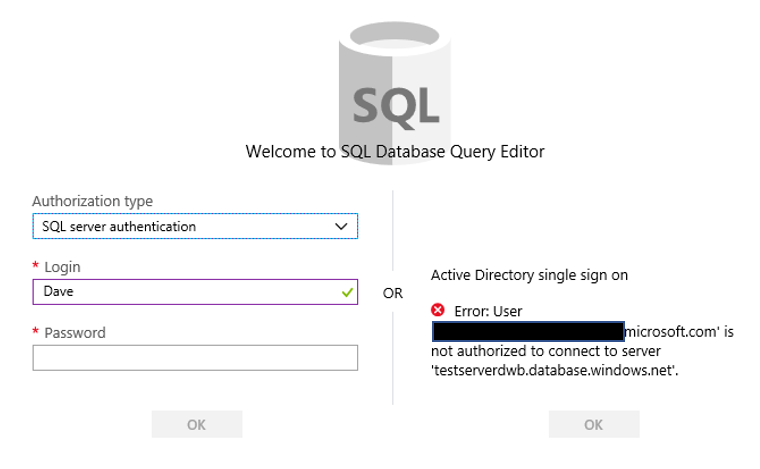 Notice on the right side there is the ability to utilize the Active Directory single sign on functionality, which I do not have. On the left you will enter the appropriate credentials to login to the database.
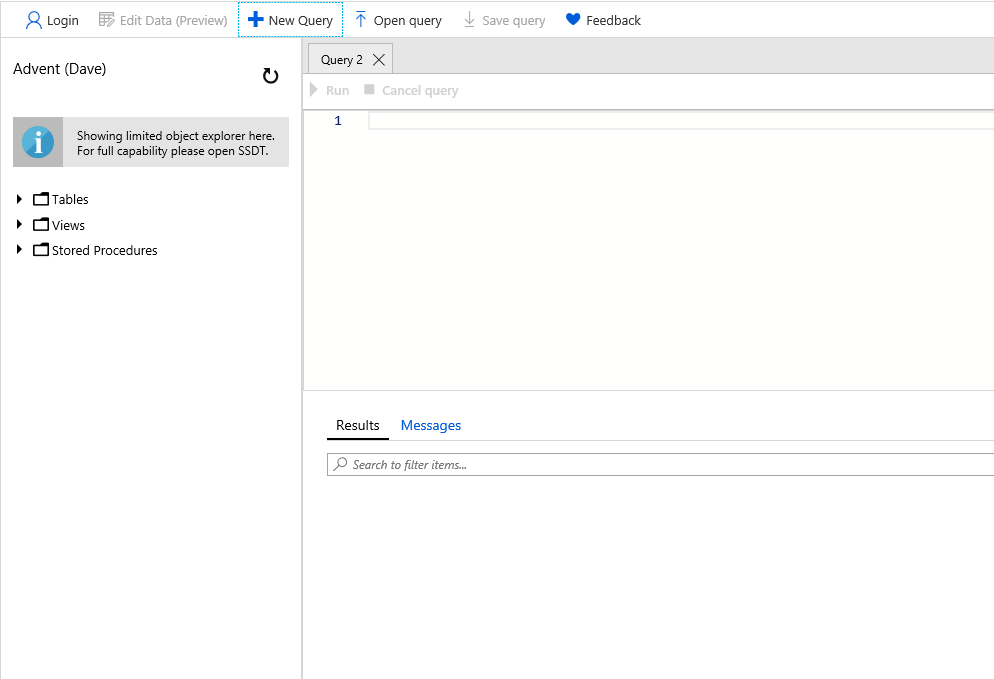
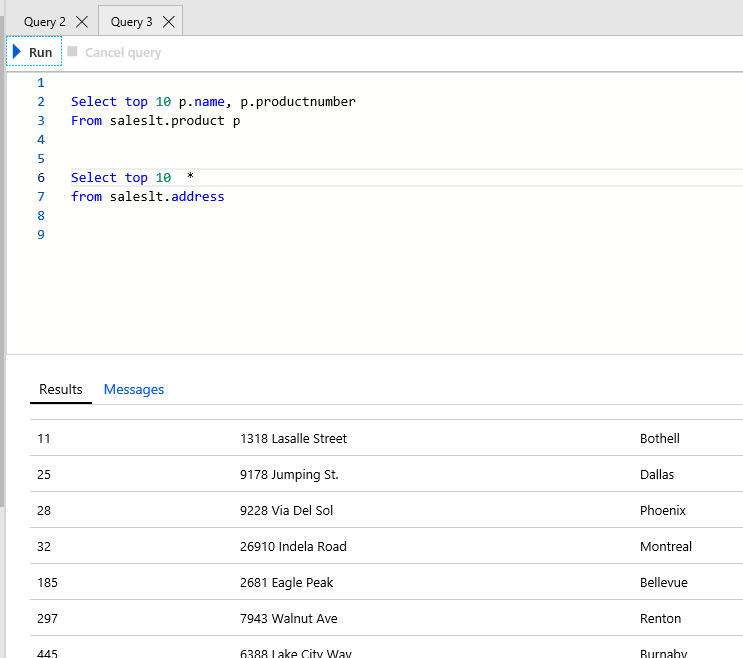
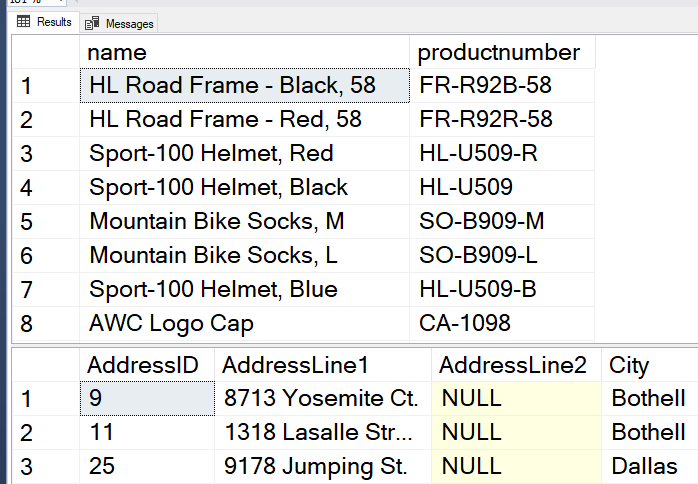
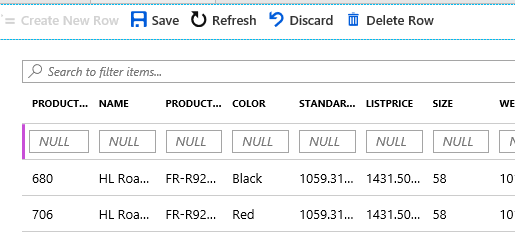 One option that is important to me is the ability to change the font size. I have NOT found out how to do this in Azure Query editor.
 Once you have your query as you like, all you have to do it click the Run button
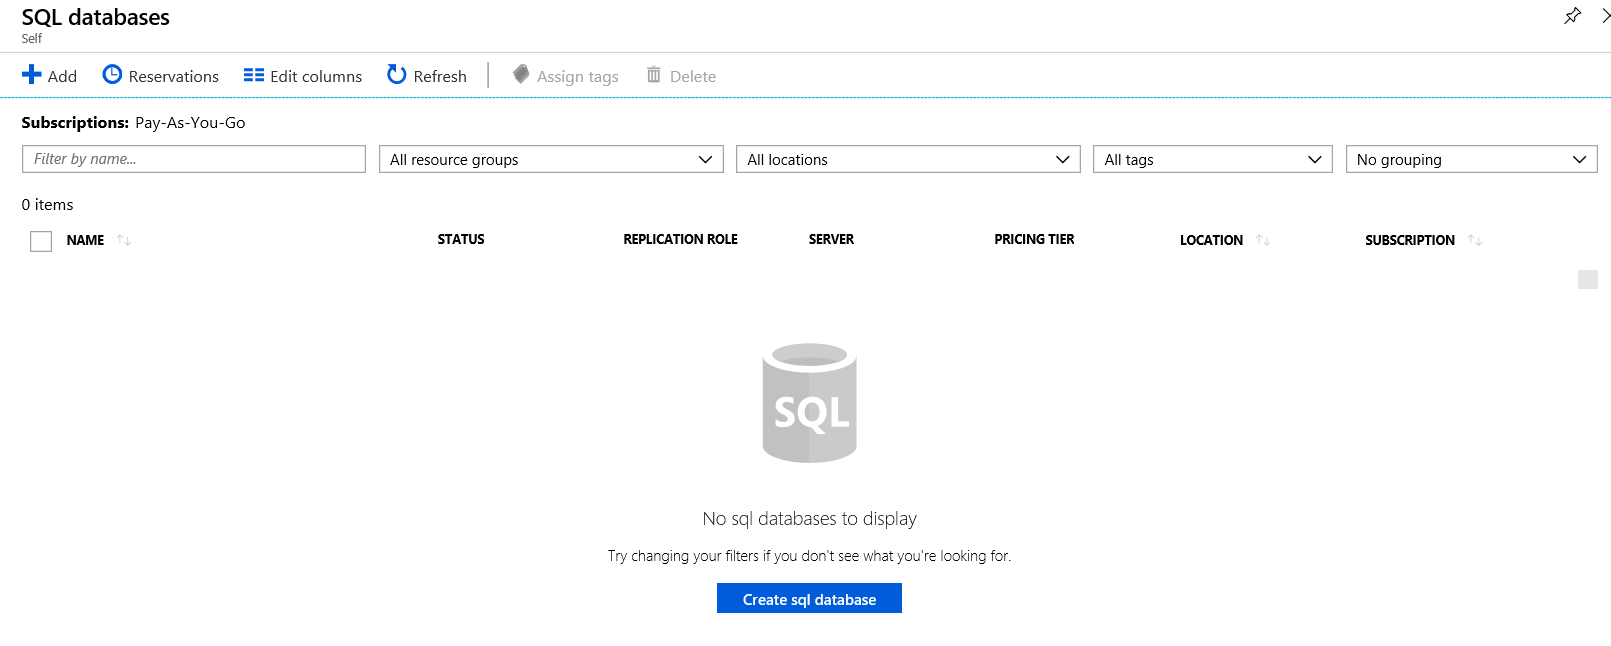
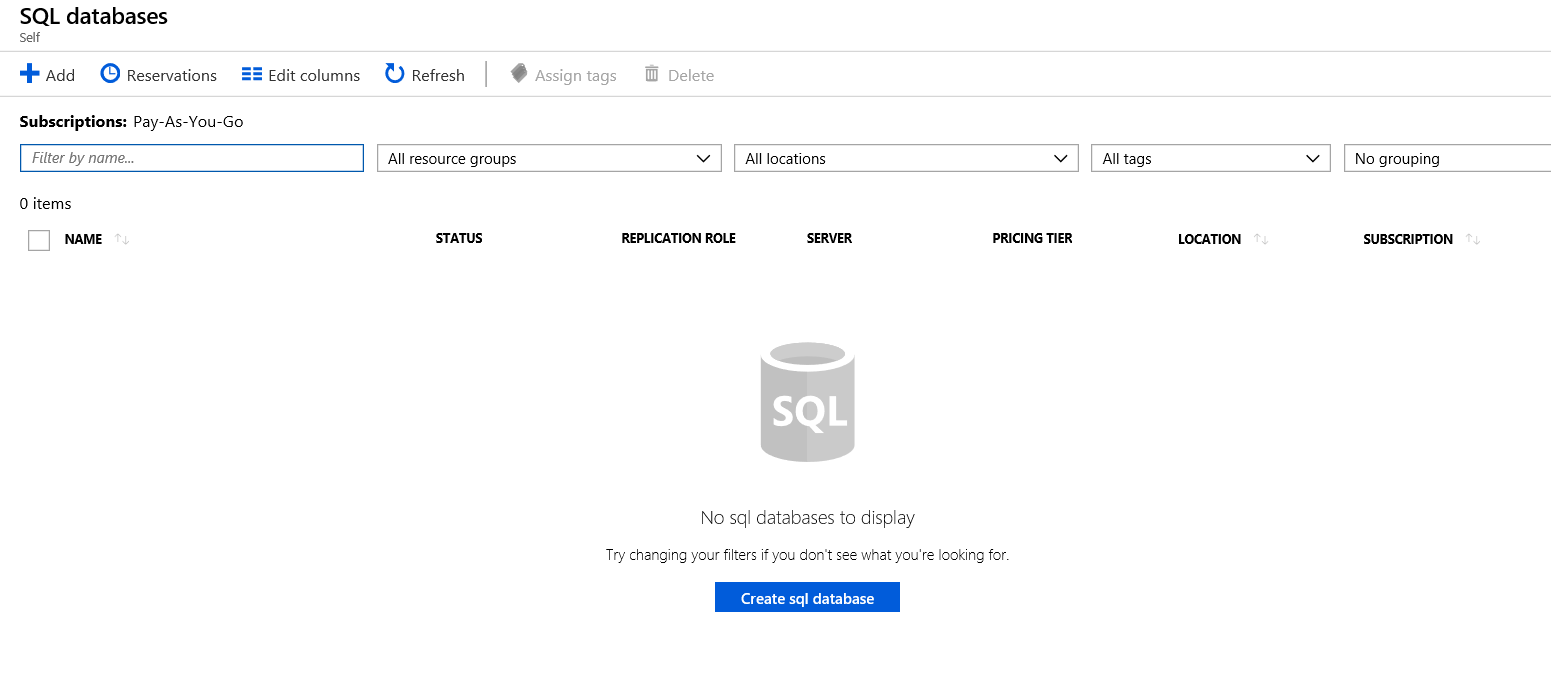 Before we move on, I would also like to point out that there are several methods to reach this page. Most notably is by using the menu item on the left. Then you will need to create the database, you can click the “SQL Databases” option. This will take you to the part of the portal that will allow you to create a database, as you see in the image above.
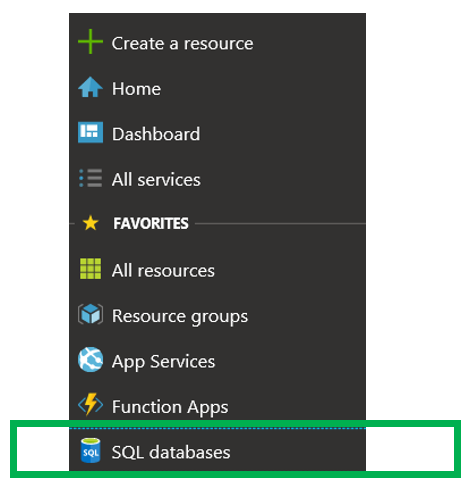
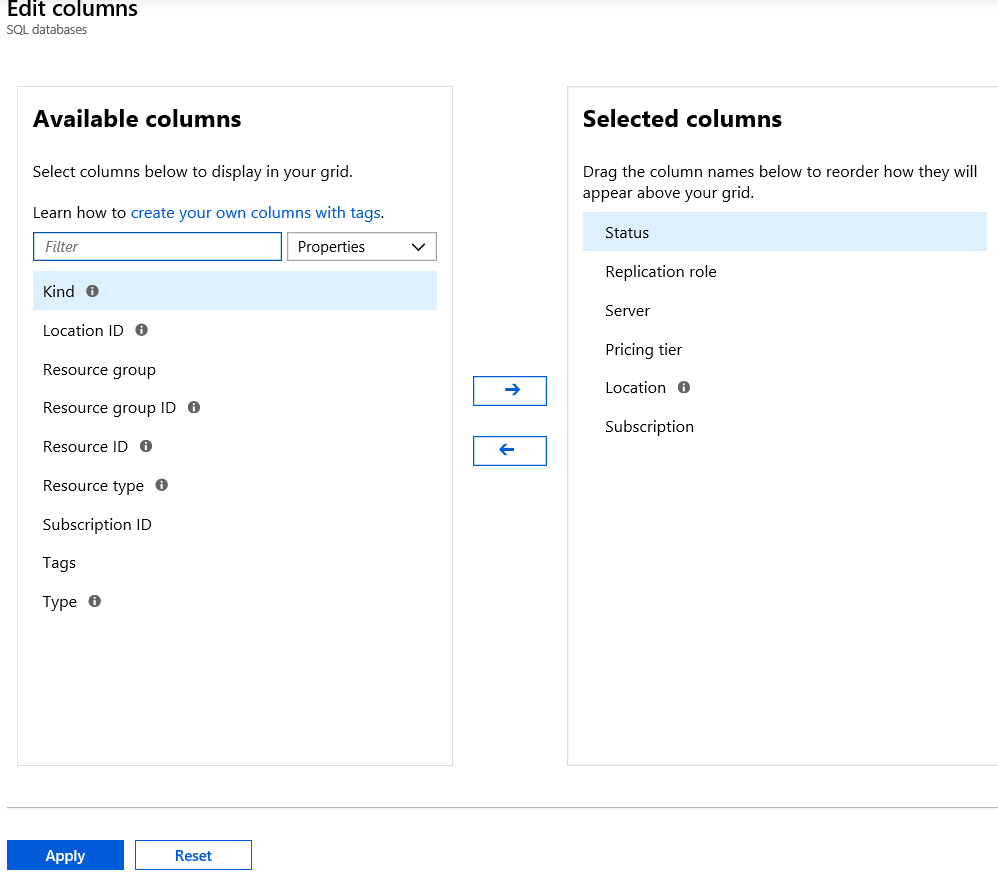
 You also have the ability to change the columns that you see in the list. You simple click “Edit Columns”. You can also click “Refresh” to see new items if they do not appear.
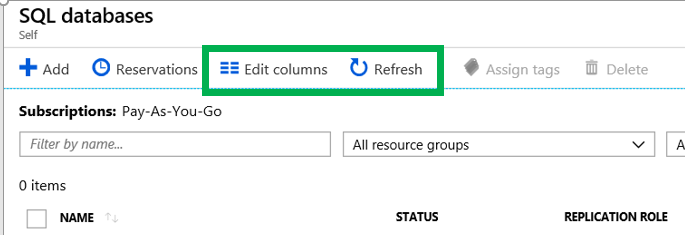

 If you violate one of the rules, Azure will tell you. Just as seen below.
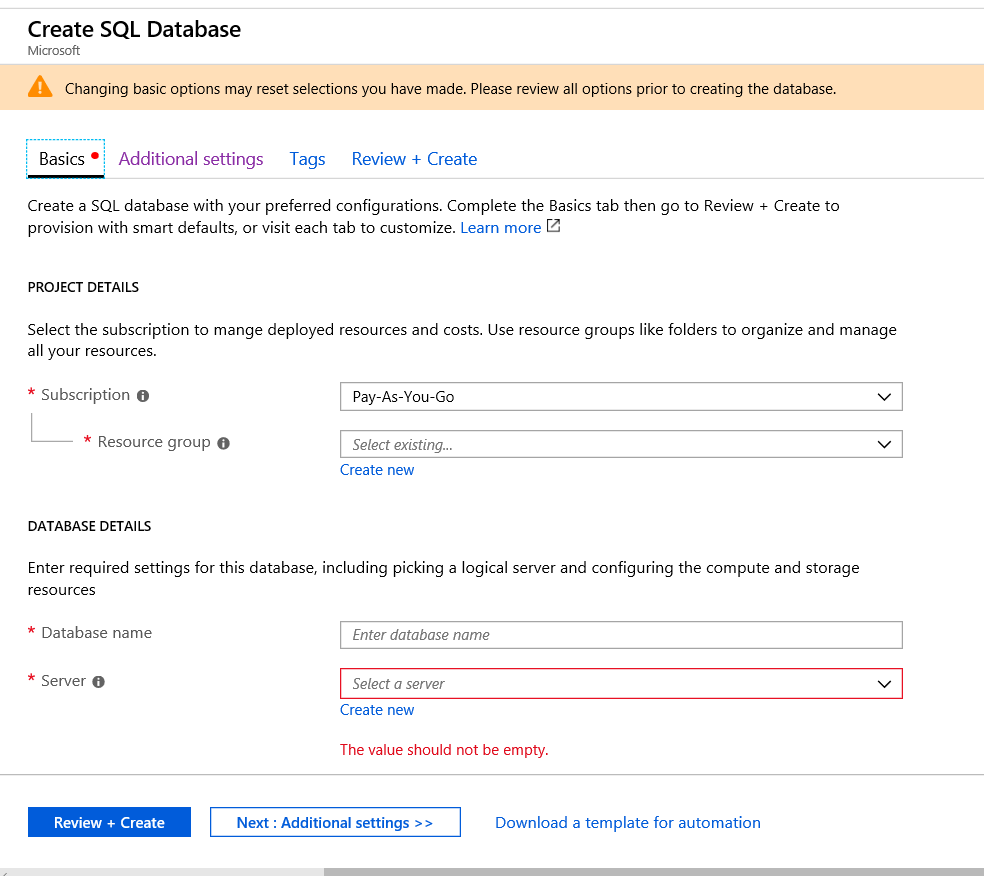
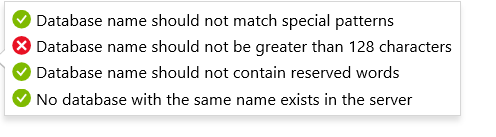 Now that we have provided a name for the database, the next step is to assign it to a server.
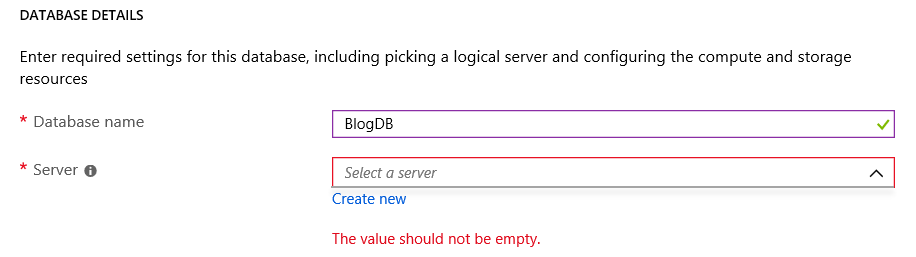 If you have not created a server yet, you can simply click the “Create New” link. A server for Azure SQL Database is a logical container for your SQL Databases and provides a centralized point for administration. Here is a link to Microsoft’s
 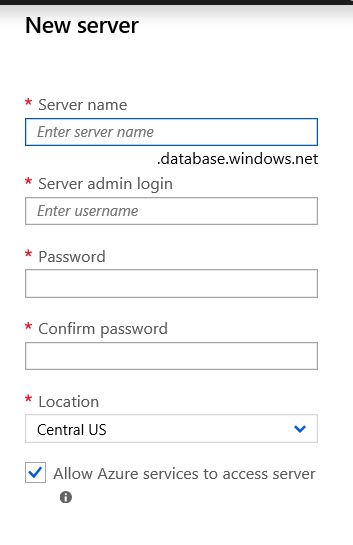 Once you have click the “Select” button and filled out all the information, it may look like you are done, but you are not. We need to provide additional information. By clicking on the “Additional Setting” item towards the bottom we will see the what else we need to provide.
 The first item we need to address is the Data Source. Here you have three options.
 The rest of the options are pretty straight forward, however should be carefully be reviewed before creating the database.
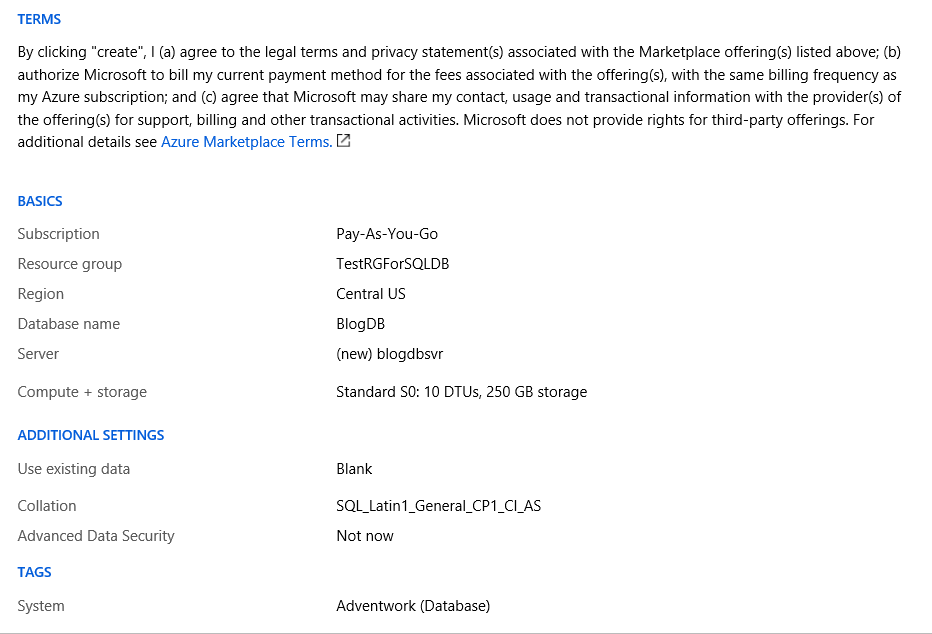
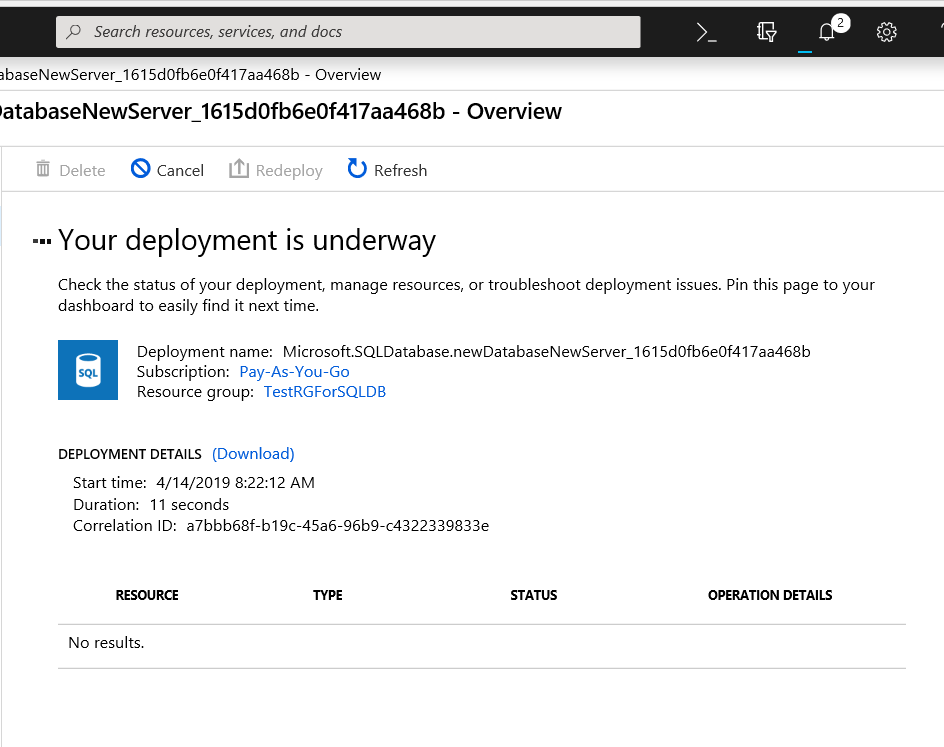 Once the deployment is complete, Azure will tell you as seen below.
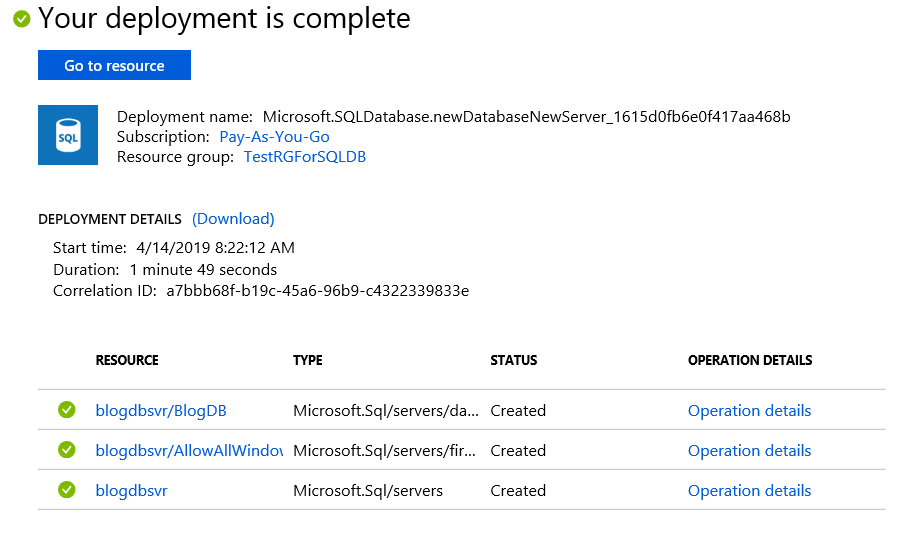
 Notice that our new database is listed.
 If you click the drop down arrow you will see this and the tags that was created. By clicking the box next to Adventwork, the list will only show items that have a tag of Adventwork.
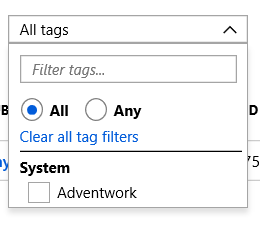 Connecting to the Database
 Once on the clipboard, it is time to open SSMS. You will connect just as if you were connecting to an On-Prem SQL Server using SQL Authentication.
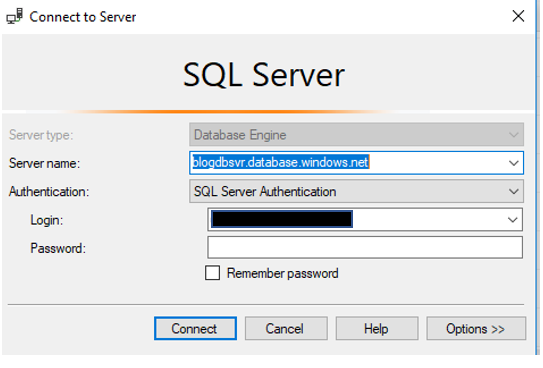 Once you enter a user name and password, you click Connect. This is where you will begin to see a few differences. You will be asked to login into your Azure account as well as a few screens about your IP address.
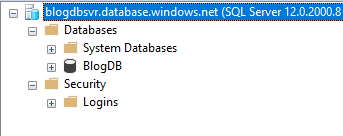
 Listing all the differences is outside the purpose of the post, however there is a lot of really good information available. I may cover some of these differences in future blog posts. Once you are in SSMS, you can do many of the same things you have done with an on-prem instance. Including creating objects, writing queries and working with security. Please keep in mind that there are some differences on how security is set up, however that is for another time.

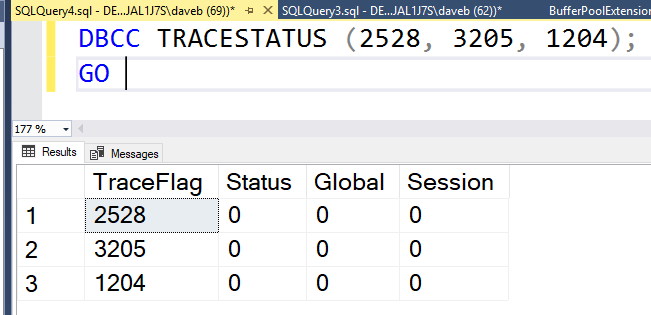
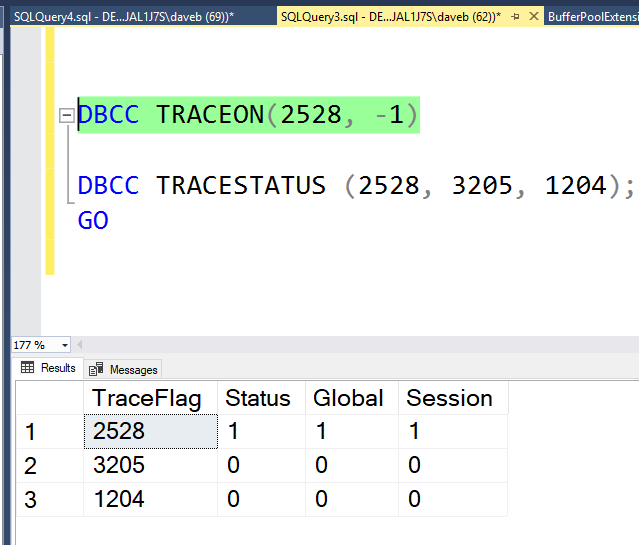
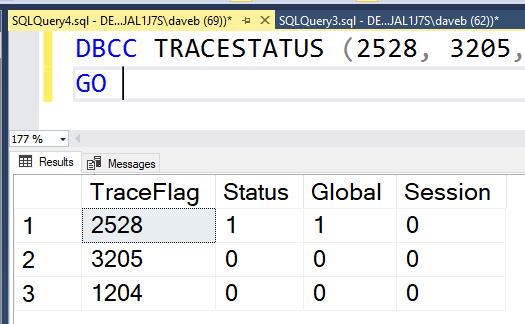
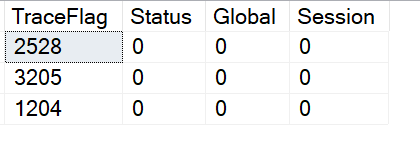 This brings us to the point of this post. The third and forth column of the result set, Global and Session. These columns identify if the trace flag is turned on globally or just for the current session.
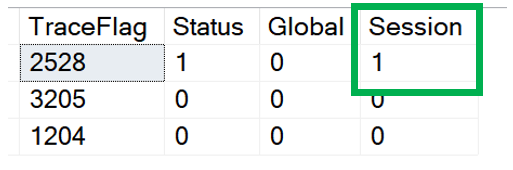 So what does it mean to when a trace flag is turned on just for a session? It means that the trace flag is only active for the current session and is not visible from other sessions. The image below show that 2528 is not active. The trace flag was enable for SPID 62 and can not be seen from session 69.