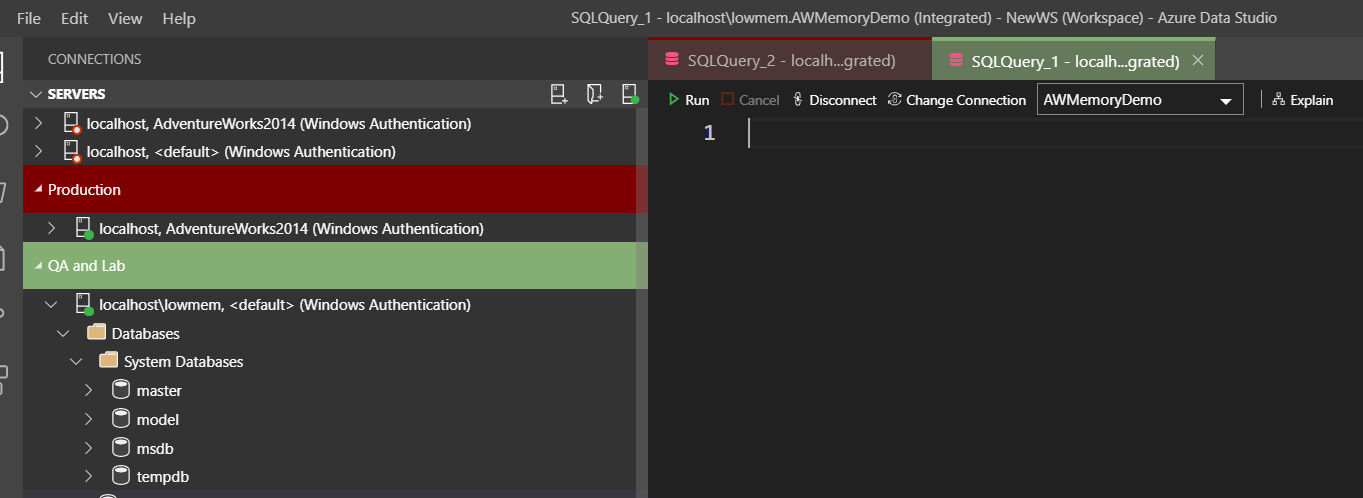
Have you ever been in an environment where you worked with both DEV\QA servers and Production servers? Of course you have, we all have. However, being in such an environment brings a certain level of risk. We all try to be very careful to run any code we are asked to run on the correct server and in the correct environment. Despite all of our checks and our Due diligence, we are still human and do make a mistake from time to time. Azure Data Studio has a nice feature that will allows us to change the color of tabs based on the environment the server is in. The image below is an example of what it would look like.
Setting this up can easily be done in two steps, creating Server Groups with different colors and changing the tab color property in Settings.
Create a New Server Group
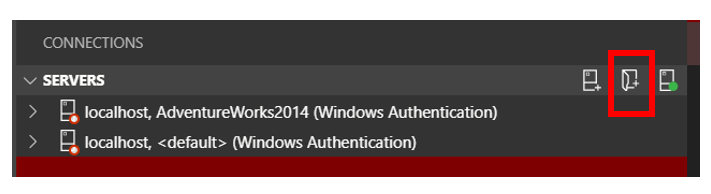
Creating a new server group is pretty easy. When in the servers window, float your cursor in the upper right corner and three buttons will appear. These buttons are, from left to right, New Connection, New Server Group and Show Active Connections. The middle one is the one we want.
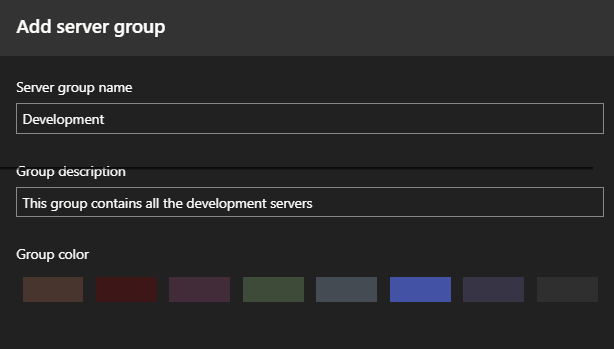
Once you do, a very simple window will open up. This window may appear on the right side of your screen, which is by default where it will appear. To create a group you only need three bits of information, the group name, group description and color.
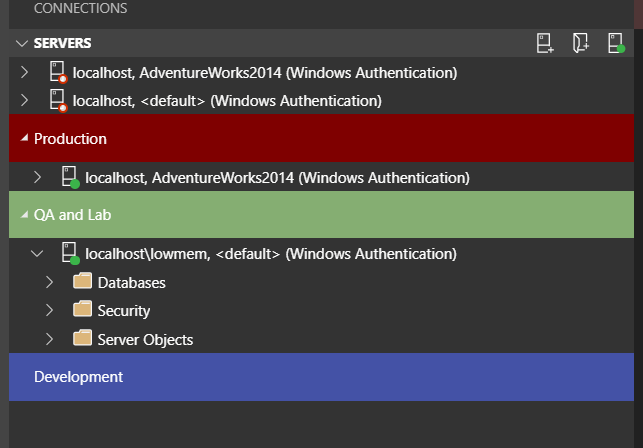
Once you click “OK”, you will now see your server group. You will see the description when you float your cursor over the group.
Now that we have our server group, it is time to add a connection to that group. This is pretty easy as well. When creating a new connection, one of the properties you will be asked to fill out, although not required, is the Server Group.

What about if it is an existing connection? This is even easier. When in the connections window, simply drag the connection to the group header that you want to move it to.
Tab Settings
Now that we have our groups, it is time to set Azure Data Studio up so the query tabs will match the group color, similar to the image below.

To do this we need to change a property. The property can easily be found by first going to Settings. This can be found under the File menu.
File —> Preferences —> Settings
Once there, do a search on “Tab Color” and the proper setting will be returned. The name of the setting is SQL: Tab Color Mode.
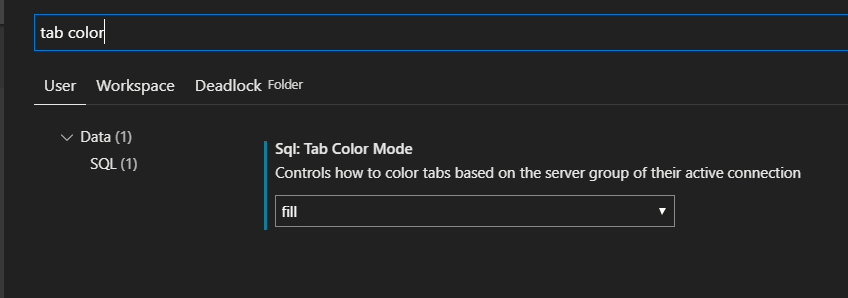
In the drop down box there are three options.
-
-
- Off
- Border
- Fill
-
Off is what it is…Off. Border will place a colored line that matches the group color. Fill turns the entire tab the color of the group. If you change the setting, you should restart Azure Data Studio.
This is what the Border setting will look like. Notice that there is a line across the top of the tab.
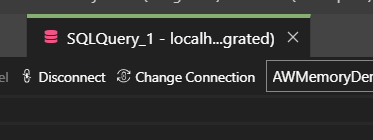
Now we have an additional check we can make to help us assure we are in the proper environment.
Thanks for visiting by blog!!!