We have all been using SQL Server Management Studio to query and manipulate data, even for an Azure SQL database. There is also an option to do this same thing built into the SQL Azure database interface in the Azure portal. Although there have been a number of posts related to this topic dating back a few years, this feature is still marked as “preview” in the Azure portal.
How to get to the Query Editor
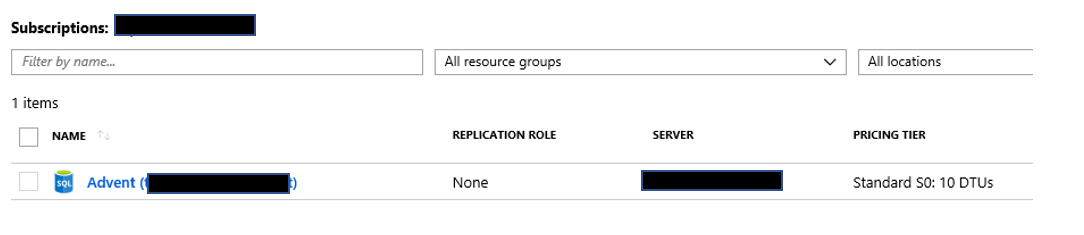
Once you are in the SQL Database list in the portal, find the database you would like to work with and click it.
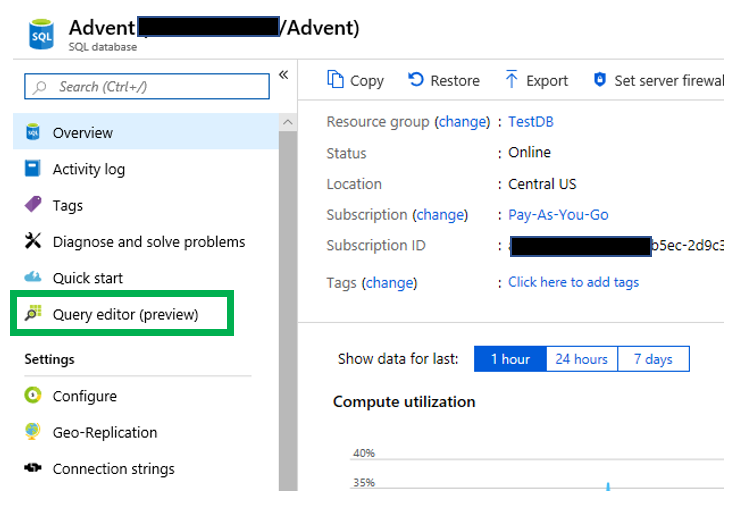
 When you do, you will be taken to the administration page for the database. On the left side you will see the “Query editor” link. You will also notice that this is a feature that is still considered to be in preview.
 When I did a Google search on the Query editor in the Azure portal, I found posts from as far back as 2017. Despite that, I still wanted to complete a blog post on it. Once you click it, you will be taken to a login page similar to below.
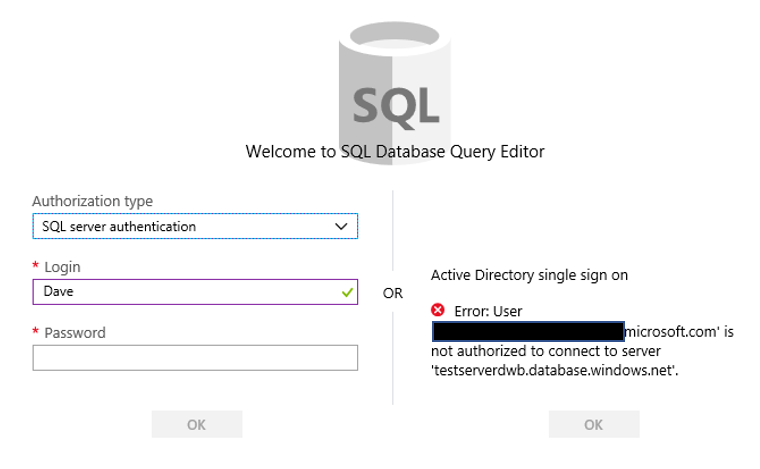 Notice on the right side there is the ability to utilize the Active Directory single sign on functionality, which I do not have. On the left you will enter the appropriate credentials to login to the database.
Once at the Query Editor
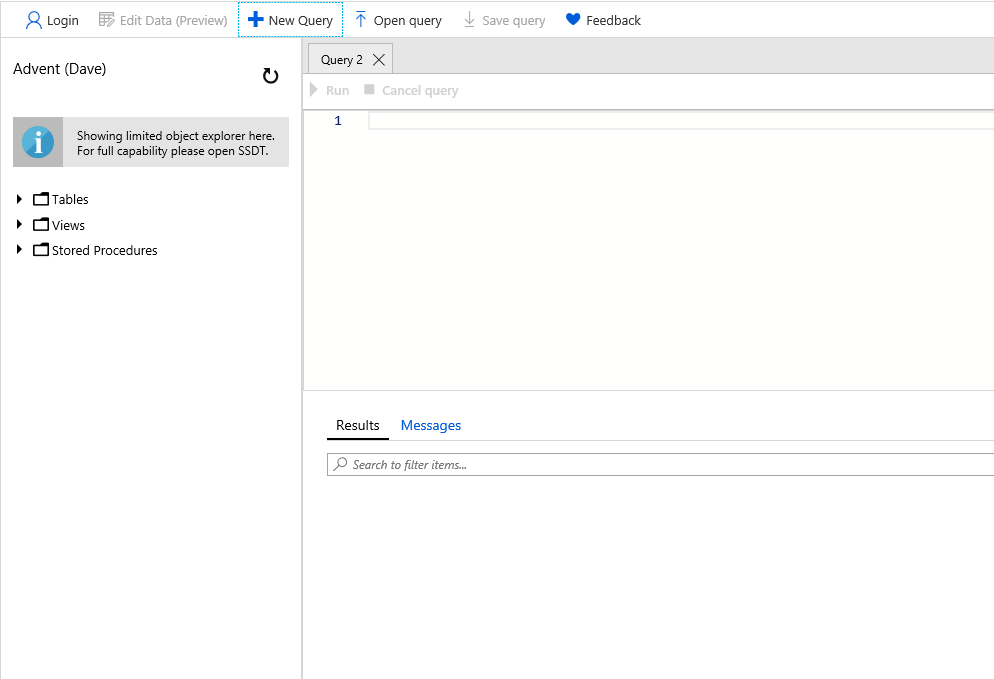
Once you are in the Query editor, you will notice many of the same features as SSMS.
These features include the following
-
-
- Tabs for new queries
- Open query
- Results pane
- Messages pain
- A condensed object explorer
- as well as many other features of SSMS
-
Below you will find a screenshot of the Query editor interface.
Menu Bar
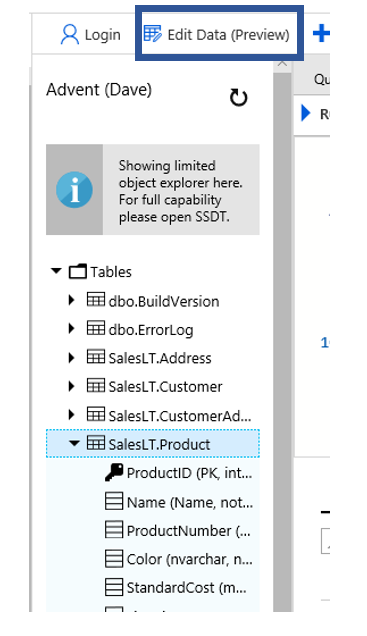
Starting with the menu bar across the top, you will find the expected buttons. In addition to the Open query, new query and save query buttons, there is also an Edit Data(Preview) button. This does as you expect it might, allows you to edit the data. Just like the Query editor, this is also a preview feature. There is also a Login button if you wish to use a different user.
Object Explorer
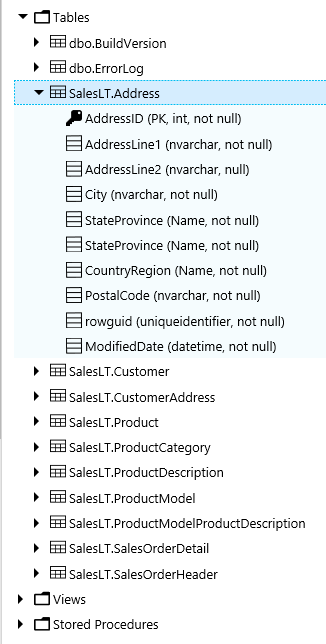
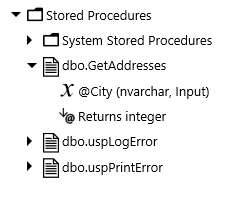
The Object explorer is very similar as that in SSMS, however there are some very glaring differences, mostly that there are fewer object types displays in Query editor. As you can see you can browse tables, views and stored procedures. As for the tables, you can see the column names and data types as well. For stored procedures, you are able to see the parameters just as the image below indicates.
In SSMS a user can right click on a stored procedure and execute it. In the Azure query editor, when you right click on an object you get nothing. The context menu does not appear, therefore not allowing you to execute the procedure. Of course you can still use T-SQL to execute a stored procedure.
Query Window
In many aspects the query window is very similar to that of SSMS. There are tabs across the top, the T-SQL pane, a results pane and a messages pane.
Starting with the T-SQL pane, there is color coding of the SQL, however it is slightly different than that of SSMS. First big difference is that there is not an option to change the size or color of the font.
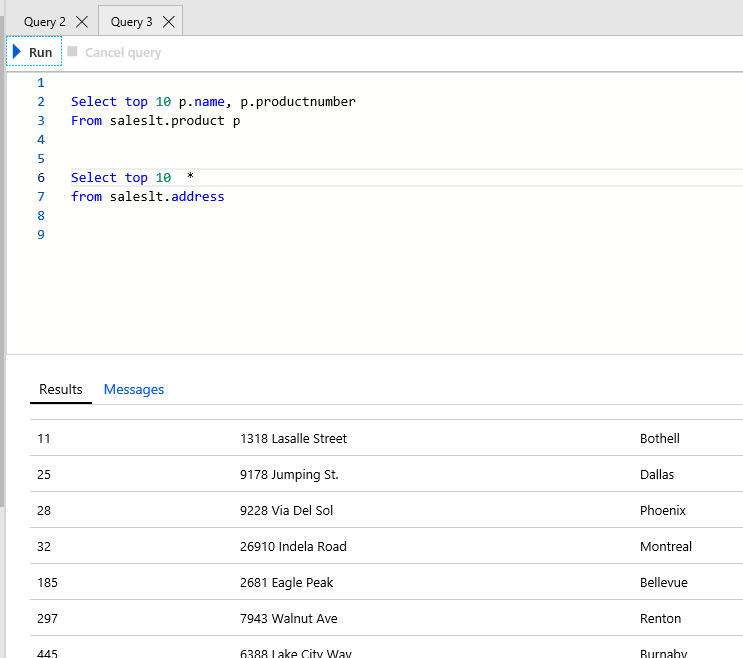
If SSMS if you execute two SELECT statements, like the ones below, the results are much different in Azure Query editor when compared to the same two queries in SSMS.
SELECT TOP 10 p.name
, p.productnumber
FROM saleslt.product p
SELECT TOP 10 *
FROM saleslt.address
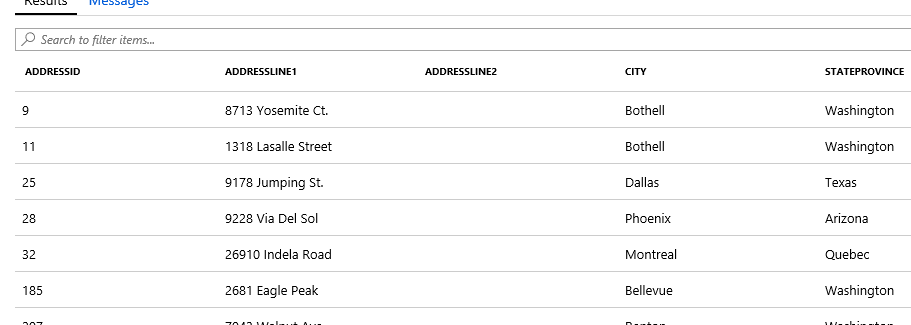
Here are the results when you run the code in SSMS. Notice that there are two data sets
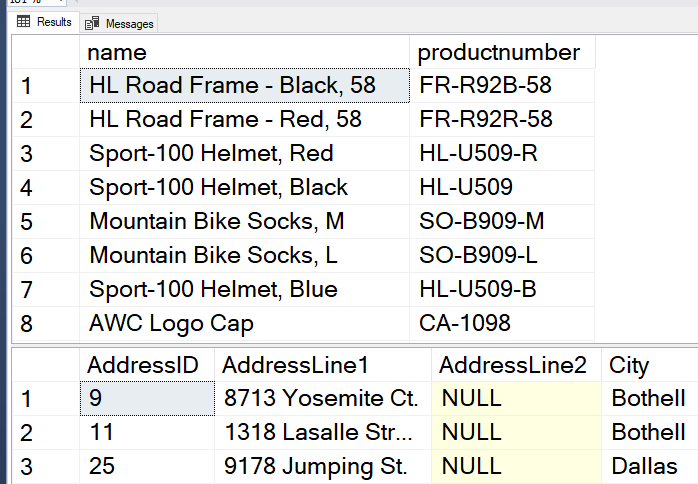
Now look what happens when I run the same queries as the Query editor, I only get one data set vs the two when executed in SSMS.
In SSMS, if you right click on a table you will see an option to Edit X number of rows. That options is very similar in Azure Query Editor. The way this is done in the portal is to click on a table and then click the “Edit Data (Preview)” button just to the right of the Login button.
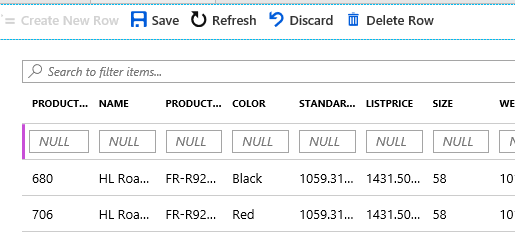
This will in turn, return the data in a grid that allows for editing data. You can just double click in a cell in the results set. This will change the cell to an editable version. The edit menu has just 5 buttons on it.
![]() The are:
The are:
-
-
-
- Create New Row
- Save
- Refresh
- Discard
- Delete row
-
-
When you click the new row button, the new row will appear in a different location that if you attempted to enter a new record use the grid results set in SSMS. The big difference here is that the new row will appear at the top of the grid.
 One option that is important to me is the ability to change the font size. I have NOT found out how to do this in Azure Query editor.
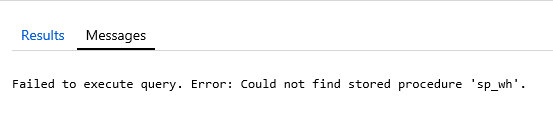
When you execute a statement and an error is returned. In SSMS this error is red, but default. In the Query editor it is black.
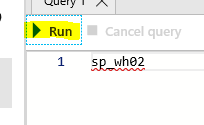
 Once you have your query as you like, all you have to do it click the Run button
Limitations
There are a number of limitations in the Query editor at this time. Since it is in preview, my hope is the Microsoft will address some of these deficiencies as the Query editor moves closer to having the preview label removed.
-
-
- Does not allow for the viewing of object definitions
- Limited objects in object explorer
- Tabs in the query window does not have the SPiD on it
- If more than one SELECT statement is executed in a batch, you will only see the results of the last one
- Cannot right click on a stored procedure to execute it
- No options such as display Actual Execution Plan
- Cannot drag and drop object names into the query
-
Despite all of the limitations, I still like it. Once you get used to the limitations it really isn’t that difficult to use. Since the name of the tool is Query Editor, it does make sense that it doesn’t have all the same functionality as SQL Server Management Studio. However, it would be nice to have some the items that are currently not included.
Thanks for stopping by and I hope you learned something small.