ADS: Why doesn’t the app ask to save anything when I close it?

Azure Data Studio has many great features and even more if you add all the extensions that are available.  Many extensions are very useful now, even though they are still in preview.  These features are naturally compared to SQL Server Management Studio.  One feature I like that sort of exists I SSMS is the auto save feature.  This feature will automatically save your files when you close Azure Data Studio and will be there the next time you use ADS.  SSMS has the auto recovery option, but is works a bit differently so it isn’t quite the same. ADS has a setting named “Files: Hot Exit”.

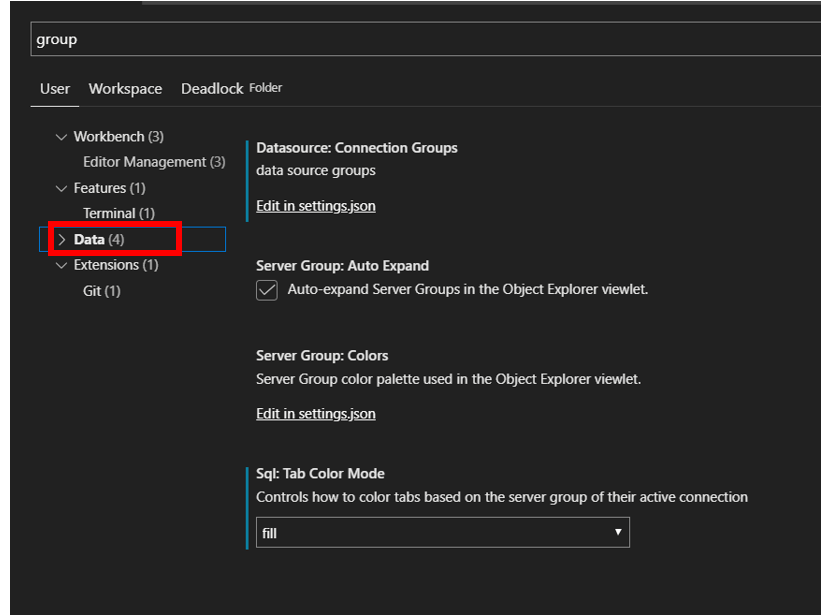
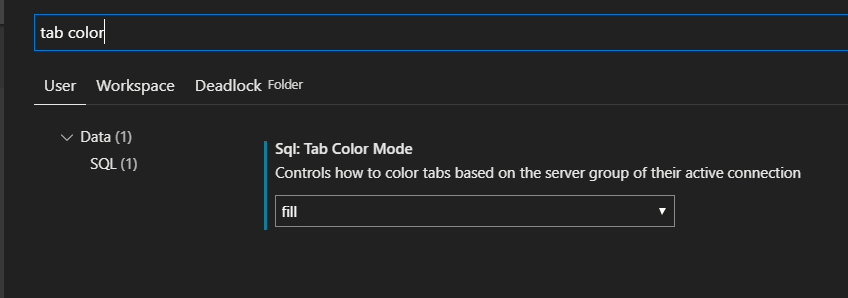
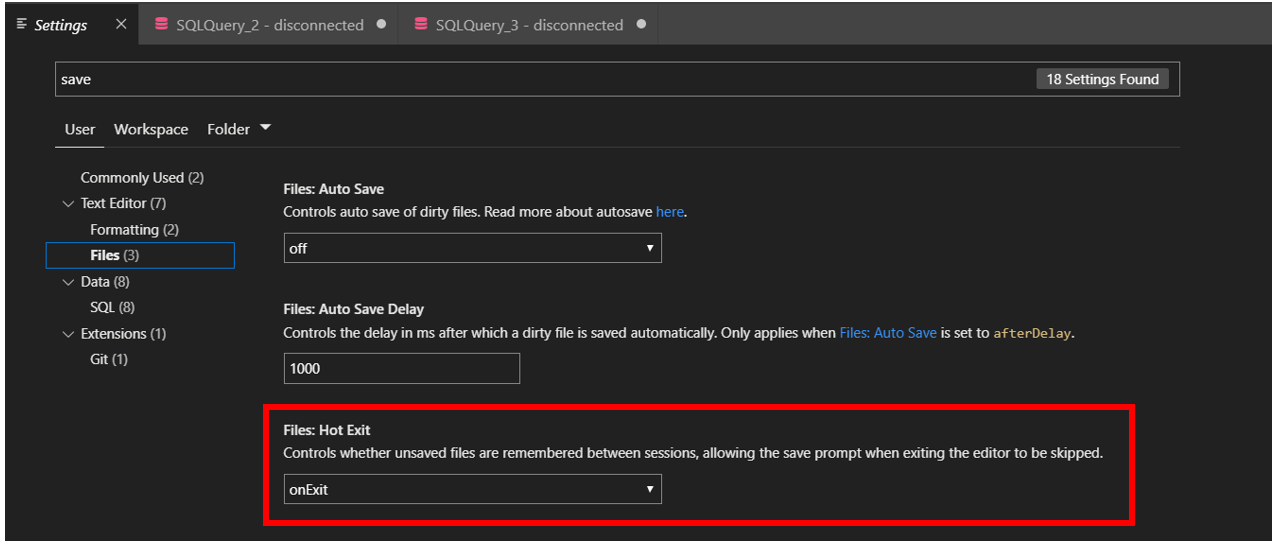
If you open Settings and then do a search on “save”, you will see a few settings returned.  The one we are looking for is under “Text Editor” then “Files”.  When you click files you will see the setting at the bottom.

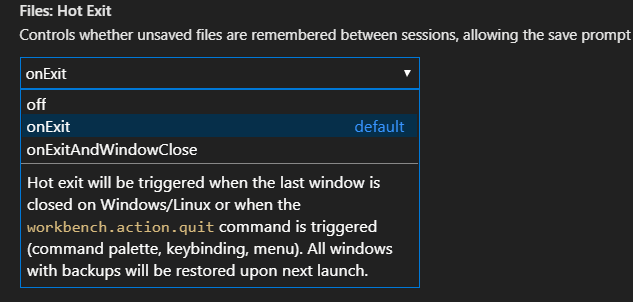
When you click the drop down box you will see three options, Off, onExit and onExitandWindowClose.  What I like about it is that as you float your cursor over each option, a description appears below it. As you can see below, onExit is the default option.

According to the documentation from Microsoft, these are the descriptions of the three options, these are directly from Microsoft here.

      • "off": Disable hot exit.
      • "onExit": Hot exit will be triggered when the application is closed, that is when the last window is closed on Windows/Linux or when the workbench.action.quit command is triggered (from the Command Palette, keyboard shortcut or menu). All windows with backups will be restored upon next launch.
      • "onExitAndWindowClose": Hot exit will be triggered when the application is closed, that is when the last window is closed on Windows/Linux or when the workbench.action.quit command is triggered (from the Command Palette, keyboard shortcut or menu), and also for any window with a folder opened regardless of whether it is the last window. All windows without folders opened will be restored upon next launch. To restore folder windows as they were before shutdown, set window.restoreWindows to all.

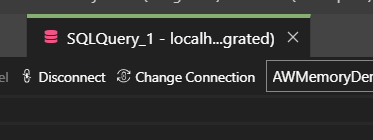
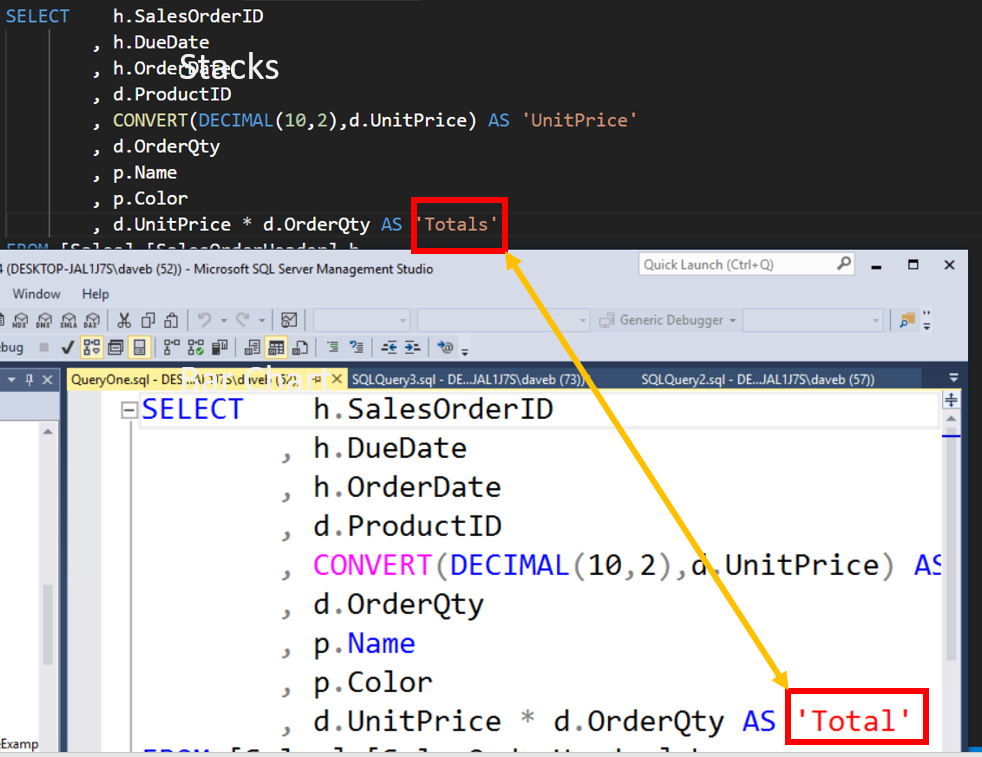
While this feature may give the perception that the changes were saved, in reality the file on disk has not changed at all.  The image below shows a change to the word “Total(s)”.  The top Totals is the word in Azure Data Studio after a change and after a close of the ADS.  The bottom one is from the file that was opened in SQL Server Management Studio, notice there is an “s”.  This shows that despite ADS persisting the change when ADS is restarted, but actual file was not changed.

I really like this option.  Not only will it “save” the files, but it will also save any text you have selected.  If you have a block a text selected and Azure Data Studio is closed, your text will also be selected when you restart Azure Data Studio.

This will not only save your files, but it will also save a number of other items that you may have open.

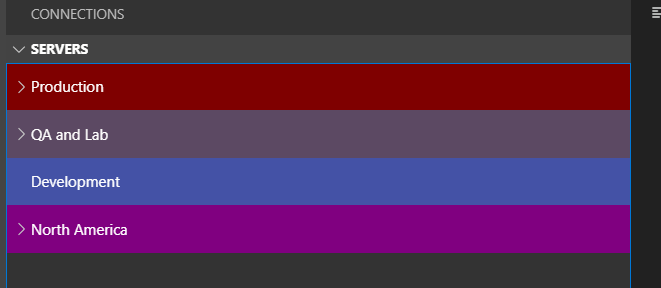
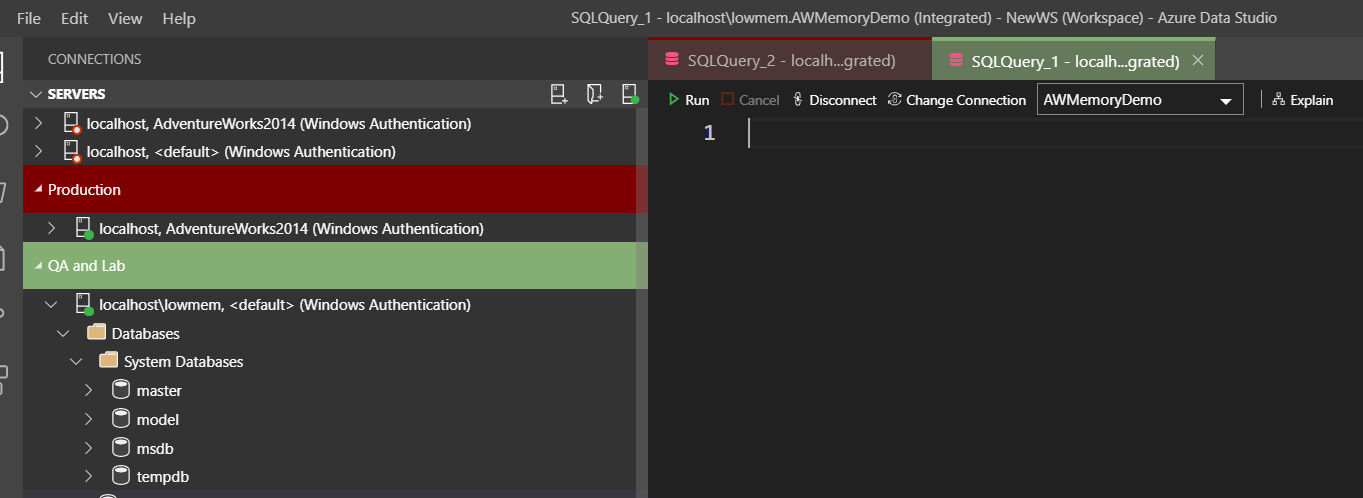
If you have the Settings open when ADS is closed, it will also be open when reopen ADS.  Although you may not be in the same place in Settings when you return.  If you have the connections window open, this will also be open when reopening ADS.  Like Settings, you may not be in the same place in Connections when I reopens.

Although there might be some Settings you might want to change, for me personally I don’t think this one should be on the list of things to change.

Thanks for visiting my blog!!!


ADS – AutoClose Database Setting

Recently when working with Azure Data Studio, I noticed something I hadn’t seen before. I noticed to the right of the database name the words “Auto Closed”, as in the image below.

Let’s take a quick second to go over exactly what Auto Close is and what it means.  Auto Close is a database level setting that can be set to either On or Off.  When this is set to On, SQL Server behaves slightly different.  SQL Server will open and close the database for each connection.  While this creates additional, usually unneeded overhead, this isn’t the only concern.  When Auto Close is set to ON, it will free up all the resources it is currently consuming, including the plans in the plan cache.

To turn this on or off, you will need to go to the settings of the database.

Having this is to ON, can cause a performance issues and more entries in the log.  Below is an example of what entries you may see in your log.

In the below image you can see the database that has been flagged as having been closed automatically.

This is something new in Azure Data Studio.  SQL Server Management studio does not display this, as shown in the image below.

Once you query a table, the “Auto Closed” message will go away.  The reason it will go away is because the database is no longer closed.

Now that we have covered what Auto Close is and how it will be displayed in Azure Data Studio, you might be wondering whether or not it should be turned ON.  The answer is NO…you should not turn this on.  I think Pinal Dave summed it up the best in the screenshot of something from one of his blog posts, the screenshot is below.  This is the link to this page.

In addition to what Pinal says, there many others that also recommend that this setting be turned OFF.  This post really wasn’t about the inner workings of the Auto Close setting, but I felt it was important to give a brief overview of what it is.  Read some of the other posts and make up your own mind, but keep in mind it is considered a best practice to leave this off.

Thanks for visiting my blog!!


ADS – Server Groups

Azure Data Studio has a ton of great features. Of course some I like more than others, but Server Groups is something I really like.  The team I am currently part of manages almost 200 production SQL Servers.  However we do find ourselves working on Dev and QA servers as well, greatly increasing the numbers of servers where could potentially work with.  This greatly increases the likelihood of making a mistake and running the code on the wrong server.   However, even with just a few servers, it would be nice to be able to group the connections to make it a bit easier.  Server Groups are not new, it has been in SQL Server Management Studio for quite some time.

Create a New Server Group

Creating a new server group is pretty easy.  When in the servers window, float your cursor in the upper right corner and three buttons will appear.  These buttons are, from left to right, New Connection, New Server Group and Show Active Connections.  The middle one is the one we want.

Once you do, a very simple window will open up.  This window may appear on the right side of your screen, which is by default where it will appear.  To create a group you only need three bits of information, the group name, group description and color.

Once you click “OK”, you will now see your server group.  You will see the description when you float your cursor over the group.

Now that we have our server group, it is time to add a connection to that group.  This is pretty easy as well.  When creating a new connection, one of the properties you will be asked to fill out, although not required, is the Server Group.

What if it is an existing connection I want to move to the new group?  This is even easier.  When in the connections window, simply drag the connection to the group header that you want to move it to.

Add a Server Connection to a Group

Now that we have the group, we can begin to add server connections to the group.  This can be done simply by right clicking on the group and then clicking, New Connection.  This will open the New Connection window with the server group already filled in.

If the connection already exists and would like to add it to the new group.  All you need to do is click and drag the connection to the header of the group.

Changing settings of an Existing Group

If you attempt to right click on a group, you will get three options.

      • New Connection
      • Edit Server group
      • Delete group

As mentioned earlier, the New connection will take you to the new connection window with the server group already filled in, although you can still change it if you like.

Edit Server group will take you to the same window that you used to create the group.  This allows you to change the Name, Description and color.

However, what if the setting I want to change isn’t in the list.  For this you will need to go to Settings.  This can be found under the File menu.

File —> Preferences —> Settings

When you are there, type group into the search box and a number of settings will appear. The ones we are looking for are under Data.  As highlighted below.

Notice there are four settings.  Of which, only two can be modified here.

Server Group: Auto Expand – will expand the server groups automatically

SQL: Tab Color Mode – This will change the color of the tab to the color of the server group it is in.  I complete another blog post on the details of how this works and how to change it.  The post can be found here.

That leaves Server Group: Colors and Data Source: Connection Groups.  These will need to be modified in a much different way.  These will involve editing the settings.json file.

The settings.json file can be found here:

C:\Users\daveb\AppData\Roaming\azuredatastudio\User

According to Microsoft’s web site the file can be found in this location:

%APPDATA%\azuredatastudio\User\settings.json

Although knowing the location is good, we really don’t need it.  Azure Data Studio provides a link that will open the file in ADS so we can modify it.

Reading the Json File

Let’s take a few minutes to go over how to read the json file.  While this is not a json post, knowing how to read what you see is important.  We will discuss only the two settings that are relevant to this post.  While reading this, please keep in mind I am not a json expert. Jim Dorame has a really nice SQL Saturday presentation titled “Json for the Data Mortals” that is very good.  He presented it at the SQL Saturday in Madison, WI this past year.  The presentation can be found here.  The image below is a screenshot of what you might see if you clicked either one of the links in the settings window.

If you look above, you will see these []. These define an array.  In this case the array is named: dataource.connectiongroups.  Under that you will begin to see these:{}.  These will define each object within the array. In this case there are four items.  Finally within each object you can find the properties.

Notice that each object has an ID as well as the ParentID.  The ParentID can be used to create a hierarchy of the server group.  This could be useful in many ways.  For example, you have a ton of SQL Servers, some in North America and some in Europe.  You could create a top level group named Produciton and then under that of two subgroups, North America and Europe.  Similar to what you see below.

Now let’s take a quick look at the Json.  In the image below, you will notice that the parentID for the North America object is the same as the ID for the Production object.  If you wanted to move the North America group to another top level group, you will need to find the ID of that new group and paste it into the ParentID setting of the North America group.  When you exit out of the settings.json file, you will be asked to save the file.  Of course you will want to save it.  If you do change it, keep in mind that the setting won’t take effect until Azure Data Studio is restarted.

Another property you may want to change is the group color.  When creating the server group, you only have a few options.

Well, what do I do if either I don’t like the colors or I have more groups that colors.  Again, this is where the settings.json file will come into play.

For each group you will see a color setting.  All you will need to do is find the hexadecimal number for the color you are wanting to use and place it into this property.  Here is a few good links, HTMLColors and Color-Hex.

Let’s say I wanted a group to be purple.  I could find the hex number, which is #800080 and paste it in the settings.json file as you can see below.

After restarting Azure Data Studio, this is what you will see, North America is now purple.

Now you have all the information to create groups to help you manage you servers.

Thanks for visiting my blog!!!


ADS – How to Mark a Tab as Production or QA

Have you ever been in an environment where you worked with both DEV\QA servers and Production servers?  Of course you have, we all have.  However, being in such an environment brings a certain level of risk.  We all try to be very careful to run any code we are asked to run on the correct server and in the correct environment.  Despite all of our checks and our Due diligence, we are still human and do make a mistake from time to time.  Azure Data Studio has a nice feature that will allows us to change the color of tabs based on the environment the server is in.  The image below is an example of what it would look like.

Setting this up can easily be done in two steps, creating Server Groups with different colors and changing the tab color property in Settings.

Create a New Server Group

Creating a new server group is pretty easy.  When in the servers window, float your cursor in the upper right corner and three buttons will appear.  These buttons are, from left to right, New Connection, New Server Group and Show Active Connections.  The middle one is the one we want.

Once you do, a very simple window will open up.  This window may appear on the right side of your screen, which is by default where it will appear.  To create a group you only need three bits of information, the group name, group description and color.

Once you click “OK”, you will now see your server group.  You will see the description when you float your cursor over the group.

Now that we have our server group, it is time to add a connection to that group.  This is pretty easy as well.  When creating a new connection, one of the properties you will be asked to fill out, although not required, is the Server Group.

What about if it is an existing connection?  This is even easier.  When in the connections window, simply drag the connection to the group header that you want to move it to.

Tab Settings

Now that we have our groups, it is time to set Azure Data Studio up so the query tabs will match the group color, similar to the image below.

To do this we need to change a property.  The property can easily be found by first going to Settings.  This can be found under the File menu.

File —> Preferences —> Settings

Once there, do a search on “Tab Color” and the proper setting will be returned.  The name of the setting is SQL: Tab Color Mode.

In the drop down box there are three options.

      •  Off
      • Border
      • Fill

Off is what it is…Off.  Border will place a colored line that matches the group color.  Fill turns the entire tab the color of the group.  If you change the setting, you should restart Azure Data Studio.

This is what the Border setting will look like.  Notice that there is a line across the top of the tab.

Now we have an additional check we can make to help us assure we are in the proper environment.

Thanks for visiting by blog!!!