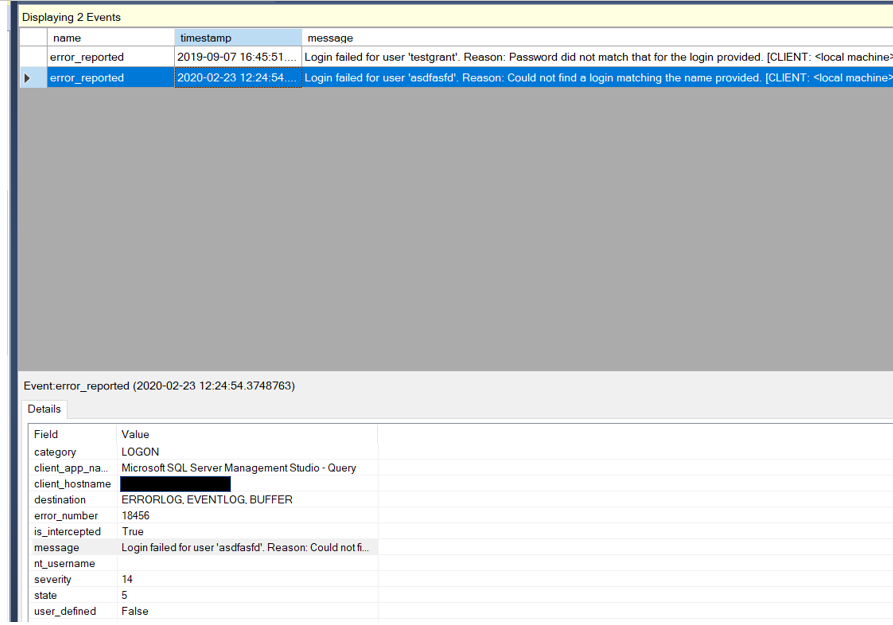
As many of you know, a data breach is a big deal. Not only do they place your customers at risk, a data breach can also have a very negative impact on the reputation of the company you work for. As a DBA, I teach my students that we are the last line of defense against a breach. I feel that an important part of protecting the data is to investigate failed logins. However, in order to investigate them, we need to find the failed logins first. You may be asking, if investigating failed logins is important, how did I find them? There are few methods we can use, including reading the log, SQL Server Audit and using Extended Events. We will cover each of these including how to set it up and read the data.
This will be a three part series covering each of the methods to capture failed logins.
Find Failed Logins Using Error Log
Find Failed Logins Using SQL Server Audit
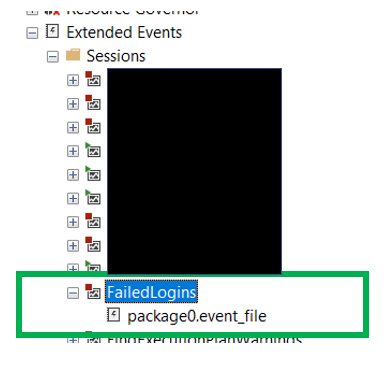
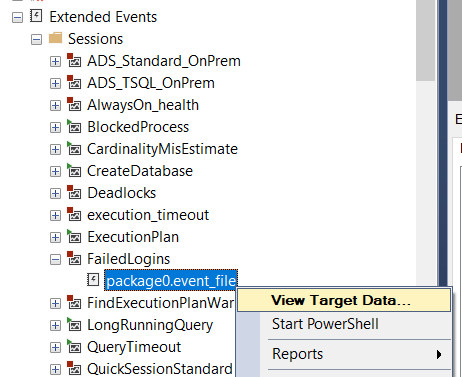
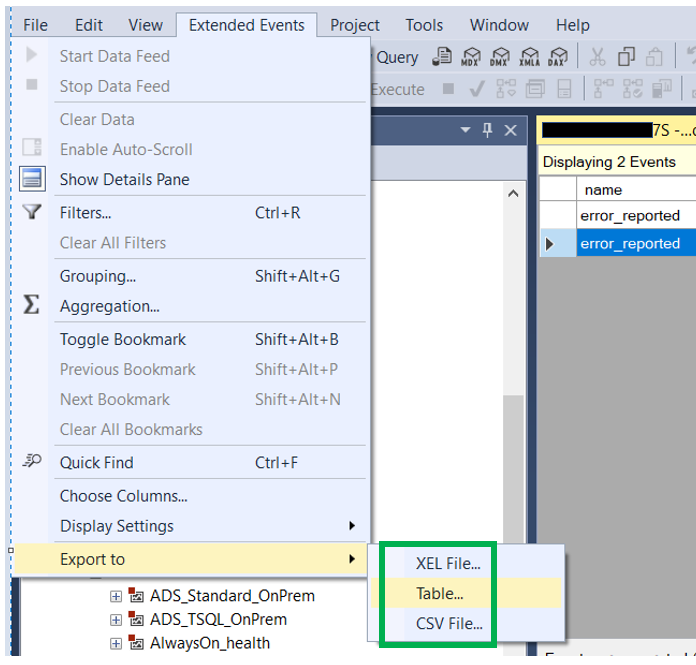
Find Failed Logins Using Extended Events
SQL Server Audit
While using the Error log to capture failed logins is configured by default, using SQL Server Audit is not and will need to be configured. Before we get too deep into how to configure audit, let’s go over a few of the basics.
SQL Server audit is broken up into two parts, Audit and Audit Specification. The Audit can be summarized as the place where are we are going to store the data. While the Audit Specification can be viewed as what we want to capture and to be stored in the Audit location.
To set up an audit…the first thing we need to set up in the Audit itself. This can be found under Security.
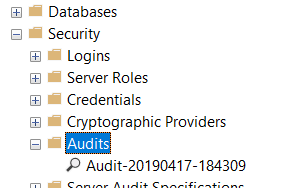
To create an audit all you need to do is right click on Audits and go to New Audit. When you do you will see something similar to what is below.
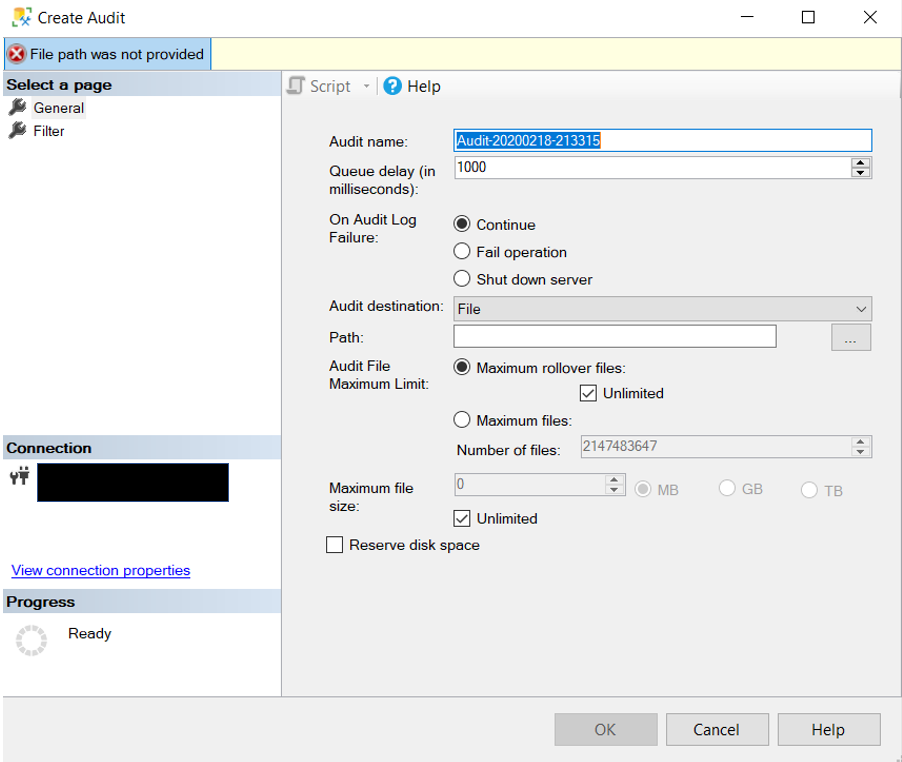
While this is not a post about how to create an audit there are few properties that I think are important to cover.
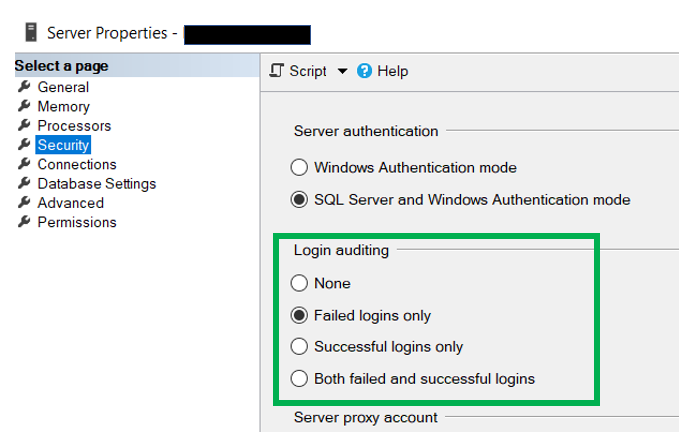
The first property is “On Audit Log on Failure”. Depending on your environment and audit requirements, you may need to shut the server down if the audit is not working properly. That is what this property is intended to do. As you can see there are three options. You will just need to set it to something that meets the needs of your company.
The next property is “Audit Destination”. As expected, this is where the data collected will be stored. You have three options here: file, Security Log and Application log. You will then need to pick a local of the files, assuming you picked File for the destination. Next you need pick the max number of files and files size. As well as a few other properties that are pretty straight forward. Once you have set everything, click OK and now you have your audit.
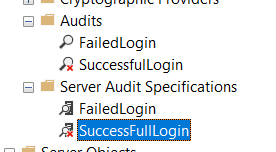
What you don’t have is the Audit Specification. There are two locations an Audit Specification can be set up. One is at the server level and the other is at the database level. In this case because we are looking for failed logins, we will need to utilize the server level audit specification.
The create an Audit Specification, simply right click on Audit Specification just below the Audit item.
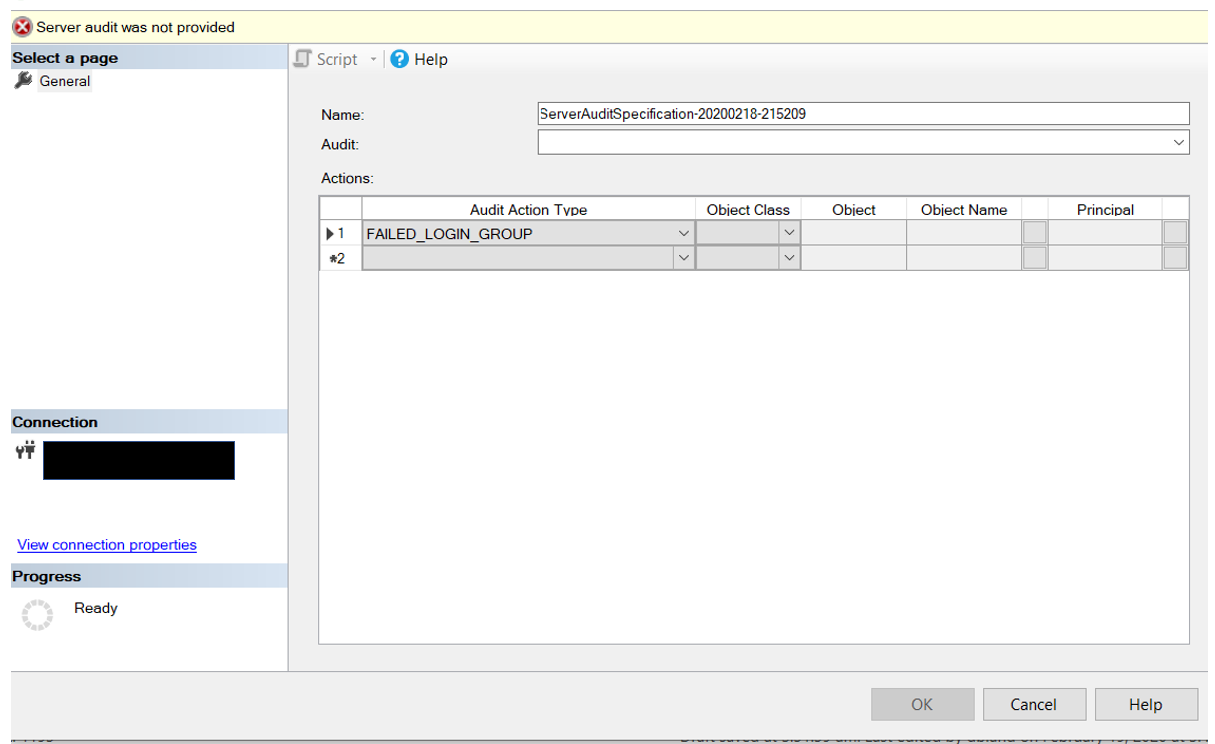
You will probably want to provide a more appropriate name and you will need to pick the Audit from the drop down box. Because of this, the Audit must be created before the Audit Specification.
Which brings us to the final piece of the pie so to speak. We need to identify what data we want to capture. For the purposes of this blog post, we are only looking for failed logins. Under the “Audit Action Type” you will need to pick “Failed_Login_Group”. Once you click OK…both the audit and audit specification have been created. You will need to check them though. When both an Audit and an Audit Specification are first created they are disabled. You will need to enable them by right clicking on them.
Once both the Audit and Audit Specification have been created. Before they will start collecting data, they will both need to be enabled. You can easily see in the image below how to tell if the Audit or Audit Specification are enabled or disabled.
Now to read the data we have collected. There are two methods that can be used to read audit data. The easiest was is to use SSMS and right click on the audit. Make sure you clicking on the Audit and not the Audit Specification. Remember, the data is stored in the Audit and the Audit Specification is used to identify what you want to capture.
When you right click on the Audit and go to “View Audit Logs”, you will see something like this. 
This is very much like the other log viewers we use on a regular basis, job history and Error logs. The data can be filtered, searched and exported.

This is a great way to view the audit data, however what if I want to automate that process so I can build alerts around it. Well can’t really do that using the above method. However, there is a function, sys.fn_get_audit_file, that you can use. Here is a link to Microsoft’s documentation, click here.
If you look at the documentation you will see that there are three arguments for this function. However for our purposes, we really only need to use the first one. In the sample below you will see that the we are indeed only using the first argument. The other two we just put the word Default in. As far as the filename, you can put a specific file name, however, if there is a file rollover, the code will not work. Notice I placed the start of the file name and then and asterisk. In this case we will read from all files in the C:\Test location that start with “FailedLogin” and have a file extension of .sqlaudit.
sys.fn_get_audit_file (‘C:\Test\FailedLogin*.sqlaudit’,default,default)
Below is a more complete sample script. While the function returns many more columns, these are the ones I think we need. Notice the where clause is looking for an action_is that equals LGIF. This will be useful if you use the same audit to collect more than just failed logins.
SELECT event_time
, action_id
, succeeded
, server_principal_name
, server_instance_name
, statement
, file_name
, application_name
FROM sys.fn_get_audit_file (‘C:\Test\FailedLogin*.sqlaudit’, default, default)
WHERE action_id = ‘LGIF’
ORDER BY event_time DESC
The code below looks for failed logins using the SA account for the past hour.
SELECT server_principal_name
, COUNT(server_principal_name) AS ‘NumberOfFailedLogins’
FROM sys.fn_get_audit_file (‘C:\Test\FailedLogin*.sqlaudit’,default,default)
WHERE action_id = ‘LGIF’
AND server_principal_name = ‘sa’
AND event_time > DATEADD(HOUR, -1, GETDATE())
GROUP BY server_principal_name
Of course you will need to change the path to the file that matches yours. If you are using an Azure SQLDB, audit as defined above is not an option.
Thanks for visiting my blog!!