I recently downloaded and installed Azure Data Studio and so far it looks pretty good. As I learn more about it I blog about the features and what is different from SQL Server Management Studio. Azure Data Studio is a free offering by Microsoft and the install is very simple.
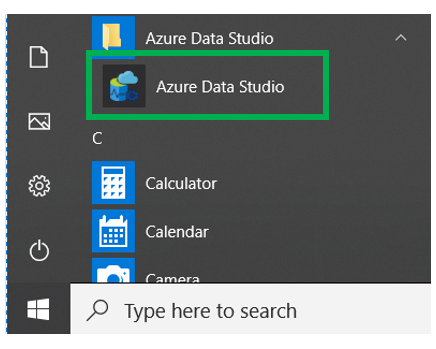
Once installed, you will find the menu item in a slightly differently location. You will not find it under any of the SQL Server related groupings. As you can see below, there is a new menu grouping, “Azure Data Studio”. Under this is where you can find the menu item to launch the application.
Once you open Azure Data Studio obviously you do not have a connection to any data source. At this point you will asked to establish a connection.
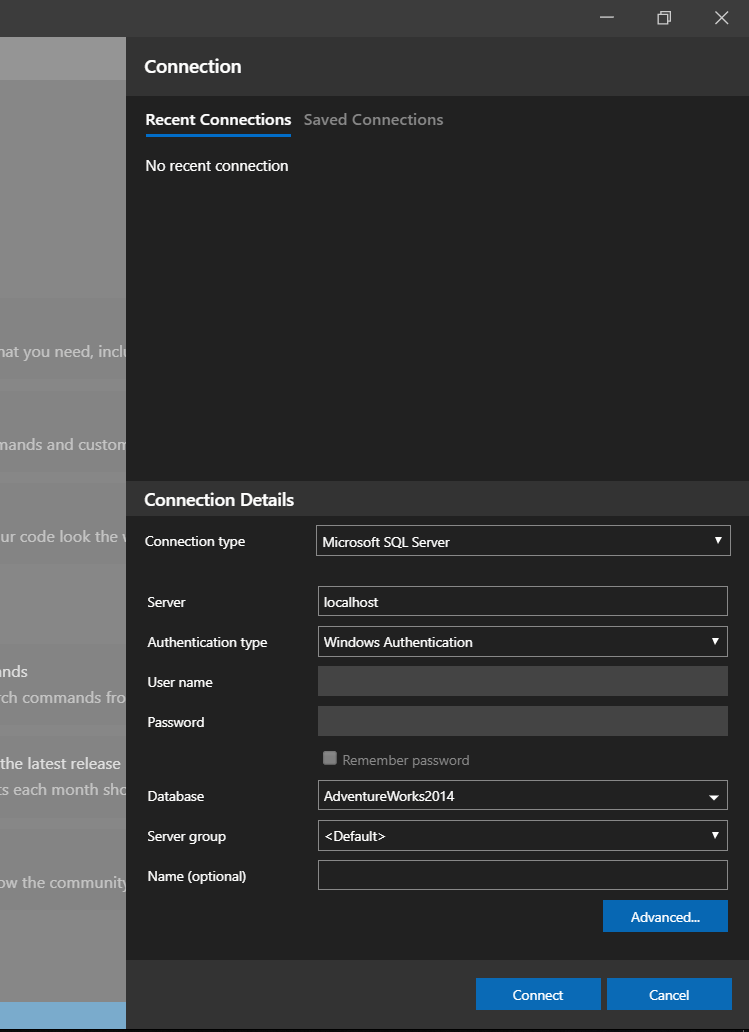
You are asked to provide much of the same information you would in SSMS. This includes server name, type of authentication and well as the database. You can also provide a Server Group if you like. This provides nothing more than a logical grouping of servers for easier management.
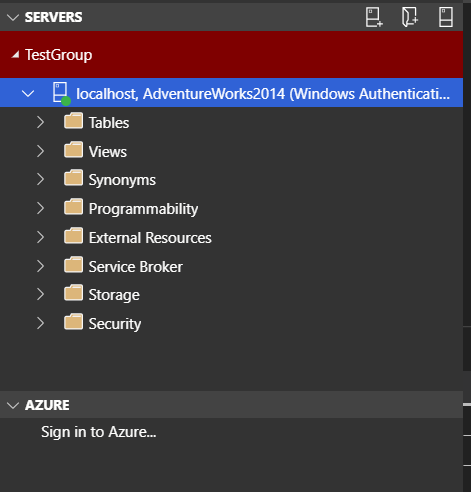
Once you connect you will then see the dashboard, similar to below. Here you are able to confirm the connection information, see a list of all the objects in the database,
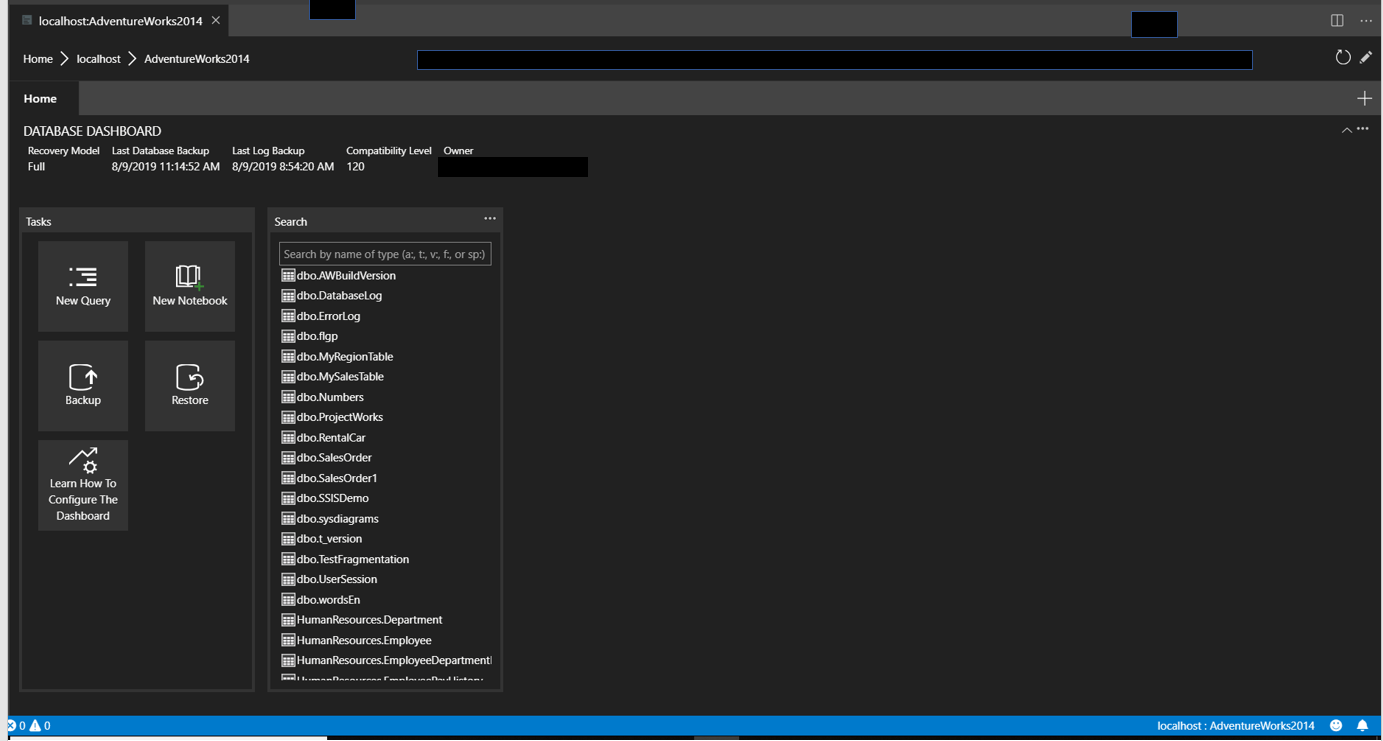
Here you will see a list of all the objects in the database. You will also see that there are widgets. The default widgets are to perform such tasks as database backup, database restore, new query and new notebook. The first three of these have been around for years. What might be new to some is the notebook. We will get into that later in this post. This dashboard also includes information about the connection including the compatibility level of the database.
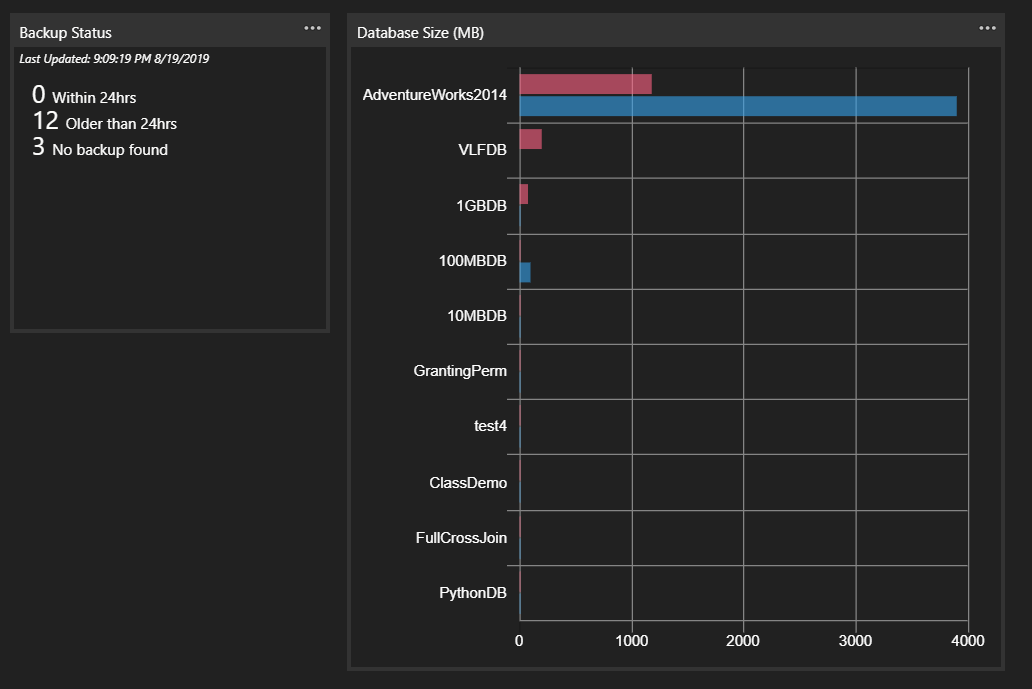
If you click the server name in the breadcrumbs across the top as below. You will see a few widgets that apply to the server level.

As in the screenshot below, you can see the backup status of all the databases and the currently size.
If you click the upper left corner of the backup status, the current state of all the databases will be returned.
One of the biggest reasons of why we might be using Azure Data Studio is to read data. This is very similar to SQL Server Management Studio. Click the “New Query” item on the dashboard or New Query under the File menu. When you do it is similar to SSMS. There are tabs across the top and you can also change databases. Both of these are the same as SSMS, although the database list is in a slightly different location. You will see the connect\disconnect button and change connection. These do exactly as you would expect them to do.
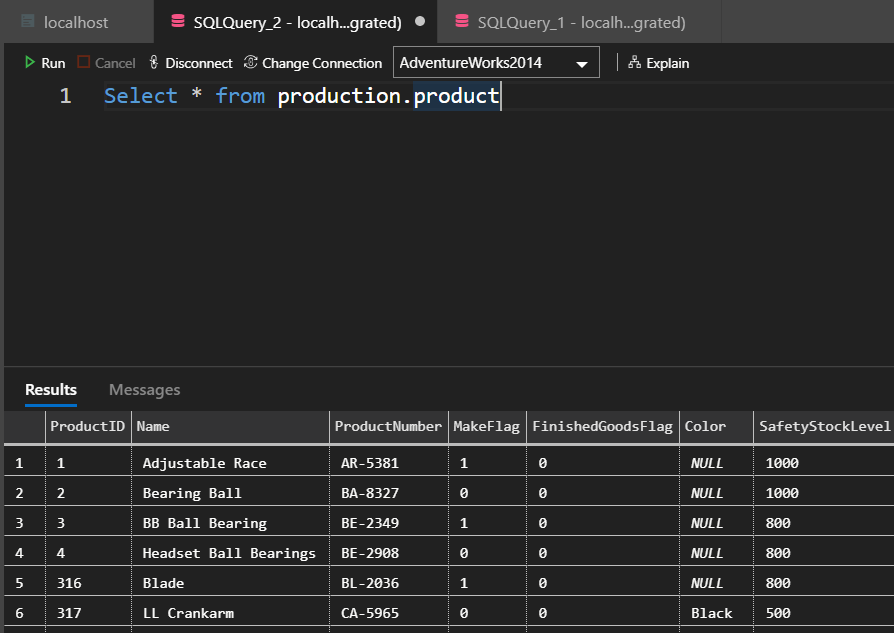
Results and Messages are still there, just as in SSMS. Now let’s take a quick look a few of the things that are different than SSMS. The most obvious difference is the “Explain” button. This will simply return the estimated execution plan of the query you are looking to run.
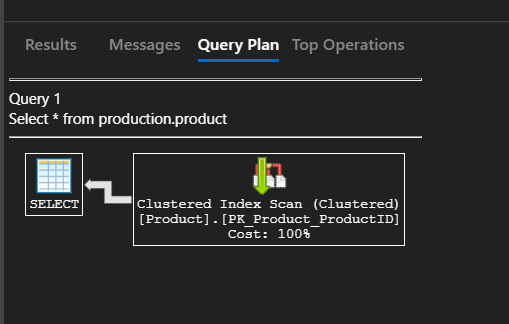
When you click the “Explain” button you will see what is above. The query plan and messages as well as the Top Operators. The image below is what you will see on the Top Operators tab.

You might think that the results table would have results in it. The answer is yes and no. It does return results, just not data. You will find the XML of the Execution Plan. If you click it, a new tab will open with the XML in it.
Another item that is different is on the far right of the results tab, as below.
The top four buttons are to save the data. In order, they are for CSV, Excel, Json and XML. The bottom two are for visualizing the data using charts.
Now we will move to the upper right corner. The icon in the box below is for connections.
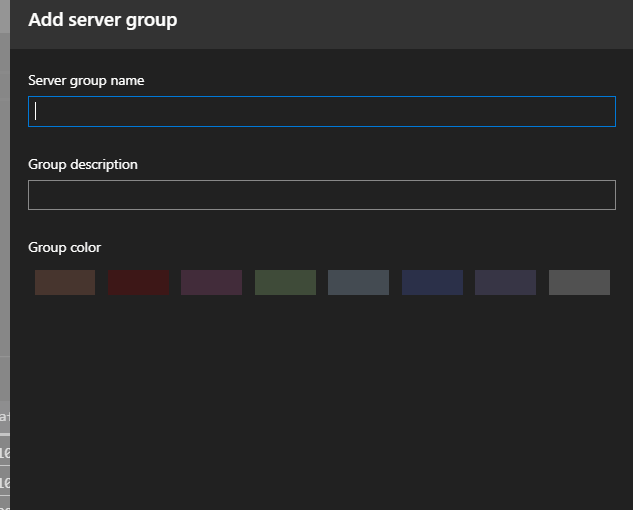
This is where we can add new connections. In the upper right corner you will see three buttons. The farthest on the left is the new connections button. The middle button is for creating server groups. This is what you see below in the red bar.
When adding a server group you are asked only to provide a group name, description and a color. When you create a new connection, you will be able to pick a server group to add the new server to.
All the items covered above are also in SSMS in some form or another. What is really cool about Azure Data Studio is something that cannot be found in SSMS. That is SQL Notebook. So far I am a big fan of this new feature. It basically allows you to store notes and executable T-SQL code in the same document.
To add a new Notebook, you can find the Add Notebook item under the file menu. There are two types of items that can be added to a notebook, code and text. To add either one, you can click the buttons in the upper left or the links in the middle.

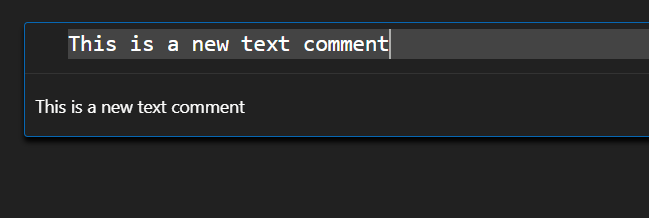
When the Text is clicked you will then have the opportunity to enter notes. Below is an image of what you will see. It looks like there are duplicate lines, but in reality there is not. Once you click away from the note, the top one will disappear, leaving on the note.
If you click Code, you will then be able to enter T-SQL code just as you would in SSMS.

Notice the icon on the left side that looks like a play button. Well that is exactly what it does, it runs or the query.
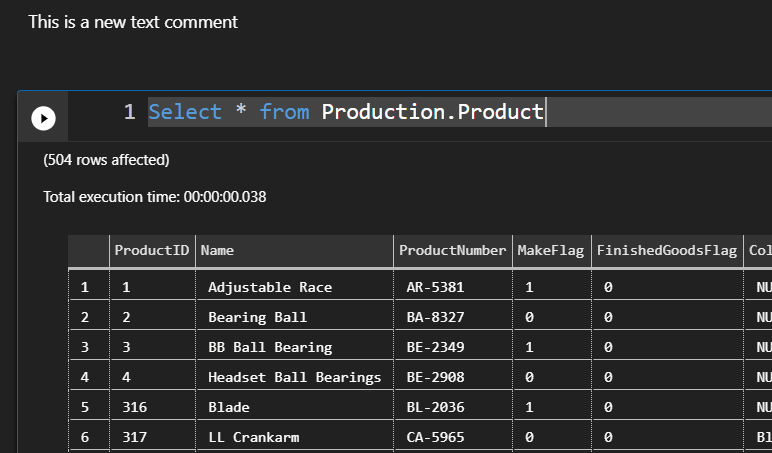
In the image above, you can see the text as well as the results of the query. Once you are done with the results, you can clear them by clicking the ellipsis in the upper right corner of the results. The bottom option is Clear Output.
![]()
Once you have everything in the Notebook you can save it. The Notebook, the file extension is ipynb.
In the coming weeks I will be doing more posts on Azure Data Studio. Although so far I really like it, there are a few things that I have not been able to find yet, like Actual Execution plans.